多线程(一):认识线程,创建线程和线程的常用方法
发布日期:2021-05-07 13:13:43
浏览次数:20
分类:原创文章
本文共 7781 字,大约阅读时间需要 25 分钟。
多线程(一):认识线程,创建线程和线程的常用方法
概念
进程是系统分配资源的最小单位,线程是系统调度的最小单位。一个进程内的线程之间是可以共享资源的。每个进程至少有一个线程存在,即主线程。

例程:实现字符缓慢输出
public class ThreadDemo1 { public static void main(String[] args) throws InterruptedException { String content = "别人说你不行,是因为他自己做不到。你要尽全力保护你的梦想,那些嘲笑你的人,他们必定会失败," + "他们想把你变成和他们一样的人。如果你有梦想的话,就要努力去实现, 就这样。"; for (char item : content.toCharArray()) { System.out.print(item); //执行到此行休眠200毫秒 Thread.sleep(200); } }}


多线程的优势-增加运行速度
可以观察下面这个多线程例程,体验多线程时如何怎加运行速度的。
public class ThreadDemo2 { //执行的循环次数 private static final Long count = 5_0000_0000L; public static void main(String[] args) throws InterruptedException { // System.out.println(Thread.currentThread().getName()); //调用多线程的方法 concorrency(); //调用单线程的方法 serial(); } //单线程的方法 private static void serial() { //记录开始时间 Long stime = System.currentTimeMillis();//记录当前时间的毫秒时间戳// System.nanoTime();//当前时间的纳秒时间戳(更精确) int a = 0; //执行15亿次循环 for (int i = 0; i < 3 * count; i++) { a++; } //记录结束时间 Long etime = System.currentTimeMillis(); System.out.println("单线程执行了: " + (etime - stime)); } //多线程的方法 private static void concorrency() throws InterruptedException { //开始时间 Long stime = System.currentTimeMillis(); //执行15亿次循环 //创建了线程任务 Thread t1 = new Thread(new Runnable() { @Override public void run() { //具体业务 int a = 0; for (int i = 0; i < count; i++) { a++; } } }); //开始执行线程 t1.start(); Thread t2 = new Thread(new Runnable() { @Override public void run() { int b = 0; for (int i = 0; i < count; i++) { b++; } } }); t2.start(); //让主线程执行5亿次 int c = 0; for (int i = 0; i < count; i++) { c++; } //等待线程t1和t2执行完成之后,再统计时间 t1.join(); t2.join(); //结束时间 Long etime = System.currentTimeMillis(); System.out.println("多线程执行了: " + (etime - stime)); }}该代码运行结果如下:

可见,多线程的优势,可以增加运行速度,缩短运行时间的。
线程的创建方式,动手接触线程(三类六种)
第一类:继承Thread类来实现线程的创建(2种创建方式)
创建方式①:
/* * 第一类:继承 Thread 类创建方法1 */public class ThreadDemo3 { static class MyThread extends Thread { @Override public void run() { //线程执行的任务 System.out.println("线程名称: " + Thread.currentThread().getName()); } } public static void main(String[] args) { System.out.println("当前线程的名称(主线程):" + Thread.currentThread().getName()); //创建了线程 Thread t1 = new MyThread(); //运行线程 t1.start(); }}该代码执行如下

创建方式②:
/* * 第一类:继承 Thread 类创建方法2 */public class ThreadDemo4 { public static void main(String[] args) { System.out.println("当前线程的名称(主线程):" + Thread.currentThread().getName()); Thread thread = new Thread() { @Override public void run() { //线程执行的任务 System.out.println("线程名称: " + Thread.currentThread().getName()); } }; thread.start(); }}该代码执行如下

第一类创建方式(继承Thread类的方式)缺点:
Java 语言的设计当中,只能实现单继承,如果该类继承了Thread类,也就无法继承其他类。
第二类:实现Runnable接口的方式来实现线程的创建(3种创建方式)
弥补了第一类创建方法的缺点,即Java不能多继承,但可以实现多个接口
创建方式①:
public class ThreadDemo5 { static class MyRunnable implements Runnable { @Override public void run() { System.out.println("线程名: " + Thread.currentThread().getName()); } } public static void main(String[] args) { System.out.println("当前线程的名称(主线程):" + Thread.currentThread().getName()); //1.新建 Runnable 类 MyRunnable runnable = new MyRunnable(); //2.新建 Thread Thread thread = new Thread(runnable); //3.启动线程 thread.start(); }}该代码执行如下

创建方式②:使用匿名内部类的方式实现线程
public class ThreadDemo6 { public static void main(String[] args) { System.out.println("当前线程的名称(主线程):" + Thread.currentThread().getName()); //使用匿名内部类的方式实现线程 Thread thread = new Thread(new Runnable() { @Override public void run() { System.out.println("线程名: " + Thread.currentThread().getName()); } }); thread.start(); }}该代码执行如下

创建方式③:lambda + 匿名 Runnable 的实现方式
public class ThreadDemo7 { public static void main(String[] args) { System.out.println("当前线程的名称(主线程):" + Thread.currentThread().getName()); //JDK8中的固定写法 //lambda + 匿名 Runnable 的实现方式 Thread thread = new Thread(() -> { System.out.println("线程名: " + Thread.currentThread().getName()); }); thread.start(); }}该代码执行如下

第三类:实现Callable接口的方式来实现线程的创建(1种创建方式)
优点在于可以得到线程执行之后的结果。
public class ThreadDemo8 { //创建了线程的任务和返回方法 static class MyCallable implements Callable<Integer> { @Override public Integer call() throws Exception { // 生成一个随机数 int num = new Random().nextInt(10) + 1; System.out.println("子线程:" + Thread.currentThread().getName() + ",随机数:" + num); return num; } } public static void main(String[] args) throws ExecutionException, InterruptedException { // 1.创建一个 Callable MyCallable myCallable = new MyCallable(); // 2.创建一个 FutureTask 对象来接收返回值 FutureTask<Integer> futureTask = new FutureTask<>(myCallable); // 3.创建 Thread Thread thread = new Thread(futureTask); // 启动线程 thread.start(); // 得到线程执行结果 int result = futureTask.get(); System.out.println(String.format("线程名:%s,数字:%d", Thread.currentThread().getName(), result)); }}该代码执行结果如下

线程休眠(实现方式有三种)
实现方法①
优点:精确度很高。
缺点:当休眠时间过大时,代码书写较复杂。
public class ThreadDemo9 { public static void main(String[] args) throws InterruptedException { System.out.println("开始时间: " + new Date()); //休眠1s Thread.sleep(1000); System.out.println("结束时间: " + new Date()); }}代码执行结果如下

当休眠较长时间,可用实现方法②和实现方法③。
实现方法②
public class ThreadDemo9 { public static void main(String[] args) throws InterruptedException { System.out.println("开始时间: " + new Date()); //休眠1s TimeUnit.SECONDS.sleep(1); System.out.println("结束时间: " + new Date()); }}该代码执行结果如下

实现方法③
public class ThreadDemo9 { public static void main(String[] args) throws InterruptedException { System.out.println("开始时间: " + new Date()); //休眠1s Thread.sleep(TimeUnit.SECONDS.toMillis(1)); System.out.println("结束时间: " + new Date()); }该代码执行结果如下

典型例题:使用两个线程来打印"AABBCCDD"。
解题思路:使用多线程+线程休眠即可完成题目要求
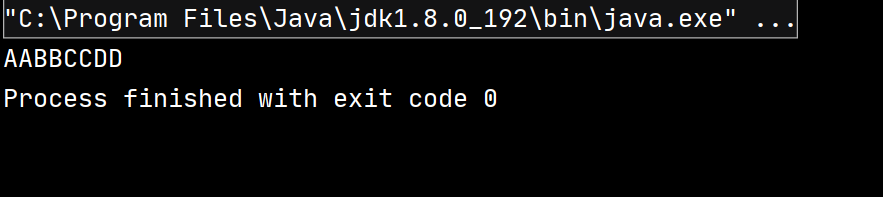
public class ThreadDemo10 { public static void main(String[] args) { //创建一个任务 Runnable runnable = new Runnable() { @Override public void run() { String data = "ABCD"; for (char item : data.toCharArray()) { System.out.print(item); try { Thread.sleep(100); } catch (InterruptedException e) { e.printStackTrace(); } } } }; Thread t1 = new Thread(runnable); Thread t2 = new Thread(runnable); t1.start(); t2.start(); }}该代码执行结果如下
发表评论
最新留言
感谢大佬
[***.8.128.20]2025年03月22日 04时03分47秒
关于作者

喝酒易醉,品茶养心,人生如梦,品茶悟道,何以解忧?唯有杜康!
-- 愿君每日到此一游!
推荐文章
在 springboot 项目中全局处理异常
2021-05-08
ILI9341几个重要的命令
2021-05-08
AD如何对原理图进行注释
2021-05-08
力扣:地图分析(多源bfs)
2021-05-08
NC15136: 迷宫
2021-05-08
动态点击a标签
2021-05-08
@RequestBody和@RequestParam
2021-05-08
oracle创建序列语法
2021-05-08
springboot通过控制层跳转页面404
2021-05-08
idea2020 没有 tomcat server
2021-05-08
jq动态修改元素的onclick属性的值
2021-05-08
为什么讨厌所谓仿生AI的说法
2021-05-08
ORACLE 客户端工具
2021-05-08
Elasticsearch下载慢?分享百度云下载-ELK
2021-05-08
云服务器springboot jar项目开启jmx remote监控-解决无法连接的问题
2021-05-08
文件上传-FileUpload
2021-05-08
快速排序
2021-05-08
Pyinstaller打包的exe文件过大的解决方法
2021-05-08
Linux的软链接跟Windows快捷方式一样?
2021-05-08
白红宇的个人博客 - 记录点点滴滴的事 - 您是第 457351182 位访客