python Intel Realsense udp协议 局域网传输实时视频流并通过窗口显示 (opencv压缩解码)
发布日期:2021-05-10 09:06:03
浏览次数:21
分类:精选文章
本文共 16390 字,大约阅读时间需要 54 分钟。
文章目录
发送端
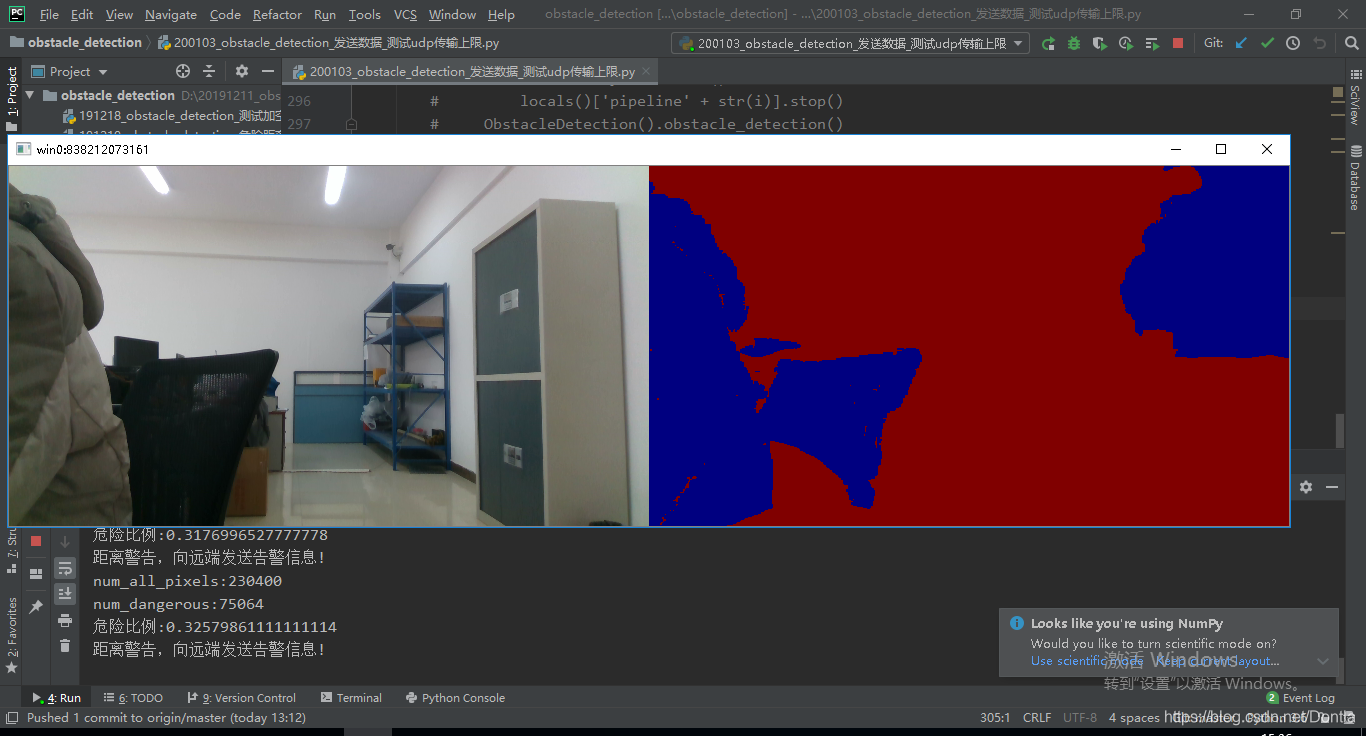
# -*- coding: utf-8 -*-"""@File : 200103_obstacle_detection_发送数据_测试udp传输上限.py@Time : 2020/1/3 14:28@Author : Dontla@Email : sxana@qq.com@Software: PyCharm"""import socketimport structimport timeimport numpy as npimport pyrealsense2 as rsimport cv2import sysfrom numba import jitdef udp_send_image(img, pack_size, socket, ip_port): _, img_encode = cv2.imencode('.jpg', img) data = img_encode.tobytes() # print(len(data)) # 有很多超过65535的 # 【定义文件头、数据】(打包名为l?不是,l表示长整型,占四个字节) fhead = struct.pack('i', len(data)) # 【发送文件头、数据】 socket.sendto(fhead, ip_port) # 每次发送x字节,计算所需发送次数 send_times = len(data) // pack_size + 1 for count in range(send_times): # time.sleep(0.01) if count < send_times - 1: socket.sendto( data[pack_size * count:pack_size * (count + 1)], ip_port) else: socket.sendto(data[pack_size * count:], ip_port)# @jit# 貌似开不了jit,不知啥原因,开了也没明显看到加速def filter_alpha(depth_image, filter_alpha): if filter_alpha > 1: # 获取depth_image宽高 h, w = depth_image.shape[0], depth_image.shape[1] # 360,640 # 创建上下alpha(不同方法都能创建) # filter_upper = np.array([1] * int(h / 2)) filter_upper = np.full(int(h / 2), 1) filter_lower = np.linspace(1, filter_alpha, h / 2) # 将filter_upper和filter_lower连在一起 filter = np.r_[filter_upper, filter_lower] # print(filter) # print(filter.shape) # (360,) # print(filter_alpha_upper) # print(filter_alpha_upper.shape) # (180,) # print(filter_alpha_lower) # print(filter_alpha_lower.shape) # (180,) return (depth_image.T * filter).T else: return depth_image# 如果要防止下面棉花过近被误探测,可用两层for循环设置梯度过滤# 不过貌似还得中间对半分,下面直接舍弃掉,只用上面作为判断,因为就算下面用了梯度...(还是得用梯度...)@jitdef traversing_pixels(depth_image, threshold_dangerous_distance): num_dangerous = 0 num_all_pixels = 0 depth_image_ravel = depth_image.ravel() # depth_image_segmentation为分割后的图像(红蓝两色) depth_image_segmentation_ravel = [] for pixel in depth_image_ravel: num_all_pixels += 1 # 第一种效果要好一些 if pixel < threshold_dangerous_distance and pixel != 0: # if pixel < threshold_dangerous_distance: num_dangerous += 1 depth_image_segmentation_ravel.append(0) else: depth_image_segmentation_ravel.append(6000) depth_image_segmentation = np.array(depth_image_segmentation_ravel).reshape(depth_image.shape) return num_all_pixels, num_dangerous, depth_image_segmentationclass ObstacleDetection(object): def __init__(self): # self.cam_serials = ['838212073161', '827312071726'] # self.cam_serials = ['838212073161', '827312071726', '838212073249', '827312070790', '836612072369', # '826212070395'] self.cam_serials = ['838212073161'] self.cam_width, self.cam_height = 640, 360 # 【危险距离:单位mm】 self.threshold_dangerous_distance = 3000 # 【摄像头到棉花平面垂直距离(单位mm)】 self.distance_cam_vertical_to_cotton_top = 260 # 【危险距离补偿系数】用于让最下面深度远离临界值,避免造成误检测 self.factor_compensation_dangerous_distance = 1.5 # 【危险距离像素占比】 self.threshold_dangerous_scale = 0.05 # 【摄像头视场角(单位°)】 self.FOV_width = 69.4 self.FOV_height = 42.5 self.FOV_scale = self.FOV_height / self.FOV_width # 0.6123919308357348 # 【实际变换后height视场角】 if self.cam_height / self.cam_width < self.FOV_scale: self.FOV_height_actual = self.FOV_width * self.cam_height / self.cam_width else: self.FOV_height_actual = self.FOV_height # 【计算过滤α值(distance_min为图像最下方的深度,看到最近棉花的距离)】 # 当摄像头到棉花顶垂直距离为800,最小距离为2256,当危险距离为2000时,alpha滤值为0.88 # 当摄像头到棉花顶垂直距离为800,最小距离为2256,当危险距离为3000时,alpha滤值为1.32 # 所以,后面进行滤值时需判断self.filter_alpha的值是否大于1(已添加进filter_alpha()函数中) self.distance_min = self.distance_cam_vertical_to_cotton_top / ( np.tan(self.FOV_height_actual / 2 * np.pi / 180)) self.filter_alpha = self.threshold_dangerous_distance / self.distance_min * self.factor_compensation_dangerous_distance # 【UDP信号发送模块】 # 远程主机ip地址及端口 self.ip_port = ('192.168.1.49', 9000) self.udp_server_client = socket.socket(socket.AF_INET, socket.SOCK_DGRAM) # self.bytes_udp_pack = 1024 self.bytes_udp_pack = 65507 def obstacle_detection(self): # print(self.distance_min) # 2256.7829632201597 # print(self.filter_alpha) # 0.8862172537611853 # 摄像头个数(在这里设置所需使用摄像头的总个数) cam_num = 6 ctx = rs.context() '''连续验证机制''' # D·C 1911202:创建最大验证次数max_veri_times;创建连续稳定值continuous_stable_value,用于判断设备重置后是否处于稳定状态 max_veri_times = 100 continuous_stable_value = 5 print('\n', end='') print('开始连续验证,连续验证稳定值:{},最大验证次数:{}:'.format(continuous_stable_value, max_veri_times)) continuous_value = 0 veri_times = 0 while True: devices = ctx.query_devices() connected_cam_num = len(devices) print('摄像头个数:{}'.format(connected_cam_num)) if connected_cam_num == cam_num: continuous_value += 1 if continuous_value == continuous_stable_value: break else: continuous_value = 0 veri_times += 1 if veri_times == max_veri_times: print("检测超时,请检查摄像头连接!") sys.exit() '''循环reset摄像头''' # hardware_reset()后是不是应该延迟一段时间?不延迟就会报错 print('\n', end='') print('开始初始化摄像头:') for dev in ctx.query_devices(): # 先将设备的序列号放进一个变量里,免得在下面for循环里访问设备的信息过多(虽然不知道它会不会每次都重新访问) dev_serial = dev.get_info(rs.camera_info.serial_number) # 匹配序列号,重置我们需重置的特定摄像头(注意两个for循环顺序,哪个在外哪个在内很重要,不然会导致刚重置的摄像头又被访问导致报错) for serial in self.cam_serials: if serial == dev_serial: dev.hardware_reset() # 像下面这条语句居然不会报错,不是刚刚才重置了dev吗?莫非区别在于没有通过for循环ctx.query_devices()去访问? # 是不是刚重置后可以通过ctx.query_devices()去查看有这个设备,但是却没有存储设备地址?如果是这样, # 也就能够解释为啥能够通过len(ctx.query_devices())函数获取设备数量,但访问序列号等信息就会报错的原因了 print('摄像头{}初始化成功'.format(dev.get_info(rs.camera_info.serial_number))) '''连续验证机制''' # D·C 1911202:创建最大验证次数max_veri_times;创建连续稳定值continuous_stable_value,用于判断设备重置后是否处于稳定状态 print('\n', end='') print('开始连续验证,连续验证稳定值:{},最大验证次数:{}:'.format(continuous_stable_value, max_veri_times)) continuous_value = 0 veri_times = 0 while True: devices = ctx.query_devices() connected_cam_num = len(devices) print('摄像头个数:{}'.format(connected_cam_num)) if connected_cam_num == cam_num: continuous_value += 1 if continuous_value == continuous_stable_value: break else: continuous_value = 0 veri_times += 1 if veri_times == max_veri_times: print("检测超时,请检查摄像头连接!") sys.exit() '''配置各个摄像头的基本对象''' for i in range(len(self.cam_serials)): locals()['pipeline' + str(i)] = rs.pipeline(ctx) locals()['config' + str(i)] = rs.config() locals()['config' + str(i)].enable_device(self.cam_serials[i]) # 为啥我设置成1280×720就报错呢?明明Intel Realsense的usb接口已经显示为3.0了 # locals()['config' + str(i)].enable_stream(rs.stream.depth, 640, 480, rs.format.z16, 30) # locals()['config' + str(i)].enable_stream(rs.stream.color, 640, 480, rs.format.bgr8, 30) locals()['config' + str(i)].enable_stream(rs.stream.depth, self.cam_width, self.cam_height, rs.format.z16, 30) locals()['config' + str(i)].enable_stream(rs.stream.color, self.cam_width, self.cam_height, rs.format.bgr8, 30) locals()['pipeline' + str(i)].start(locals()['config' + str(i)]) # 创建对齐对象(深度对齐颜色) locals()['align' + str(i)] = rs.align(rs.stream.color) '''运行摄像头''' try: while True: start_time = time.time() for i in range(len(self.cam_serials)): locals()['frames' + str(i)] = locals()['pipeline' + str(i)].wait_for_frames() # 获取对齐帧集 locals()['aligned_frames' + str(i)] = locals()['align' + str(i)].process( locals()['frames' + str(i)]) # 获取对齐后的深度帧和彩色帧 locals()['aligned_depth_frame' + str(i)] = locals()[ 'aligned_frames' + str(i)].get_depth_frame() locals()['color_frame' + str(i)] = locals()['aligned_frames' + str(i)].get_color_frame() if not locals()['aligned_depth_frame' + str(i)] or not locals()['color_frame' + str(i)]: continue # 获取颜色帧内参 locals()['color_profile' + str(i)] = locals()['color_frame' + str(i)].get_profile() locals()['cvsprofile' + str(i)] = rs.video_stream_profile( locals()['color_profile' + str(i)]) locals()['color_intrin' + str(i)] = locals()['cvsprofile' + str(i)].get_intrinsics() locals()['color_intrin_part' + str(i)] = [locals()['color_intrin' + str(i)].ppx, locals()['color_intrin' + str(i)].ppy, locals()['color_intrin' + str(i)].fx, locals()['color_intrin' + str(i)].fy] locals()['color_image' + str(i)] = np.asanyarray( locals()['color_frame' + str(i)].get_data()) locals()['depth_image' + str(i)] = np.asanyarray( locals()['aligned_depth_frame' + str(i)].get_data()) # 【阿尔法过滤】 locals()['depth_image_alpha_filter' + str(i)] = filter_alpha(locals()['depth_image' + str(i)], self.filter_alpha) # 【遍历深度图像素值,如存在小于危险值范围比例超过阈值,则告警】 locals()['num_all_pixels' + str(i)], locals()['num_dangerous' + str(i)], locals()[ 'depth_image_segmentation' + str(i)] = traversing_pixels( locals()['depth_image_alpha_filter' + str(i)], self.threshold_dangerous_distance) print('num_all_pixels:{}'.format(locals()['num_all_pixels' + str(i)])) print('num_dangerous:{}'.format(locals()['num_dangerous' + str(i)])) locals()['dangerous_scale' + str(i)] = locals()['num_dangerous' + str(i)] / locals()[ 'num_all_pixels' + str(i)] print('危险比例:{}'.format(locals()['dangerous_scale' + str(i)])) locals()['depth_colormap' + str(i)] = cv2.applyColorMap( cv2.convertScaleAbs(locals()['depth_image_segmentation' + str(i)], alpha=0.0425), cv2.COLORMAP_JET) locals()['image' + str(i)] = np.hstack( (locals()['color_image' + str(i)], locals()['depth_colormap' + str(i)])) # 注意: 窗口名不要用中文字符, 小心乱码 cv2.imshow('win{}:{}'.format(i, self.cam_serials[i]), locals()['image' + str(i)]) # cv2.imshow('colorWin{}: {}'.format(i, self.cam_serials[i]), locals()['color_image' + str(i)]) # cv2.imshow('depthWin{}: {}'.format(i, self.cam_serials[i]), locals()['depth_colormap' + str(i)]) cv2.waitKey(1) # 【向远端发送告警信号及图片:】 if locals()['dangerous_scale' + str(i)] > self.threshold_dangerous_scale: print("距离警告,向远端发送告警信息!") # self.udp_server_client.sendto('摄像头{}告警'.format(i).encode('utf-8'), self.ip_port) # print(locals()['image' + str(i)].shape) # (360, 1280, 3) udp_send_image(locals()['image' + str(i)], self.bytes_udp_pack, self.udp_server_client, self.ip_port) end_time = time.time() # print('单帧运行时间:{}'.format(end_time - start_time)) # 遇到异常再次启动检测函数,如有需要可以将连续监测和摄像头重置全放进去 # except: # print('\n出现异常,请重新检查摄像头连接!\n') # for i in range(len(self.cam_serials)): # cv2.destroyAllWindows() # locals()['pipeline' + str(i)].stop() # ObstacleDetection().obstacle_detection() finally: for i in range(len(self.cam_serials)): locals()['pipeline' + str(i)].stop()if __name__ == '__main__': ObstacleDetection().obstacle_detection() 接收端
# -*- encoding: utf-8 -*-"""@File : 201003_避障程序信号及图像接收端_测试udp传输上限.py@Time : 2020/1/3 14:32@Author : Dontla@Email : sxana@qq.com@Software: PyCharm"""import socketimport structimport timeimport cv2import numpy as npip_port = ('192.168.1.49', 9000)BUFSIZE = 65507udp_server_client = socket.socket(socket.AF_INET, socket.SOCK_DGRAM)udp_server_client.bind(ip_port)def receive(): while True: try: while True: # 计算fmt字节长度(貌似没必要我先注释掉了) # fhead_size = struct.calcsize('i') # print('fhead_size大小:{}'.format(fhead_size)) # 4 # 获取数据头信息,第一个参数为信息,第二个参数是发送方ip地址 buffer, _ = udp_server_client.recvfrom(BUFSIZE) # print(buffer) # print(len(buffer)) # 可能为4或60000+ if len(buffer) == 4: # print(buffer) # b';\xfb\x00\x00' # 每次都不一样的 # 解包,看看有多大(unpack返回的是只有一个元素的元组,如(64282,),元素个数貌似取决于fmt) data_size = struct.unpack('i', buffer)[0] # data_size = struct.unpack('i', buf)[0] # print(data_size) # 64315 else: print('不是struct头,继续下次循环!') # cv2.destroyAllWindows() continue # 重写接收程序 recv_times = data_size // BUFSIZE + 1 # print(recv_times) # 按目前的BUFSIZE,为1或2,大部分为2 data_total = b'' recvd_size = 0 for count in range(recv_times): data, _ = udp_server_client.recvfrom(BUFSIZE) recvd_size += len(data) data_total += data # 判断data_total长度是否等于图片长度,不是就继续下次循环 # print(len(data_total)) if len(data_total) != data_size: print('一定又是哪接收出错了,导致没接收上,继续下轮循环!') continue # recvd_size = 0 # data_total = b'' # while recvd_size < data_size: # if data_size - recvd_size >= BUFSIZE: # data, _ = udp_server_client.recvfrom(BUFSIZE) # recvd_size += len(data) # else: # data, _ = udp_server_client.recvfrom(data_size - recvd_size) # recvd_size += len(data) # data_total += data print('received!') # print(data_total) # print(type(data_total)) # nparr = np.fromstring(data_total, np.uint8) # print(nparr) # [255 216 255 ... 15 255 217] # 每次不一样的 img_decode = cv2.imdecode(nparr, cv2.IMREAD_COLOR) cv2.imshow('win', img_decode) # 保存截图 # cv2.imwrite('{}.jpg'.format(time.clock()), img_decode) cv2.waitKey(1) # data, addr = udp_server_client.recvfrom(BUFSIZE) # print(data.decode('utf-8'), addr) # print(data, addr) # nparr = np.fromstring(data, np.uint8) # img_decode = cv2.imdecode(nparr, cv2.IMREAD_COLOR) # cv2.imshow('result', img_decode) # cv2.waitKey() except: print('出现异常,继续调用receive()函数!') # receive() finally: # cv2.destroyAllWindows() pass # breakif __name__ == '__main__': receive() 执行结果
发送端
接收端

发表评论
最新留言
能坚持,总会有不一样的收获!
[***.219.124.196]2025年04月22日 17时07分38秒
关于作者

喝酒易醉,品茶养心,人生如梦,品茶悟道,何以解忧?唯有杜康!
-- 愿君每日到此一游!
推荐文章
Android Studio打包生成Jar包的方法
2021-05-10
Excel 如何根据单元格中的值设立不同的颜色(或渐变)?(222)
2021-05-10
python 文件操作 open()与with open() as的区别(打开文件)
2021-05-10
python中列表 元组 字典 集合的区别
2021-05-10
python struct 官方文档
2021-05-10
Docker镜像加速
2021-05-10
Unity3D的InputField输入框控件按下Tab键光标自动切换
2021-05-10
静态数组类的封装(泛型)
2021-05-10
操作记录-2021-03-15: sunxiaoyu_project
2021-05-10
Android DEX加固方案与原理
2021-05-10
Android Retrofit2.0 上传单张图片和多张图片
2021-05-10
vue 导出Excel乱码问题解决方案
2021-05-10
eggjs validate no function 解决方案
2021-05-10
Permission denied 解决方案
2021-05-10
iOS_图片添加水印_文本倾斜
2021-05-10
白红宇的个人博客 - 记录点点滴滴的事 - 您是第 460855994 位访客