本文共 3203 字,大约阅读时间需要 10 分钟。
一. 引言
nginx 优秀的负载均衡性能,可以满足企业大规模集群的需要。但是,如果nginx负载宕机时,整个服务就不可用。
Keepalived是Linux下面实现VRRP备份路由的高可靠性运行件。基于Keepalived设计的服务模式能够真正做到主服务器和备份服务器故障时IP瞬间无缝交接。
二. keepalived 双机热备方案
拓扑如下图所示:

1. 虚拟ip(VIP) 192.168.1.100
2. 虚拟机192.168.1.103 作为master
3. 虚拟机192.168.1.104 作为backup
4. master正常时访问虚拟ip192.168.1.100就是访问192.168.1.103;master宕机时,backup无缝切换,这时虚拟ip192.168.1.100指向192.168.1.104.当master又正常提供服务后,虚拟ip再次指向192.168.1.103.
5. 结合nginx就可以实现高可用的双机热备负载均衡。
三. 实现
两台虚拟机 103/104
系统 Ubuntu14.04
1.设置虚拟IP:
103/104 执行命令
sudo ifconfig eth0:0 192.168.1.100 netmask 255.255.255.0 up
查看是否设置成功
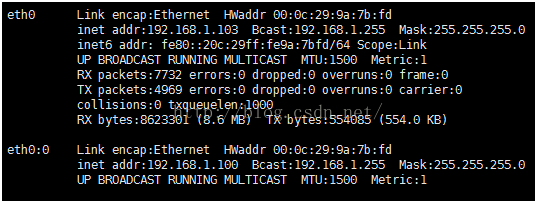
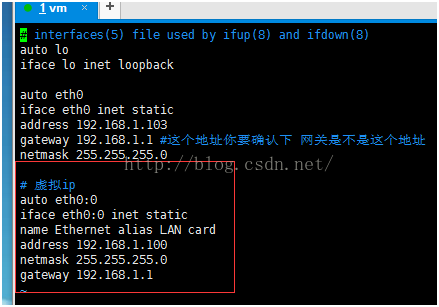
设置成功后,将设置写入配置文件,防止重启后设置失效
sudo vim sudo vim /etc/network/interfaces
删除虚拟IP的方法:
ifconfig eth0:0 down
2.安装keepalived
1. 103/104 执行命令
sudo apt-get update
sudo apt-get install keepalived
2. nginx监控脚本
为了是nginx停止服务时,虚拟ip能无缝切换,需要在keepalived中监测nginx是否正常提供服务,方法就是监测nginx端口是否正常,如果不正常,则停止keepalived服务,以使备机切换成主机。
安装nmap端口监测工具
sudo apt-get install nmap
创建nginx监控脚本 check_nginx_port:
# check nginx port
PORT=8080
nmap 127.0.0.1 -p $PORT | grep "$PORT/tcpopen"
#echo $?
if [ $? -ne 0 ];then
sudoservice keepalived stop
fi
设置脚本执行权限:
chmod 777 check_nginx_port // 777最高权限
3. 103修改配置文件
sudo vi/etc/keepalived/keepalived.conf
! ConfigurationFile for keepalived
global_defs {
notification_email {
#7205804@qq.com
}
#notification_email_from keepalived_adm
#smtp_server 192.168.200.1
smtp_connect_timeout 30
router_id LVS_DEVEL
}
vrrp_script chk_http_port {
script "/home/joey/check_nginx_port.sh" //nginx 监控脚本路径
interval 1
weight 2
}vrrp_instanceVI_1 {
state MASTER // 主机
interface eth0
virtual_router_id 51 // 两台机路由id必须一致
priority 100
advert_int 1
authentication {
auth_type PASS
auth_pass 1111
}
virtual_ipaddress {
192.168.1.100 // 虚拟ip
}
track_script {
chk_http_port // 执行脚本
}}
重启keepalived
servicekeepalived restart
4. 104 修改配置文件
sudo vi/etc/keepalived/keepalived.conf
! ConfigurationFile for keepalived
global_defs {
notification_email {
#7205804@qq.com
}
#notification_email_from keepalived_adm
#smtp_server 192.168.200.1
smtp_connect_timeout 30
router_id LVS_DEVEL
}
vrrp_script chk_http_port {
script "/home/joey/check_nginx_port.sh" //nginx 监控脚本路径
interval 1
weight 2
}vrrp_instanceVI_1 {
state BACKUP // 备机
interface eth0
virtual_router_id 51 // 两台机路由id必须一致
priority 99 // 权重小于主机
advert_int 1
authentication {
auth_type PASS
auth_pass 1111
}
virtual_ipaddress {
192.168.1.100 // 虚拟ip
}
track_script {
chk_http_port // 执行脚本
}}
重启keepalived
servicekeepalived restart
3.安装nginx
1. 103/104安装nginx(略)
2. 103 nginx index.html文件内容如下:
<html>
<head>
<title>Welcome to nginx!</title>
</head>
<body bgcolor="white" text="black">
<center><h1>Welcome to nginx! 192.168.1.103</h1></center>
</body>
</html>
3. 104 nginx index.html文件内容如下:
<html>
<head>
<title>Welcome to nginx!</title>
</head>
<body bgcolor="white" text="black">
<center><h1>Welcome to nginx! 192.168.1.104</h1></center>
</body>
</html>
4.测试
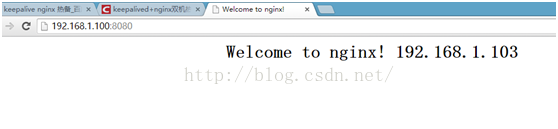
1. 停止keepalived服务
访问192.168.1.100:8080,显示103

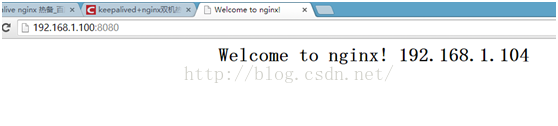
关闭103 keepalived服务
sudo service keepalived stop
再次访问192.168.1.100:8080,显示104
重启103 keepalived服务
sudo service keepalived restart
访问192.168.1.100:8080,再次显示103
2. 停止nginx服务
结果与上面一致。
四. 参考文档
http://blog.csdn.net/e421083458/article/details/30092795
http://www.cnblogs.com/holbrook/archive/2012/10/25/2738475.html
发表评论
最新留言
关于作者
