本文共 18466 字,大约阅读时间需要 61 分钟。
我先整个看下与连接部分相关的结构:
通过前面的介绍,是由server.xml通过Digester去创建整个容器的结构的,我们再回顾整理下前面的内容。createStartDigester方法里面的一些内容(这里创建Connector并将其addConnector(加到StandardService中)):
digester.addRule("Server/Service/Connector", new ConnectorCreateRule());digester.addRule("Server/Service/Connector", new SetAllPropertiesRule( new String[]{"executor", "sslImplementationName", "protocol"}));digester.addSetNext("Server/Service/Connector", "addConnector", "org.apache.catalina.connector.Connector");
对应server.xml文件:
<Service name="Catalina">
<Connector port="8080" protocol="HTTP/1.1" connectionTimeout="20000" redirectPort="8443" />
这里是通过ConnectorCreateRule类去解析创建Connector对象,并将其添加到Service(StandardService)的,我们看下ConnectorCreateRule类是怎样去创建Connector的:
@Overridepublic void begin(String namespace, String name, Attributes attributes) throws Exception { Service svc = (Service)digester.peek(); Executor ex = null; if ( attributes.getValue("executor")!=null ) { ex = svc.getExecutor(attributes.getValue("executor")); } Connector con = new Connector(attributes.getValue("protocol")); if (ex != null) { setExecutor(con, ex); } String sslImplementationName = attributes.getValue("sslImplementationName"); if (sslImplementationName != null) { setSSLImplementationName(con, sslImplementationName); } digester.push(con);}
通过new Connector(attributes.getValue("protocol")):看下其构造方法:
public Connector(String protocol) { boolean aprConnector = AprLifecycleListener.isAprAvailable() && AprLifecycleListener.getUseAprConnector(); if ("HTTP/1.1".equals(protocol) || protocol == null) { if (aprConnector) { protocolHandlerClassName = "org.apache.coyote.http11.Http11AprProtocol"; } else { protocolHandlerClassName = "org.apache.coyote.http11.Http11NioProtocol"; } } else if ("AJP/1.3".equals(protocol)) { if (aprConnector) { protocolHandlerClassName = "org.apache.coyote.ajp.AjpAprProtocol"; } else { protocolHandlerClassName = "org.apache.coyote.ajp.AjpNioProtocol"; } } else { protocolHandlerClassName = protocol; } ProtocolHandler p = null; try { Class<?> clazz = Class.forName(protocolHandlerClassName); p = (ProtocolHandler) clazz.getConstructor().newInstance(); } ...... finally { this.protocolHandler = p; }}
这里的协议是HTTP/1.1,所以Connector的protocolHandler变量是Http11AprProtocol。并且与连接相关的NioEndpoint是Connector的成员变量、而Poller、Accpetor又是NioEndPoint的内部类。所以一个socket能找到连接器Connector,然后通过Connector找到其StandardService。由此一个socket连接想向上能找到StandardServer、向下也能找到Engine、Host等这些容器来处理这个socket(这些容器的内容以及通过上一章讲过的mapperListener.start(),设置到了StandardService的Mapper中了),现在我们来看下具体的过程。
1、首先是Accptor接受然后通过Poller去处理,转换为TaskThread,这里就不具体再描叙了是上一章就说过了,这里我们直接从 getAdapter().service(request, response)开始,关于这两个入参的初始化有提到:
@Overridepublic void service(org.apache.coyote.Request req, org.apache.coyote.Response res) throws Exception { Request request = (Request) req.getNote(ADAPTER_NOTES); Response response = (Response) res.getNote(ADAPTER_NOTES); if (request == null) { // Create objects request = connector.createRequest(); request.setCoyoteRequest(req); response = connector.createResponse(); response.setCoyoteResponse(res); // Link objects request.setResponse(response); response.setRequest(request); // Set as notes req.setNote(ADAPTER_NOTES, request); res.setNote(ADAPTER_NOTES, response); // Set query string encoding req.getParameters().setQueryStringCharset(connector.getURICharset()); } ........ postParseSuccess = postParseRequest(req, request, res, response); if (postParseSuccess) { request.setAsyncSupported( connector.getService().getContainer().getPipeline().isAsyncSupported()); // Calling the container connector.getService().getContainer().getPipeline().getFirst().invoke( request, response); .............. } ........... }}
这里两种Request、Response在文章中也有提到就不在描叙了。首先取不到,通过connector创建:
public Request(Connector connector) { this.connector = connector; .........}
将connector设置到这个Request中,之后request.setCoyoteRequest(req)(调用request的方法,其实request首次是再调用req的方法,然后将结果再放到request的成员变量中)。
之后是postParseRequest(req, request, res, response)方法:
protected boolean postParseRequest(org.apache.coyote.Request req, Request request, org.apache.coyote.Response res, Response response) throws IOException, ServletException {............
parsePathParameters(req, request);
.............
connector.getService().getMapper().map(serverName, decodedURI, version, request.getMappingData());
..............
MessageBytes redirectPathMB = request.getMappingData().redirectPath; if (!redirectPathMB.isNull()) { String redirectPath = URLEncoder.DEFAULT.encode( redirectPathMB.toString(), StandardCharsets.UTF_8); ........ response.sendRedirect(redirectPath); ..... }doConnectorAuthenticationAuthorization(req,request);
}
通过parsePathParameters(req, request)方法解析路径参数(从req URL中带;的参数,一般没有看到这种用法)并设置到request中。之后是connector.getService().getMapper().map(serverName, decodedURI, version, request.getMappingData())方法(这个方法很关键):
我们看下方法其的整个调用链。通过connector获取StandardService,再获取Mapper(就是前面由mapperListener.start()设置到StandardService中的),调用其map方法,入参是有request的成员变量MappingData,其变量有:
public class MappingData { public Host host = null; public Context context = null; public int contextSlashCount = 0; public Context[] contexts = null; public Wrapper wrapper = null; public boolean jspWildCard = false; public final MessageBytes contextPath = MessageBytes.newInstance(); public final MessageBytes requestPath = MessageBytes.newInstance(); public final MessageBytes wrapperPath = MessageBytes.newInstance(); public final MessageBytes pathInfo = MessageBytes.newInstance(); public final MessageBytes redirectPath = MessageBytes.newInstance(); // Fields used by ApplicationMapping to implement javax.servlet.http.Mapping public MappingMatch matchType = null;}
看下Mapper的map方法(参数内容):

map方法调用internalMap方法:private final void internalMap(CharChunk host, CharChunk uri, String version, MappingData mappingData) throws IOException { // Virtual host mapping Mapper.MappedHost[] hosts = this.hosts; Mapper.MappedHost mappedHost = exactFindIgnoreCase(hosts, host); .......... mappingData.host = mappedHost.object; .......... // Context mapping Mapper.ContextList contextList = mappedHost.contextList; Mapper.MappedContext[] contexts = contextList.contexts; int pos = find(contexts, uri); ........... Mapper.MappedContext context = null; while (pos >= 0) { context = contexts[pos]; ............ pos = find(contexts, uri); } ......... context = contexts[0]; .......... mappingData.contextPath.setString(context.name); Mapper.ContextVersion contextVersion = null; Mapper.ContextVersion[] contextVersions = context.versions; final int versionCount = contextVersions.length; if (versionCount > 1) { Context[] contextObjects = new Context[contextVersions.length]; for (int i = 0; i < contextObjects.length; i++) { contextObjects[i] = contextVersions[i].object; } mappingData.contexts = contextObjects; if (version != null) { contextVersion = exactFind(contextVersions, version); } } if (contextVersion == null) { contextVersion = contextVersions[versionCount - 1]; } mappingData.context = contextVersion.object; mappingData.contextSlashCount = contextVersion.slashCount; // Wrapper mapping if (!contextVersion.isPaused()) { internalMapWrapper(contextVersion, uri, mappingData); }}1、首先通过CharChunk host,找到Mapper.MappedHost,并设置到mappingData中,再之后通过CharChunk uri找到对应的MappedContext,然后找到contextVersions,这里与contextVersions相关的概念有个webappVersion属性,对应在contextVersion中就是那么属性,默认是"",现在还不明白这个设计的目的:

最后通过这个contextversion找到context:mappingData.context = contextVersion.object。
之后调用internalMapWrapper方法(通过这个方法找到Wrapper(即对应的servlet处理类)):
private final void internalMapWrapper(ContextVersion contextVersion, CharChunk path, MappingData mappingData) throws IOException { ..... MappedWrapper[] exactWrappers = contextVersion.exactWrappers; internalMapExactWrapper(exactWrappers, path, mappingData); ........}
现在的入参是: 这里注意path已经是"/ts"了说明在这里是要找Wrapper了,同时mappingData有两个属性contextPath(Context的路径)、requestPath(Wrapper的路径):
internalMapExactWrapper方法:
private final void internalMapExactWrapper (MappedWrapper[] wrappers, CharChunk path, MappingData mappingData) { MappedWrapper wrapper = exactFind(wrappers, path); if (wrapper != null) { mappingData.requestPath.setString(wrapper.name); mappingData.wrapper = wrapper.object; if (path.equals("/")) { // Special handling for Context Root mapped servlet mappingData.pathInfo.setString("/"); mappingData.wrapperPath.setString(""); // This seems wrong but it is what the spec says... mappingData.contextPath.setString(""); mappingData.matchType = MappingMatch.CONTEXT_ROOT; } else { mappingData.wrapperPath.setString(wrapper.name); mappingData.matchType = MappingMatch.EXACT; } }}
通过path找到对应的wrapper,并设置到mappingData中:

至此就通过请求的url以及原来的Mapper找到了对应的host-》context-》wrapper(Servlet) 。现在再回到原来的
方法postParseRequest,之后是如果有重定向,则将重定向设置到response中:MessageBytes redirectPathMB = request.getMappingData().redirectPath;if (!redirectPathMB.isNull()) { String redirectPath = URLEncoder.DEFAULT.encode( redirectPathMB.toString(), StandardCharsets.UTF_8); ........ response.sendRedirect(redirectPath); .....}
然后是doConnectorAuthenticationAuthorization方法,这个是授权方法,先不管这个。
所以这里通过一连串的调用,最终是将standardService中的Mapper的关于容器的内容设置到了Request中的mappingData中。下面就是这个mappingData的使用了。
现在我们再将目光移到最开始的service方法,接下来是调用connector.getService().getContainer().getPipeline().getFirst().invoke( request, response)方法:
这里就是pipeline在四个容器的调用了:我们先通过最初的StandardEngineValve来看下mappingData的使用:

@Overridepublic final void invoke(Request request, Response response) throws IOException, ServletException { // Select the Host to be used for this Request Host host = request.getHost(); if (host == null) { // HTTP 0.9 or HTTP 1.0 request without a host when no default host // is defined. This is handled by the CoyoteAdapter. return; } if (request.isAsyncSupported()) { request.setAsyncSupported(host.getPipeline().isAsyncSupported()); } // Ask this Host to process this request host.getPipeline().getFirst().invoke(request, response);}
看下request.getHost()方法(就是通过mappingData一步步获取对应的host、context、wrapper):
public Host getHost() { return mappingData.host;}
这里最终会调到StandardWrapperValve,看其invoke方法:
@Overridepublic final void invoke(Request request, Response response) throws IOException, ServletException { ........... StandardWrapper wrapper = (StandardWrapper) getContainer(); Servlet servlet = null; Context context = (Context) wrapper.getParent(); ........... servlet = wrapper.allocate(); ........... ApplicationFilterChain filterChain = ApplicationFilterFactory.createFilterChain(request, wrapper, servlet); if ((servlet != null) && (filterChain != null)) { // Swallow output if needed if (context.getSwallowOutput()) { ...... filterChain.doFilter(request.getRequest(), response.getResponse()); } ........ } else { filterChain.doFilter (request.getRequest(), response.getResponse()); } } } ........}
1、获取到StandardWrapper。
2、通过wrapper去初始化获取servlet,wrapper.allocate()。
3、创建ApplicationFilterChain执行链,ApplicationFilterFactory.createFilterChain(request, wrapper, servlet):
public static ApplicationFilterChain createFilterChain(ServletRequest request, Wrapper wrapper, Servlet servlet) { .......... // Create and initialize a filter chain object ApplicationFilterChain filterChain = null; if (request instanceof Request) { ........ filterChain = (ApplicationFilterChain) req.getFilterChain(); if (filterChain == null) { filterChain = new ApplicationFilterChain(); req.setFilterChain(filterChain); } } .......... filterChain.setServlet(servlet); // Acquire the filter mappings for this Context StandardContext context = (StandardContext) wrapper.getParent(); FilterMap filterMaps[] = context.findFilterMaps(); .......... // Acquire the information we will need to match filter mappings DispatcherType dispatcher = (DispatcherType) request.getAttribute(Globals.DISPATCHER_TYPE_ATTR); String requestPath = null; Object attribute = request.getAttribute(Globals.DISPATCHER_REQUEST_PATH_ATTR); if (attribute != null){ requestPath = attribute.toString(); } String servletName = wrapper.getName(); // Add the relevant path-mapped filters to this filter chain for (int i = 0; i < filterMaps.length; i++) { if (!matchDispatcher(filterMaps[i] ,dispatcher)) { continue; } if (!matchFiltersURL(filterMaps[i], requestPath)) continue; ApplicationFilterConfig filterConfig = (ApplicationFilterConfig) context.findFilterConfig(filterMaps[i].getFilterName()); filterChain.addFilter(filterConfig); } // Add filters that match on servlet name second for (int i = 0; i < filterMaps.length; i++) { if (!matchDispatcher(filterMaps[i] ,dispatcher)) { continue; } if (!matchFiltersServlet(filterMaps[i], servletName)) continue; ApplicationFilterConfig filterConfig = (ApplicationFilterConfig) context.findFilterConfig(filterMaps[i].getFilterName()); filterChain.addFilter(filterConfig); } return filterChain;}
这里就是这个ApplicationFilterChain的创建,设置其的最终运行目标Servlet,然后获取context的过滤器Filter(一个context对应的就是一个web.xml文件,这个过滤器就是配置在其中的),将这些Filter添加到ApplicationFilterChain到。
然后是filterChain.doFilter(request.getRequest(), response.getResponse())方法的调用,doFilter方法调用的是internalDoFilter方法:
private void internalDoFilter(ServletRequest request, ServletResponse response) throws IOException, ServletException { // Call the next filter if there is one if (pos < n) { ApplicationFilterConfig filterConfig = filters[pos++]; Filter filter = filterConfig.getFilter(); ............ filter.doFilter(request, response, this); ............. reuturn; } ........... servlet.service(request, response); ...........}
这个结构可以清楚的看到,先调用所有的filter,如果其中有的Filter类最后没有再调用filterChain.doFilter (request, response)形成循环调用,将所有的Filter都运行完,则最后会return就不会运行Servlet了。当所有的Filter运行完后,就调用Servlet的service方法了。
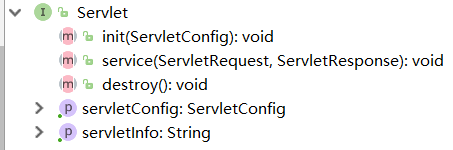
至此,这个请求的处理就完成了,下面补充关于Servlet接口的内容。
自己写的Servlet一般会继承HttpServlet类,再重写doGet/doPost方法(自己也可以直接继承Servlet,然后去自定义一些细节):
public class MyServlet extends HttpServlet { protected void doPost(HttpServletRequest request, HttpServletResponse response) throws ServletException, IOException { response.setContentType("text/html"); PrintWriter writer = response.getWriter(); writer.println("<html>\n" + " <head>\n" + " <title>Title</title>\n" + " </head>\n" + " <body>\n" + " Hello Servlet\n" + " </body>\n" + "</html>"); writer.flush(); } protected void doGet(HttpServletRequest request, HttpServletResponse response) throws ServletException, IOException { doPost(request,response); }}

前面的servlet.service方法我们看下在HttpServlet中是怎样处理的:
protected void service(HttpServletRequest req, HttpServletResponse resp) throws ServletException, IOException { String method = req.getMethod(); if (method.equals(METHOD_GET)) { long lastModified = getLastModified(req); if (lastModified == -1) { // servlet doesn't support if-modified-since, no reason // to go through further expensive logic doGet(req, resp); } else { long ifModifiedSince; try { ifModifiedSince = req.getDateHeader(HEADER_IFMODSINCE); } catch (IllegalArgumentException iae) { // Invalid date header - proceed as if none was set ifModifiedSince = -1; } if (ifModifiedSince < (lastModified / 1000 * 1000)) { // If the servlet mod time is later, call doGet() // Round down to the nearest second for a proper compare // A ifModifiedSince of -1 will always be less maybeSetLastModified(resp, lastModified); doGet(req, resp); } else { resp.setStatus(HttpServletResponse.SC_NOT_MODIFIED); } } } else if (method.equals(METHOD_HEAD)) { long lastModified = getLastModified(req); maybeSetLastModified(resp, lastModified); doHead(req, resp); } else if (method.equals(METHOD_POST)) { doPost(req, resp); } else if (method.equals(METHOD_PUT)) { doPut(req, resp); } else if (method.equals(METHOD_DELETE)) { doDelete(req, resp); } else if (method.equals(METHOD_OPTIONS)) { doOptions(req,resp); } else if (method.equals(METHOD_TRACE)) { doTrace(req,resp); } else { // // Note that this means NO servlet supports whatever // method was requested, anywhere on this server. // String errMsg = lStrings.getString("http.method_not_implemented"); Object[] errArgs = new Object[1]; errArgs[0] = method; errMsg = MessageFormat.format(errMsg, errArgs); resp.sendError(HttpServletResponse.SC_NOT_IMPLEMENTED, errMsg); }}
发表评论
最新留言
关于作者
