本文共 30708 字,大约阅读时间需要 102 分钟。
首先看下,了解tomcat的基本结构
以下内容是冲源码的角度去解析:
前面那些例如类加载器等一些内容就不描叙了,我们直接到加载启动过程。
1、tomcat的入口类是:Bootstrap 直接看main方法
public static void main(String args[]) { ....... Bootstrap bootstrap = new Bootstrap(); bootstrap.init(); daemon = bootstrap; String command = "start"; ........ else if (command.equals("start")) { daemon.setAwait(true); daemon.load(args); daemon.start(); ........... }bootstrap.init是初始化tomcat的运行环境--不具体展开。
2、 然后我们看daemon.load方法:
private void load(String[] arguments) String methodName = "load"; Method method = catalinaDaemon.getClass().getMethod(methodName, paramTypes); method.invoke(catalinaDaemon, param); }这里的catalinaDaemon是类Catalina类。用反射运行load方法。
3、 我们来看Catalina类的load方法:
public void load() { .......... Digester digester = createStartDigester(); ........... File file = null; file = configFile(); inputStream = new FileInputStream(file); ........... digester.push(this); digester.parse(inputSource); .......... getServer().init(); ..........}
一:首先是Digester的创建(如果不想深入理解Digester的话,可以简单知道其是栈结构。其作用就是通过入栈、出栈去创建XML里面表示的类的创建、然后再去创建子节点的类,并设置到父节点)可以看下。
看下这个 createStartDigester 方法:
digester.addObjectCreate("Server", "org.apache.catalina.core.StandardServer", "className");digester.addSetProperties("Server");digester.addSetNext("Server", "setServer", "org.apache.catalina.Server"); ..............digester.addObjectCreate("Server/Listener", null, // MUST be specified in the element "className");digester.addSetProperties("Server/Listener");digester.addSetNext("Server/Listener", "addLifecycleListener", "org.apache.catalina.LifecycleListener");digester.addObjectCreate("Server/Service", "org.apache.catalina.core.StandardService", "className");digester.addSetProperties("Server/Service");digester.addSetNext("Server/Service", "addService", "org.apache.catalina.Service");digester.addObjectCreate("Server/Service/Listener", null, // MUST be specified in the element "className");digester.addSetProperties("Server/Service/Listener");digester.addSetNext("Server/Service/Listener", "addLifecycleListener", "org.apache.catalina.LifecycleListener");//Executordigester.addObjectCreate("Server/Service/Executor", "org.apache.catalina.core.StandardThreadExecutor", "className");digester.addSetProperties("Server/Service/Executor");digester.addSetNext("Server/Service/Executor", "addExecutor", "org.apache.catalina.Executor");digester.addRule("Server/Service/Connector", new ConnectorCreateRule());digester.addRule("Server/Service/Connector", new SetAllPropertiesRule( new String[]{"executor", "sslImplementationName", "protocol"}));digester.addSetNext("Server/Service/Connector", "addConnector", "org.apache.catalina.connector.Connector"); ...........(省略关于一些授权、以及SSL的内容(这些节点如果没有在server.xml中配置,其实tomcat启动过程中也不会使用))digester.addObjectCreate("Server/Service/Connector/Listener", null, // MUST be specified in the element "className");digester.addSetProperties("Server/Service/Connector/Listener");digester.addSetNext("Server/Service/Connector/Listener", "addLifecycleListener", "org.apache.catalina.LifecycleListener");digester.addObjectCreate("Server/Service/Connector/UpgradeProtocol", null, // MUST be specified in the element "className");digester.addSetProperties("Server/Service/Connector/UpgradeProtocol");digester.addSetNext("Server/Service/Connector/UpgradeProtocol", "addUpgradeProtocol", "org.apache.coyote.UpgradeProtocol");
这里的内容就是tomcat项目/conf/server.xml的节点。当然有些在server.xml中并不是必须的。
删掉注释之后的server.xml文件:
<Server port="8005" shutdown="SHUTDOWN"> <Listener className="org.apache.catalina.startup.VersionLoggerListener" /> <Listener className="org.apache.catalina.core.AprLifecycleListener" SSLEngine="on" /> <Listener className="org.apache.catalina.core.JreMemoryLeakPreventionListener" /> <Listener className="org.apache.catalina.mbeans.GlobalResourcesLifecycleListener" /> <Listener className="org.apache.catalina.core.ThreadLocalLeakPreventionListener" /> <GlobalNamingResources> <Resource name="UserDatabase" auth="Container" type="org.apache.catalina.UserDatabase" description="User database that can be updated and saved" factory="org.apache.catalina.users.MemoryUserDatabaseFactory" pathname="conf/tomcat-users.xml" /> </GlobalNamingResources> <Service name="Catalina"> <Connector port="8080" protocol="HTTP/1.1" connectionTimeout="20000" redirectPort="8443" /> <Engine name="Catalina" defaultHost="localhost" jvmRoute="jvm1"> --> <Engine name="Catalina" defaultHost="localhost"> <Realm className="org.apache.catalina.realm.LockOutRealm"> <!-- This Realm uses the UserDatabase configured in the global JNDI resources under the key "UserDatabase". Any edits that are performed against this UserDatabase are immediately available for use by the Realm. --> <Realm className="org.apache.catalina.realm.UserDatabaseRealm" resourceName="UserDatabase"/> </Realm> <Host name="localhost" appBase="webapps" unpackWARs="true" autoDeploy="true"> <Valve className="org.apache.catalina.valves.AccessLogValve" directory="logs" prefix="localhost_access_log" suffix=".txt" pattern="%h %l %u %t "%r" %s %b" /> </Host> </Engine> </Service></Server>
上面的digester就是解析这个文件。
同时通过这两个我们也可以自己去拓展这个配置文件。
这里的节点:
digester.addSetNext("Server","setServer","org.apache.catalina.Server");
digester.addSetNext("Server/Service","addService","org.apache.catalina.Service");
其中用setServer方法的表示用的是set对象、表示只能用一个节点、不能用兄弟节点来创建同样的对象。addService方法、表明接受的是List对象、可以去拓展。例如这里就表明一个xml文件只能有一个<server>节点、而可以有多个<service>节点。这也验证了文章中图片描叙的,层次结构。
同时我们也可以自去添加或者修改原本节点默认的对象。
例如<Server>节点下已经有几个Listener了我们可以在<Server>节点下再添加一个<Listener>:
我们创建一个类:
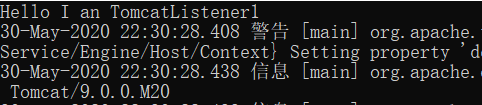
public class TomcatListener1 implements LifecycleListener { public TomcatListener1() { } public void lifecycleEvent(LifecycleEvent lifecycleEvent) { } static { System.out.println("Hello I an TomcatListener1"); }}
然后将其打成jar包,在将这个jar包放到tomcat目录下的/lib目录(如果是源码的话,就直接创建的目录下面就可以了。这里描叙的是我们直接下载的已经编译好的tomcat才需要放到/lib目录):
然后启动,我们可以看到日志中已经加载了我们添加了的Listener:
二、再来看xml文件的解析:

通过这里我们可以看到加载的是conf/server.xml
然后:
digester.push(this);(这个this就是catalina,就是将Catalina放在栈底,然后通过Digester中的节点中: digester.addSetNext("Server","setServer","org.apache.catalina.Server")这个setServer方法,就是将Server设置到catalina类,) digester.parse(inputSource);这里就是开始根据Degister类然后通过文件server.xml去解析创建类。这个时候我们可以看到Catalina中的server还是null

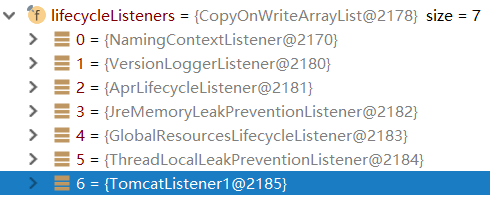
当我们运行这步之后server就是StandardServer同时这个server通过前面在Digester之后的那些节点也进行了对象的创建以及设置。

同时前面在server.xml添加的Listener也已经加载到了tomcat:
三、对象已经创建了。我们再来看其init过程:
这里先看下StandardServer的类结构:

这里Lifecycle接口由LifecycleBase去基本实现,如果有具体处理、就再由其实现类去处理。
getServer().init();这里server就是StandardServer:
public final synchronized void init() throws LifecycleException {(LifecycleBase类) ........... setStateInternal(LifecycleState.INITIALIZING, null, false); initInternal(); setStateInternal(LifecycleState.INITIALIZED, null, false); ...........}
Lifecycle接口的方法。

同时在Lifecycle(表明生命周期)接口中定义了tomcat启动过程中需要经过的各种状态。例如init、start、stop、同时这些状态又再分为before、after
看下setStateInternal方法
private synchronized void setStateInternal(LifecycleState state, Object data, boolean check) throws LifecycleException { ............ String lifecycleEvent = state.getLifecycleEvent(); if (lifecycleEvent != null) { fireLifecycleEvent(lifecycleEvent, data); }}
这里就是用Listener去处理一些事情、同时这些listener一般会进行状态判断、再什么状态进行定义的处理,具体怎样处理、有Listener去处理,例如:
public void lifecycleEvent(LifecycleEvent event) { (LifecycleBase) .............. if (event.getType().equals(Lifecycle.START_EVENT)) start(); else if (event.getType().equals(Lifecycle.STOP_EVENT)) stop();}
然后来看initInternal,其在LifecycleBase类中是抽象类:
protected abstract void initInternal() throws LifecycleException;
所以该方法是由其具体的子类实现的。这里就是StandardServer:
@Overrideprotected void initInternal() throws LifecycleException { ............... // Initialize our defined Services for (int i = 0; i < services.length; i++) { services[i].init(); }}
所以这里整个的调用链是父子节点对象都实现LifecycleBase。然后通过在实现该接口的子类中,通过实现initInternal方法、在该方法中再调用实现了LifecycleBase类的子节点对象的init方法,再通过init方法中的initInternal层层往下调,完成对应生命周期的初始化。这里现在的状态是init,还有start,
同时这里以initInternal为界:
setStateInternal(LifecycleState.INITIALIZING, null, false);
initInternal();
setStateInternal(LifecycleState.INITIALIZED, null, false);
前面就是before的内容、后面就是after的内容。before、after就是通过Listener去处理一些内容。
所以这里接下来就是services[i].init()的初始化,其实现的initInternal方法:
protected void initInternal() throws LifecycleException { ............ if (engine != null) { engine.init(); } // Initialize any Executors for (Executor executor : findExecutors()) { if (executor instanceof JmxEnabled) { ((JmxEnabled) executor).setDomain(getDomain()); } executor.init(); } ...... // Initialize mapper listener mapperListener.init(); // Initialize our defined Connectors synchronized (connectorsLock) { for (Connector connector : connectors) { connector.init(); } } ..........}
这里首先是engine.init(),这里的engine是StandardEngine,我们看其类结构:

可以看到这里除了Lifecycle接口、还有Container接口。这里就是容器需要实现的接口、由此可以知道Tomcat的四种容器(Engine、Host、Context、Wrapper都是由有实现该接口,通过类ContainerBase):
Container接口的方法:

可以看到其主要是用来保存其的子容器。
看下engine的initInternal方法实现:
@Overrideprotected void initInternal() throws LifecycleException { // Ensure that a Realm is present before any attempt is made to start // one. This will create the default NullRealm if necessary. getRealm(); super.initInternal();}
可以看到这里现在还没有去初始化engine的children,即StandardHost。
接下来是Executor的初始化、不过我们并没有在server.xml文件中去配置、所以这里并不会executor.init。
然后是(MapperListener)mapperListener.init();这个类是很关键的,不过在这里其的init是调用的默认初始化 ,其initInternal并没有特殊处理。
再之后就是connector.init();
我们的server.xml有配置两个connector、一个是用于连接http协议、还有一个是AJP

我们看http的connector.init(),其实现的initInternal方法:
@Overrideprotected void initInternal() throws LifecycleException { ........... // Initialize adapter adapter = new CoyoteAdapter(this); protocolHandler.setAdapter(adapter); ......... protocolHandler.init(); }
这里有两个重要的类CoyoteAdapter、protocolHandler,我们看下protocolHandler,这个就是协议处理器。例如这里在server.xml配置的协议protocol是"HTTP/1.1",其就是Http11AprProtocol

public Connector(String protocol) { ........... if ("HTTP/1.1".equals(protocol) || protocol == null) { if (aprConnector) { protocolHandlerClassName = "org.apache.coyote.http11.Http11AprProtocol"; } else { protocolHandlerClassName = "org.apache.coyote.http11.Http11NioProtocol"; } } else if ("AJP/1.3".equals(protocol)) { if (aprConnector) { protocolHandlerClassName = "org.apache.coyote.ajp.AjpAprProtocol"; } else { protocolHandlerClassName = "org.apache.coyote.ajp.AjpNioProtocol"; } }.............}

注意这里的 protocolHandler.init();,并不是Lifecycle接口的init方法,而是ProtocolHandler接口的。
我们看下这个init中处理的。AbstractProtocol这个类是ProtocolHandler接口的基本实现。其他不同的协议处理器都是实现整个类。
protocolHandler.init()主要是其的endpoint的init:
我们看Endpoint的:
protected void initServerSocket() throws Exception { serverSock = ServerSocketChannel.open(); socketProperties.setProperties(serverSock.socket()); InetSocketAddress addr = (getAddress()!=null?new InetSocketAddress(getAddress(),getPort()):new InetSocketAddress(getPort())); serverSock.socket().bind(addr,getAcceptCount()); serverSock.configureBlocking(true); //mimic APR behavior}
可以看到Endpoint的就是用于请求Socket的连接。这里用的是NIO。
这里整个的结构就是、一个Serveice可以有多个连接器Connector,不同的连接器有不同的协议处理器ProtocolHandler。而协议处理器用Endpoint去处理Socket连接。这里就是负责HTTP连接的连接器用Http11NioProtocol协议处理器去处理HTTP协议。而具体的socket连接则由NioEndpoint去处理。
4、load之后、我们再来看tomcat的start(启动):
LifecycleBase中关于start方法的实现:
@Overridepublic final synchronized void start() throws LifecycleException { ......... if (state.equals(LifecycleState.NEW)) { init(); } else if (state.equals(LifecycleState.FAILED)) { stop(); } else if (!state.equals(LifecycleState.INITIALIZED) && !state.equals(LifecycleState.STOPPED)) { invalidTransition(Lifecycle.BEFORE_START_EVENT); } setStateInternal(LifecycleState.STARTING_PREP, null, false); startInternal(); if (state.equals(LifecycleState.FAILED)) { stop(); } else if (!state.equals(LifecycleState.STARTING)) { invalidTransition(Lifecycle.AFTER_START_EVENT); } else { setStateInternal(LifecycleState.STARTED, null, false); } .....}
这里与前面的init是类似的:我们看下StandardServer的start,前面是initInternal,所以这里就是startInternal:
@Overrideprotected void startInternal() throws LifecycleException { fireLifecycleEvent(CONFIGURE_START_EVENT, null); setState(LifecycleState.STARTING); globalNamingResources.start(); // Start our defined Services synchronized (servicesLock) { for (int i = 0; i < services.length; i++) { services[i].start(); } }}
1、CONFIGURE_START_EVENT的生命状态去运行Listener。
2、将StandardServer的状态改为LifecycleState.STARTING)。
3、globalNamingResources.start();
4、service(StandardService)的init。
然后看下StandardService关于startInternal的实现:
@Overrideprotected void startInternal() throws LifecycleException { setState(LifecycleState.STARTING); ......... engine.start(); ........ synchronized (executors) { for (Executor executor: executors) { executor.start(); } } mapperListener.start(); // Start our defined Connectors second synchronized (connectorsLock) { for (Connector connector: connectors) { // If it has already failed, don't try and start it if (connector.getState() != LifecycleState.FAILED) { connector.start(); } } }}
1、先将standardService的生命状态设置为LifecycleState.STARTING。
2、engine(StandardEngine)的start(在init状态的时候、Engine的initInternal并没有特殊的处理,也并没有调用其子容器的init方法),同时在前面有有讲,容器都实现ContainerBase接口,所以我们看下ContainerBase类关于startInternal方法的实现:
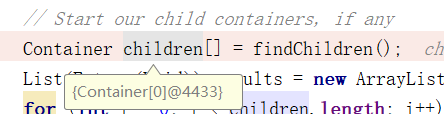
@Overrideprotected synchronized void startInternal() throws LifecycleException { // Start our subordinate components, if any Cluster cluster = getClusterInternal(); if (cluster instanceof Lifecycle) { ((Lifecycle) cluster).start(); } Realm realm = getRealmInternal(); if (realm instanceof Lifecycle) { ((Lifecycle) realm).start(); } Container children[] = findChildren(); List<Future<Void>> results = new ArrayList<>(); for (int i = 0; i < children.length; i++) { results.add(startStopExecutor.submit(new ContainerBase.StartChild(children[i]))); } for (Future<Void> result : results) { ..... result.get(); ...... } ............ ((Lifecycle) pipeline).start(); setState(LifecycleState.STARTING); threadStart();}
前面关于授权的就先不具体了解,我们可以看到后面,先是通过Callable-Future去启动子容器。然后再去启动pipeline(每个容器有自己的Value链)。
先看下StartChild类
private static class StartChild implements Callable<Void> { private Container child; public StartChild(Container child) { this.child = child; } @Override public Void call() throws LifecycleException { child.start(); return null; }}
简单来讲,也就是之容器的start方法的调用。这里父容器是engine,所以子容器是StandardHost,这里我们再来看了下
LifecycleBase类的start方法:
public final synchronized void start() throws LifecycleException {..........
setStateInternal(LifecycleState.STARTING_PREP, null, false); startInternal();}
前面有说setStateInternal方法会去运行该类Listener,然后容器类有xxxConfig类,其就实现了LifecycleListener
public class EngineConfig implements LifecycleListener所以在关于容器类的调用setStateInternal方法就去调用对应容器的对应xxxConfig中的lifecycleEvent方法。
所以这里获取调用HostConfig类(前面在Engine的init、start时候也会调用,不过Engine的EngineConfig的lifecycleEvent并没有进行特殊处理),例如EngineConfig的lifecycleEvent方法:
@Overridepublic void lifecycleEvent(LifecycleEvent event) { ......... engine = (Engine) event.getLifecycle(); .......... if (event.getType().equals(Lifecycle.START_EVENT)) start(); else if (event.getType().equals(Lifecycle.STOP_EVENT)) stop();}其中start方法:
protected void start() { if (engine.getLogger().isDebugEnabled()) engine.getLogger().debug(sm.getString("engineConfig.start"));}不过这里我们看下HostConfig的lifecycleEvent方法:
@Overridepublic void lifecycleEvent(LifecycleEvent event) { .......... // Process the event that has occurred if (event.getType().equals(Lifecycle.PERIODIC_EVENT)) { check(); } else if (event.getType().equals(Lifecycle.BEFORE_START_EVENT)) { beforeStart(); } else if (event.getType().equals(Lifecycle.START_EVENT)) { start(); } else if (event.getType().equals(Lifecycle.STOP_EVENT)) { stop(); }}这里目前StandardardHost的state就是Lifecycle.BEFORE_START_EVENT,所以这里进入到beforeStart()方法:
public void beforeStart() { if (host.getCreateDirs()) { File[] dirs = new File[] {host.getAppBaseFile(),host.getConfigBaseFile()}; for (int i=0; i<dirs.length; i++) { if (!dirs[i].mkdirs() && !dirs[i].isDirectory()) { log.error(sm.getString("hostConfig.createDirs",dirs[i])); } } }}
其中webapps我们可以知道是对应的项目安装目录。这里就是检查有没有这些目录。
然后我们再来看StandardHost类的关于startInternal()方法的实现:
@Overrideprotected synchronized void startInternal() throws LifecycleException { // Set error report valve String errorValve = getErrorReportValveClass(); ........ boolean found = false; Valve[] valves = getPipeline().getValves(); for (Valve valve : valves) { if (errorValve.equals(valve.getClass().getName())) { found = true; break; } } if(!found) { Valve valve = (Valve) Class.forName(errorValve).getConstructor().newInstance(); getPipeline().addValve(valve); } ....... super.startInternal();}这里首先看StandardHost的pipeline是不是已经添加了org.apache.catalina.valves.ErrorReportValve,没有就添加。
然后再调用了一次super.startInternal()就会调用到ContainerBase的startInternal方法(然后重复上叙流程)。
不过可以看到在StandardHost中,其children为空(也就是说现在还没有将项目从webapps目录中安装到tomcat中)
,什么时候将项目安装?
往ContainerBase的startInternal看下去。会有一个setState(LifecycleState.STARTING)方法,state已经是LifecycleState.STARTING)了:
protected synchronized void setState(LifecycleState state) throws LifecycleException { setStateInternal(state, null, true);}这里会再调用一次setStateInternal,不过已经是STARTING状态了。所以这里会再去运行一次HostConfig类的lifecycleEvent方法,不过是以STARTING状态。所以这次会运行其的start方法:
public void start() { .......... if (!host.getAppBaseFile().isDirectory()) { log.error(sm.getString("hostConfig.appBase", host.getName(), host.getAppBaseFile().getPath())); host.setDeployOnStartup(false); host.setAutoDeploy(false); } if (host.getDeployOnStartup()) deployApps();}该类的deployOnStartup属性默认是true。这里会进行判断看webapps目录是不是存在,不存在就不调用deployApps方法
protected void deployApps() { File appBase = host.getAppBaseFile(); File configBase = host.getConfigBaseFile(); String[] filteredAppPaths = filterAppPaths(appBase.list()); // Deploy XML descriptors from configBase deployDescriptors(configBase, configBase.list()); // Deploy WARs deployWARs(appBase, filteredAppPaths); // Deploy expanded folders deployDirectories(appBase, filteredAppPaths);}通过注释也能知道,这里是通过三种方式去处理webapps目录下的项目,如果是xml描叙就用deployDescriptors方法去处理,如果是war包,就用deployWARs。如果是目录,就通过deployDirectories方法。我的测试项目是目录的形式,所以用的是第三个方法(在webapps下是servletWeb1):
protected void deployDirectories(File appBase, String[] files) { ......... List<Future<?>> results = new ArrayList<>(); for (int i = 0; i < files.length; i++) { ....... if (files[i].equalsIgnoreCase("META-INF")) continue; if (files[i].equalsIgnoreCase("WEB-INF")) continue; File dir = new File(appBase, files[i]); if (dir.isDirectory()) { ......... results.add(es.submit(new HostConfig.DeployDirectory(this, cn, dir))); } } for (Future<?> result : results) { result.get(); ....... }}
这里同样是以Call-Future的方式去启动,看下DeployDirectory类:
private static class DeployDirectory implements Runnable { private HostConfig config; private ContextName cn; private File dir; public DeployDirectory(HostConfig config, ContextName cn, File dir) { this.config = config; this.cn = cn; this.dir = dir; } @Override public void run() { config.deployDirectory(cn, dir); }}现在是HostConfig,所以这里调用的是HostConfig的deployDirectory方法(这个方法就是加载的关键):
这个方法我们只看其重要的主线逻辑:
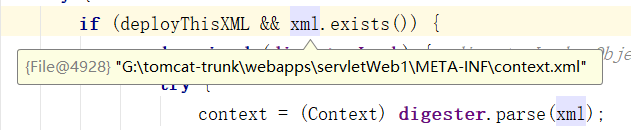
protected void deployDirectory(ContextName cn, File dir) { Context context = null; File xml = new File(dir, Constants.ApplicationContextXml); File xmlCopy = new File(host.getConfigBaseFile(), cn.getBaseName() + ".xml"); .......... if (deployThisXML && xml.exists()) { synchronized (digesterLock) { context = (Context) digester.parse(xml); } } ........... else { context = (Context) Class.forName(contextClass).getConstructor().newInstance(); } Class<?> clazz = Class.forName(host.getConfigClass()); LifecycleListener listener = (LifecycleListener) clazz.getConstructor().newInstance(); context.addLifecycleListener(listener); context.setName(cn.getName()); context.setPath(cn.getPath()); context.setWebappVersion(cn.getVersion()); context.setDocBase(cn.getBaseName()); host.addChild(context);}
如果在对应项目META-INF目录下有context.xml文件,就根据该文件去创建Context(StandardContext),
如果没有,就直接通过context = (Context) Class.forName(contextClass).getConstructor().newInstance()创建:
protected String contextClass = "org.apache.catalina.core.StandardContext";创建StandardContext后,就将其加到其父容器StandardHost。
addChild是Container接口的方法,所以到ContainerBase类:
然后其调用的是addChildInternal方法:
private void addChildInternal(Container child) { ......... if ((getState().isAvailable() || LifecycleState.STARTING_PREP.equals(getState())) && startChildren) { child.start(); ........... } finally { fireContainerEvent(ADD_CHILD_EVENT, child); }}child.start(现在state为
private volatile LifecycleState state = LifecycleState.NEW;)这里就又是LifecycleBase的start方法:
@Overridepublic final synchronized void start() throws LifecycleException { ........ if (state.equals(LifecycleState.NEW)) { init(); } else if (state.equals(LifecycleState.FAILED)) { stop(); ...... setStateInternal(LifecycleState.STARTING_PREP, null, false); startInternal();}所以想init,之后再是 setStateInternal(LifecycleState.STARTING_PREP, null, false); startInternal();
我们知道在init方法中会调:
setStateInternal(LifecycleState.INITIALIZING, null, false);initInternal();setStateInternal(LifecycleState.INITIALIZED, null, false);然后在init方法的下面还会再掉这三个方法(前面对于Server、Service、等的init状态、start状态是分开进行的,这里的context是直接再start方法完成这两者。)以不同的状态:init、start。
然后这里的StandardContext的Listener有ContextConfig。我们看下其在init、start状态会进行什么处理:
@Overridepublic void lifecycleEvent(LifecycleEvent event) { .......... // Process the event that has occurred if (event.getType().equals(Lifecycle.CONFIGURE_START_EVENT)) { configureStart(); } else if (event.getType().equals(Lifecycle.BEFORE_START_EVENT)) { beforeStart(); } else if (event.getType().equals(Lifecycle.AFTER_START_EVENT)) { // Restore docBase for management tools if (originalDocBase != null) { context.setDocBase(originalDocBase); } } else if (event.getType().equals(Lifecycle.CONFIGURE_STOP_EVENT)) { configureStop(); } else if (event.getType().equals(Lifecycle.AFTER_INIT_EVENT)) { init(); } else if (event.getType().equals(Lifecycle.AFTER_DESTROY_EVENT)) { destroy(); }}这里的状态在处理有init_after、start_before、start_after、confiugure_start
不过这里的StandardContext的initInternal方法并没有特殊,在init之后,我们看下ContextConfig关于init_after的处理:
protected synchronized void init() { // Called from StandardContext.init() Digester contextDigester = createContextDigester(); contextDigester.getParser(); contextConfig(contextDigester);}这里也有一个Digester:
可以看到其是解析context文件的,init之后,就是start,我们再来看下start_before、
protected synchronized void beforeStart() { ............ fixDocBase(); ....... antiLocking();}这里的fixDocBase方法,对于文件形式的StandardContext、并没有特殊的处理。如果是war的形式,这里就会读取包文件进行一些处理。
然后我们看下StandardContext的startInternal方法实现:


在这里有一个是fireLifecycleEvent(Lifecycle.CONFIGURE_START_EVENT, null),所以这里就会调ContextConfig类的 configureStart方法:
protected synchronized void configureStart() { ...... webConfig(); ....... if (!context.getIgnoreAnnotations()) { applicationAnnotationsConfig(); } if (ok) { validateSecurityRoles(); } // Configure an authenticator if we need one if (ok) { authenticatorConfig(); } ..........}再来看webConfig方法:
这里会解析两个web.xml(一个是在/conf/web.xml文件,这个是这个tomcat级别、还有一个是context级别,就每个项目对应的web.xml),解析并形成WebXml对象。而找到这两个文件的目录都是写好的:
public static final String DefaultWebXml = "conf/web.xml";public static final String ApplicationWebXml = "/WEB-INF/web.xml";context级别的Digester的创建:
protected Digester createContextDigester() { Digester digester = new Digester(); digester.setValidating(false); digester.setRulesValidation(true); Map<Class<?>, List<String>> fakeAttributes = new HashMap<>(); List<String> attrs = new ArrayList<>(); attrs.add("className"); fakeAttributes.put(Object.class, attrs); digester.setFakeAttributes(fakeAttributes); RuleSet contextRuleSet = new ContextRuleSet("", false); digester.addRuleSet(contextRuleSet); RuleSet namingRuleSet = new NamingRuleSet("Context/"); digester.addRuleSet(namingRuleSet); return digester;}这里关键是这个规则集WebRuleSet:
@Overridepublic void addRuleInstances(Digester digester) { digester.addCallMethod(fullPrefix + "/context-param", "addContextParam", 2); digester.addCallParam(fullPrefix + "/context-param/param-name", 0); digester.addCallParam(fullPrefix + "/context-param/param-value", 1); ....... digester.addRule(fullPrefix + "/servlet", new ServletDefCreateRule()); digester.addSetNext(fullPrefix + "/servlet", "addServlet", "org.apache.tomcat.util.descriptor.web.ServletDef"); ......... digester.addCallMethod(fullPrefix + "/servlet/init-param", "addInitParameter", 2); digester.addCallParam(fullPrefix + "/servlet/init-param/param-name", 0); digester.addCallParam(fullPrefix + "/servlet/init-param/param-value", 1); ................ digester.addCallMethod(fullPrefix + "/servlet/servlet-class", "setServletClass", 0); digester.addCallMethod(fullPrefix + "/servlet/servlet-name", "setServletName", 0); ......... digester.addRule(fullPrefix + "/servlet-mapping", new CallMethodMultiRule("addServletMapping", 2, 0)); digester.addCallParam(fullPrefix + "/servlet-mapping/servlet-name", 1); digester.addRule(fullPrefix + "/servlet-mapping/url-pattern", new CallParamMultiRule(0)); .............}这里面(上面是省略了一些内容)就是web.xml中的标签。
然后可以看到在调用digester解析解析前
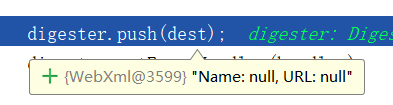
所以这里是将这个xml的内容解析到WebXML,之后进行相应的解析。
我们可以看到在解析前,这个WebXml的内容是空的:
之后:
这里现在StandardContext也创建了,WebXml对象也有了,所以现在则是将WebXml的内容设置到Context中了,configureContext(webXml)方法:
private void configureContext(WebXml webxml) { .......... for (Map.Entry<String, String> entry : webxml.getContextParams().entrySet()) { context.addParameter(entry.getKey(), entry.getValue()); } ............. for (FilterDef filter : webxml.getFilters().values()) { if (filter.getAsyncSupported() == null) { filter.setAsyncSupported("false"); } context.addFilterDef(filter); } for (FilterMap filterMap : webxml.getFilterMappings()) { context.addFilterMap(filterMap); } context.setJspConfigDescriptor(webxml.getJspConfigDescriptor()); for (String listener : webxml.getListeners()) { context.addApplicationListener(listener); } .......... for (ServletDef servlet : webxml.getServlets().values()) { Wrapper wrapper = context.createWrapper(); ......... wrapper.setName(servlet.getServletName()); Map<String,String> params = servlet.getParameterMap(); for (Map.Entry<String, String> entry : params.entrySet()) { wrapper.addInitParameter(entry.getKey(), entry.getValue()); } wrapper.setRunAs(servlet.getRunAs()); wrapper.setServletClass(servlet.getServletClass()); ....... context.addChild(wrapper); } for (String welcomeFile : webxml.getWelcomeFiles()) { if (welcomeFile != null && welcomeFile.length() > 0) { context.addWelcomeFile(welcomeFile); } } ........}这上面有一个遍历ServDef的创建Wrapper的过程。即(一个Servlet对应一个Wrapper容器)
然后添加到context,context.addChild(wrapper)(这里添加的过程就是想全面StandardContext加到StandardHost一样。不过这里tomcat并没有想ContextConfig这种Listener,也并没有默认Listener,需要自己拓展)。
5、自此,整个容器级别的加载已经完成。让我们再次到StandardService的startInternal方法:
@Overrideprotected void startInternal() throws LifecycleException { setState(LifecycleState.STARTING); if (engine != null) { synchronized (engine) { engine.start(); } } synchronized (executors) { for (Executor executor: executors) { executor.start(); } } mapperListener.start(); // Start our defined Connectors second for (Connector connector: connectors) { // If it has already failed, don't try and start it if (connector.getState() != LifecycleState.FAILED) { connector.start(); } }}这里engine的start已经完成。现在还有executors、mapperListener、connector的start。
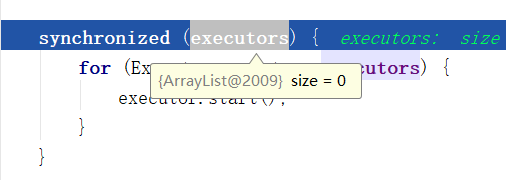
一、executors:我们并没有在server.xml中配置对应的executor
二、mapperListener:这个类很重要,是关于接受请求时决定怎样映射的,例如映射到哪个Service、StandardContext,StandardWrapper。


发表评论
最新留言
关于作者
