(十)Flutter 路由 push pop 与List 中溅墨(我咋觉得应该叫水波纹)效果(InkWell)
发布日期:2021-05-07 19:15:50
浏览次数:13
分类:技术文章
本文共 9257 字,大约阅读时间需要 30 分钟。
修改Main.dart
import 'package:flutter/material.dart';import 'demo/navigator_demo.dart';import 'demo/page_demo.dart';void main() => runApp(MyApp());class MyApp extends StatelessWidget { @override Widget build(BuildContext context) { // TODO: implement build return MaterialApp( debugShowCheckedModeBanner: false, home: NavigatorDemo(), routes: { '/about': (context) => PageDemo(title: 'About'), '/home': (context) => PageDemo(title: 'Home'), }, theme: ThemeData( primarySwatch: Colors.yellow, highlightColor: Color.fromRGBO(255, 255, 255, 0.5), splashColor: Colors.white70), ); }}
navigator_demo.dart
import 'package:flutter/material.dart';import 'package:flutter_app/demo/page_demo.dart';class NavigatorDemo extends StatelessWidget{ @override Widget build(BuildContext context) { // TODO: implement build return Scaffold( body: Center( child: Row( mainAxisAlignment: MainAxisAlignment.center, children: [ FlatButton( child: Text('Home'), onPressed: (){ Navigator.pushNamed(context, '/home'); }, ), FlatButton( child: Text('About'), onPressed: (){ Navigator.of(context).push( MaterialPageRoute(builder: (BuildContext context) { return PageDemo(title:"About"); } ) ); }, ) ], ), ), ); }} 【page_demo.dart】
import 'package:flutter/material.dart';class PageDemo extends StatelessWidget { final String title; PageDemo({ this.title }); @override Widget build(BuildContext context) { return Scaffold( appBar: AppBar( title: Text(title), elevation: 0.0, ), floatingActionButton: FlatButton( child: Icon(Icons.arrow_back), onPressed: (){ Navigator.pop(context); }, ), ); }} 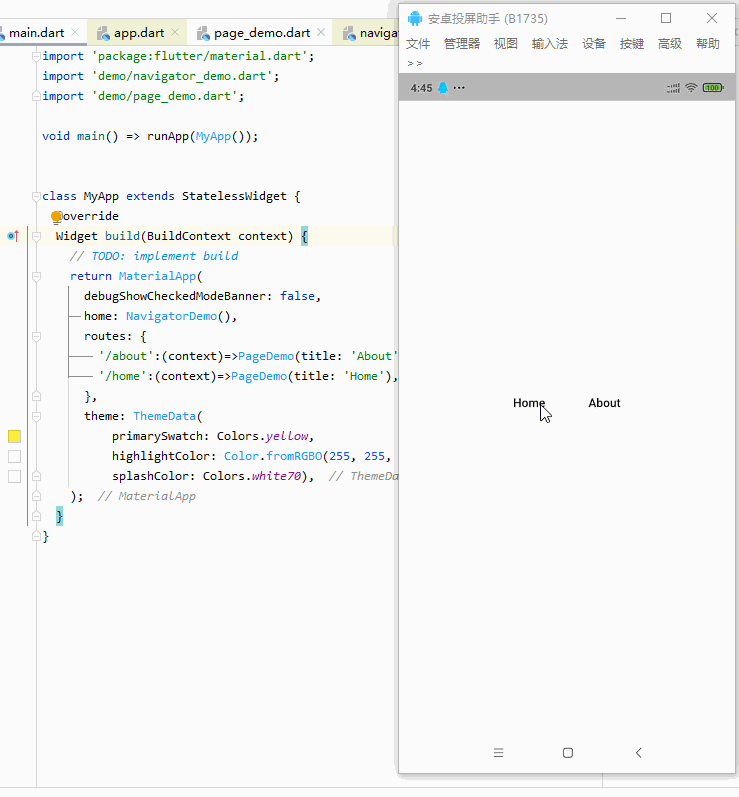
Push 和pop 是进入和退出页面 也可以主动调用,除了这种方式写路由还有一种是使用initialRoute
方式如下
修改main.dart
import 'package:flutter/material.dart';import 'demo/navigator_demo.dart';import 'demo/page_demo.dart';void main() => runApp(MyApp());class MyApp extends StatelessWidget { @override Widget build(BuildContext context) { // TODO: implement build return MaterialApp( debugShowCheckedModeBanner: false, // home: NavigatorDemo(), initialRoute: "/", routes: { '/': (context) => NavigatorDemo(), '/about': (context) => PageDemo(title: 'About'), '/home': (context) => PageDemo(title: 'Home'), }, theme: ThemeData( primarySwatch: Colors.yellow, highlightColor: Color.fromRGBO(255, 255, 255, 0.5), splashColor: Colors.white70), ); }} 效果同上 就不多贴图
'/':(context)=>NavigatorDemo(),
表示初始路由对应的文件。
initialRoute: '/',
初始路由,代表根路由对应的路径
也就是说 如果initiaRoute 换成初始值/about
initialRoute: '/about', routes: { '/':(context)=>NavigatorDemo(), '/about':(context)=>PageDemo(title: 'About'), '/home':(context)=>PageDemo(title: 'Home'), }, 那么 刚进入主页就会先显示about页面(不贴图了。。)
so 我们根据这一特性就会知道。这么写可以直接路由到主页
import 'package:flutter/material.dart';import 'package:flutter_app/home/home.dart';import 'demo/navigator_demo.dart';import 'demo/page_demo.dart';void main() => runApp(MyApp());class MyApp extends StatelessWidget { @override Widget build(BuildContext context) { // TODO: implement build return MaterialApp( debugShowCheckedModeBanner: false, // home: NavigatorDemo(), initialRoute: '/', routes: { '/':(context)=>Home(), }, theme: ThemeData( primarySwatch: Colors.yellow, highlightColor: Color.fromRGBO(255, 255, 255, 0.5), splashColor: Colors.white70), ); }} 之前我们写过一个listviewdemo 我们这次加上一个水波纹特效(溅墨)
listview_demo.dart
precode
import 'package:flutter/material.dart';import 'package:flutter_app/model/post.dart';class ListViewDemo extends StatelessWidget { Widget _listItemBuilder(BuildContext context, int index) { return Container( color: Colors.white, margin: EdgeInsets.all(8.0), child: Column( children: [ Image.network(posts[index].imgeUrl), SizedBox(height: 16.0), Text( posts[index].title, style: Theme.of(context).textTheme.headline6, ), Text( posts[index].author, style: Theme.of(context).textTheme.subtitle1, ), SizedBox(height: 16.0), ], ), ); } @override Widget build(BuildContext context) { return ListView.builder( itemCount: posts.length, itemBuilder: _listItemBuilder, ); }}
修改图片 使用
AspectRatio
布局包裹
Stack
并新增
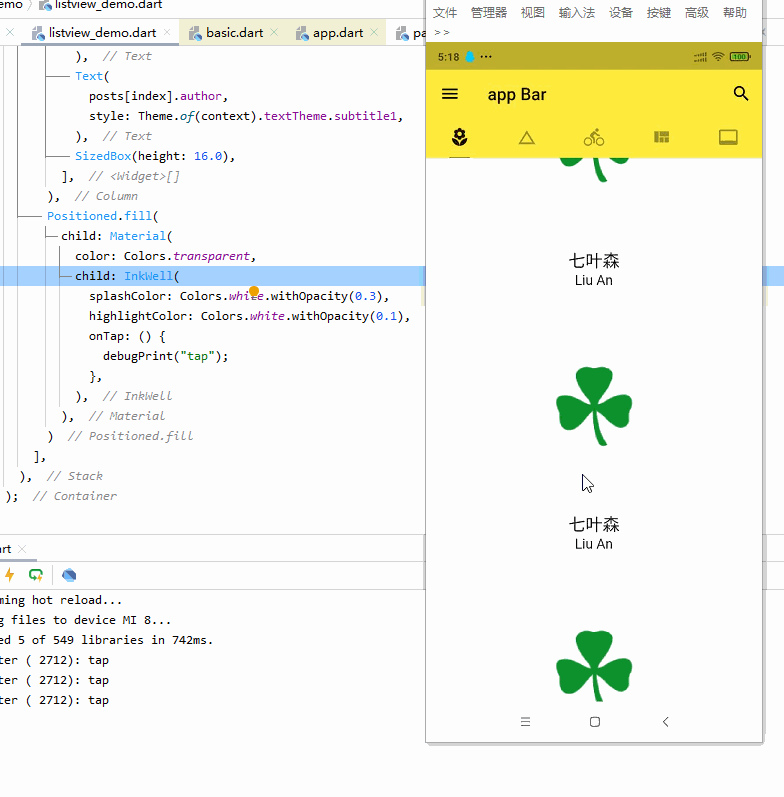
Positioned.fill( child: Material( color: Colors.transparent, child: InkWell( splashColor: Colors.white.withOpacity(0.3), highlightColor: Colors.white.withOpacity(0.1), onTap: () { debugPrint("tap"); }, ), ), ) 改变后代码
import 'package:flutter/material.dart';import 'package:nihao_flutter/model/post.dart';class ListViewDemo extends StatelessWidget { Widget _listItemBuilder(BuildContext context, int index) { return Container( color: Colors.white, margin: EdgeInsets.all(8.0), child: Stack( children: [ Column( children: [ AspectRatio( aspectRatio: 16/9, child: Image.network(posts[index].imgeUrl,fit: BoxFit.cover), ), SizedBox(height: 16.0), Text( posts[index].title, style: Theme.of(context).textTheme.title, ), Text( posts[index].author, style: Theme.of(context).textTheme.subhead, ), SizedBox(height: 16.0), ], ), Positioned.fill( child: Material( color: Colors.transparent, child: InkWell( splashColor: Colors.white.withOpacity(0.3), highlightColor: Colors.white.withOpacity(0.1), onTap: (){ debugPrint('Tap'); }, ), ), ) ], )); } @override Widget build(BuildContext context) { // TODO: implement build return ListView.builder( itemCount: posts.length, itemBuilder: _listItemBuilder, ); }} 效果
最后温习一下push ListView和详情页的交互
新建 post_show.dart 详情页面
import 'package:flutter/material.dart';import '../model/post.dart';class PostShow extends StatelessWidget { final Post post; PostShow({ @required this.post, }); @override Widget build(BuildContext context) { return Scaffold( appBar: AppBar( title: Text('${post.title}'), elevation: 0.0, ), body: Column( children: [ Image.network(post.imgeUrl), Container( padding: EdgeInsets.all(32.0), width: double.infinity, child: Column( crossAxisAlignment: CrossAxisAlignment.start, children: [ Text( '${post.title}', style: Theme.of(context).textTheme.title, ), Text( '${post.author}', style: Theme.of(context).textTheme.subhead, ), SizedBox(height: 32.0,), Text( '${post.description}', style: Theme.of(context).textTheme.body1, ), ], ), ) ], ), ); }} 之前的post.dart 加上description属性
class Post { const Post({ this.title, this.author, this.imgeUrl, this.description, }); final String title; final String author; final String imgeUrl; final String description;}final List posts = [ Post( title: '七叶森', author: 'Liu An', imgeUrl: 'https://www.baidu.com/img/bd_logo1.png?where=super', description: '1', ), Post( title: '七叶森', author: 'Liu An', imgeUrl: 'https://www.baidu.com/img/bd_logo1.png?where=super', description: '2', ), Post( title: '七叶森', author: 'Liu An', imgeUrl: 'https://www.baidu.com/img/bd_logo1.png?where=super', description: '3', ), Post( title: '七叶森', author: 'Liu An', imgeUrl: 'https://www.baidu.com/img/bd_logo1.png?where=super', description: '4', ), Post( title: '七叶森', author: 'Liu An', imgeUrl: 'https://www.baidu.com/img/bd_logo1.png?where=super', ), Post( title: '七叶森', author: 'Liu An', imgeUrl: 'https://www.baidu.com/img/bd_logo1.png?where=super', description: '5', )]; listview_demo.dart持续修改Inwell的ontap节点
onTap: (){ Navigator.of(context).push( MaterialPageRoute(builder: (BuildContext context) { return PostShow(post:posts[index]); }) ); }, 
发表评论
最新留言
很好
[***.229.124.182]2025年03月22日 01时45分19秒
关于作者

喝酒易醉,品茶养心,人生如梦,品茶悟道,何以解忧?唯有杜康!
-- 愿君每日到此一游!
推荐文章
【SSL】1072砝码称重
2019-03-04
js数据结构--队列--常见操作
2019-03-04
多项式插值法的Python程序
2019-03-04
vue.js常用指令及用法
2019-03-04
vuex的核心概念和运行机制
2019-03-04
SSLOJ1692 USACO 3.2 Magic Squares 魔板&P2730
2019-03-04
暴打算法:王者级数据结构与LeetCode笔记,一路绿灯杀进字节Java岗
2019-03-04
限时开源!公布半小时下载量达10W:阿里大牛出品「MyCat笔记」
2019-03-04
阿里Java全线成长宝典,从P5到P8一应俱全
2019-03-04
计算机系统原理——cachelab 实验1(第一周)
2019-03-04
JAVA初窥-DAY07
2019-03-04
数组--Go语言学习笔记
2019-03-04
Redis (三)——Linux 上安装 Redis
2019-03-04
c编程常见错误-函数声明没有参数类型声明
2019-03-04
概率论 贝叶斯公式
2019-03-04
java 重写(override)和重载(overload)区别
2019-03-04
java 多态
2019-03-04
java 多态类型转换
2019-03-04
java ==和equals
2019-03-04
java 接口(Interface)多态特性
2019-03-04
白红宇的个人博客 - 记录点点滴滴的事 - 您是第 457110819 位访客
访问时间: 2025-04-15 10:23:43
访问IP: 3.133.139.156
Copyright © 2020 - 2025 css8.cn 京ICP备2021015314号-1
手机版