Spring中@EnableCaching如何集成redis
发布日期:2021-05-07 09:45:43
浏览次数:14
分类:技术文章
本文共 3258 字,大约阅读时间需要 10 分钟。
上篇文章主要介绍了spring中缓存的使用,不过文中的案例都是以本地内存作为存储介质的,但是实际上我们的项目上线之后,基本上都会采用集群的方式进行部署,如果将数据存储在本地内存中,集群之间是无法共享的,我们可以将数据存储在redis中,从而实现缓存的共享,下面我们一起来看下Spring中@EnableCaching如何对接redis。
安装redis
下载地址:https://redis.io/download
pom.xml中引入redis配置
org.redisson redisson 3.13.3
项目中创建redis配置文件
新建com/javacode2018/cache/demo2/redis.yml,内容如下:
singleServerConfig: address: "redis://127.0.0.1:6379" password: null clientName: null database: 7 #选择使用哪个数据库0~15 idleConnectionTimeout: 10000 connectTimeout: 10000 timeout: 3000codec: class: "org.redisson.codec.JsonJacksonCodec"
创建redis相关的bean
package com.javacode2018.cache.demo2;import org.redisson.Redisson;import org.redisson.api.RedissonClient;import org.redisson.config.Config;import org.redisson.spring.cache.RedissonSpringCacheManager;import org.springframework.cache.CacheManager;import org.springframework.cache.annotation.EnableCaching;import org.springframework.context.annotation.Bean;import org.springframework.context.annotation.ComponentScan;import java.io.IOException;import java.io.InputStream;import java.util.Arrays;@ComponentScan@EnableCaching //@1public class MainConfig2 { @Bean //@2 public CacheManager cacheManager() throws IOException { RedissonSpringCacheManager cacheManager = new RedissonSpringCacheManager(this.redissonClient()); cacheManager.setCacheNames(Arrays.asList("cache1")); return cacheManager; } @Bean //@3 public RedissonClient redissonClient() throws IOException { InputStream is = MainConfig2.class.getResourceAsStream("/com/javacode2018/cache/demo2/redis.yml"); Config config = Config.fromYAML(is); return Redisson.create(config); }} @1:开启spring cache功能。
@2:自定义spring中cache管理器,这个地方我们定义了一个redis类型的管理器,底层使用redis来作为缓存的存储介质。
@3:通过redis.yml配置文件来创建一个RedissonClient,用于和redis进行交互。
来个测试类
package com.javacode2018.cache.demo2;import org.springframework.cache.annotation.Cacheable;import org.springframework.stereotype.Component;import java.util.Arrays;import java.util.List;@Componentpublic class BookService { @Cacheable(cacheNames = "cache1", key = "#root.targetClass.name+'-'+#root.method.name") public List list() { System.out.println("---模拟从db中获取数据---"); return Arrays.asList("java高并发", "springboot", "springcloud"); }} 测试用例
@Testpublic void test7() { AnnotationConfigApplicationContext context = new AnnotationConfigApplicationContext(MainConfig2.class); BookService bookService = context.getBean(BookService.class); System.out.println(bookService.list()); System.out.println(bookService.list()); { System.out.println("下面打印出cache1缓存中的key列表"); RedissonSpringCacheManager cacheManager = context.getBean(RedissonSpringCacheManager.class); RedissonCache cache1 = (RedissonCache) cacheManager.getCache("cache1"); cache1.getNativeCache().keySet().stream().forEach(System.out::println); }} 运行输出
---模拟从db中获取数据---[java高并发, springboot, springcloud][java高并发, springboot, springcloud]下面打印出cache1缓存中的key列表com.javacode2018.cache.demo2.BookService-list
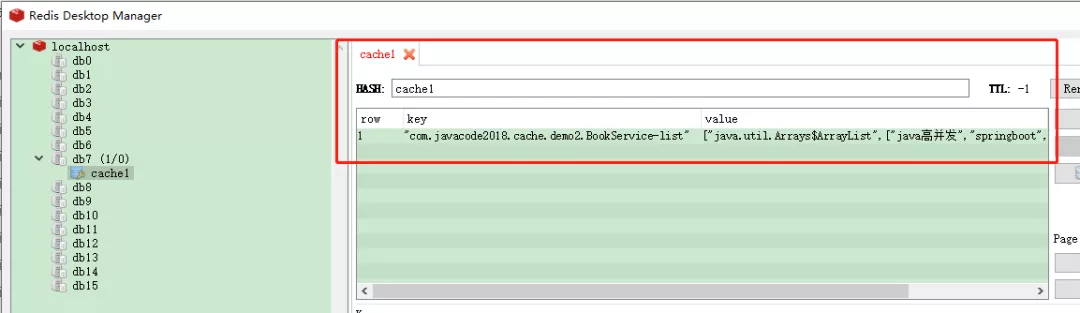
此时数据已经进入redis了,我们用redis客户端工具RedisDesktopManager来看一下。
RedisDesktopManager下载地址
链接:https://pan.baidu.com/s/1WCd-tk8dDDJnFIKciVIQsA 提取码:x728
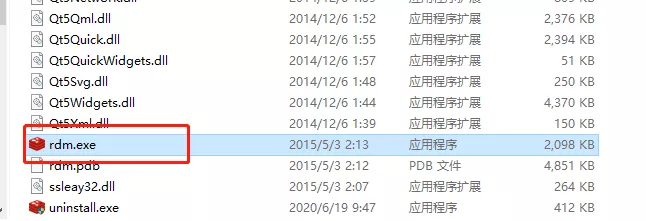
解压之后,点击下面的直接运行
发表评论
最新留言
做的很好,不错不错
[***.243.131.199]2025年03月21日 20时50分00秒
关于作者

喝酒易醉,品茶养心,人生如梦,品茶悟道,何以解忧?唯有杜康!
-- 愿君每日到此一游!
推荐文章
NAT工作原理
2019-03-05
Processes, threads and goroutines
2019-03-05
c++中的10种常见继承
2019-03-05
Vue学习—深入剖析渲染函数
2019-03-05
wxpython的Hello,World代码探索
2019-03-05
【数字图像处理】OpenCV3 学习笔记
2019-03-05
【单片机开发】智能小车工程(经验总结)
2019-03-05
【单片机开发】基于stm32的掌上游戏机设计 (项目规划)
2019-03-05
KeepAlived介绍、配置示例、KeepAlived配置IPVS、调用脚本进行监控
2019-03-05
Scala集合-数组、元组
2019-03-05
04 程序流程控制
2019-03-05
C++&&STL
2019-03-05
子集(LeetCode 78)
2019-03-05
1093 Count PAT‘s (25分) 含DP做法
2019-03-05
一篇解决JMM与volatile详解(二)
2019-03-05
数据结构之数组与经典面试题(二)
2019-03-05
无锁并发框架-Disruptor的使用(二)
2019-03-05
Android4.4 平板背光设置
2019-03-05
codeforces The Eternal Immortality 题解
2019-03-05
微信js-sdk使用简述(分享,扫码功能等)
2019-03-05
白红宇的个人博客 - 记录点点滴滴的事 - 您是第 457529784 位访客
访问时间: 2025-04-18 08:21:12
访问IP: 18.118.193.52
Copyright © 2020 - 2025 css8.cn 京ICP备2021015314号-1
手机版