本文共 3153 字,大约阅读时间需要 10 分钟。
Android弹窗:
在Android中弹出式菜单(以下称弹窗)是使用十分广泛一种菜单呈现的方式,弹窗为用户交互提供了便利。关于弹窗的实现大致有以下两种方式AlertDialog和PopupWindow;
两者的区别:AlertDialog弹窗在位置显示上是固定的,而PopupWindow则相对比较随意,能够在主屏幕上的任意位置显示;
今天就简单介绍一下,如何利用PopupWindow实现RecyclerView的自定义的弹窗布局;
使用步骤:
1.创建两个xml文件,一个mainactivity主布局,一个是popupwindow布局(因为我是在项目里写的,所以闲杂代码可能比较多):
主布局(在其写一个Button按钮,因为项目需要,我换成了ImageView):
<LinearLayout android:id="@+id/score_layout" android:layout_width="match_parent" android:layout_height="match_parent" android:orientation="vertical" app:layout_behavior="@string/appbar_scrolling_view_behavior" android:background="#f0f0f0"> <ImageView android:id="@+id/bttest" android:layout_width="50dp" android:layout_height="match_parent" android:layout_gravity="center" android:src="@mipmap/selectteam" /> </LinearLayout>popupwindow.xml布局(里面放一个RecyclerView):
<LinearLayout xmlns:android="http://schemas.android.com/apk/res/android" android:layout_width="match_parent" android:layout_height="match_parent" xmlns:app="http://schemas.android.com/apk/res-auto" android:orientation="vertical"> <android.support.v7.widget.RecyclerView android:id="@+id/select" android:layout_width="match_parent" android:layout_height="wrap_content" app:layout_scrollFlags="scroll|enterAlways|snap"> </android.support.v7.widget.RecyclerView></LinearLayout>2.在MainActivity中为ImageView进行实例化,并为其设立点击事件:
bselect.setOnClickListener(new View.OnClickListener() { @Override public void onClick(View v) { showPopupWindow(); } });private void showPopupWindow() { View view = LayoutInflater.from(getContext()).inflate(R.layout.popupwindow,null); RecyclerView recyclerView = (RecyclerView) view.findViewById(R.id.select); LinearLayoutManager linearLayoutManager = new LinearLayoutManager(getContext()); linearLayoutManager.setOrientation(LinearLayoutManager.VERTICAL); recyclerView.setLayoutManager(linearLayoutManager); ScoreTeamAdapter scoreTeamAdapter = new ScoreTeamAdapter(yearList); recyclerView.setAdapter(scoreTeamAdapter); popupWindow = new PopupWindow(main_layout, ViewGroup.LayoutParams.WRAP_CONTENT, ViewGroup.LayoutParams.WRAP_CONTENT); popupWindow.setContentView(view); popupWindow.setFocusable(true); popupWindow.showAsDropDown(bselect); }showPopupWindow()方法:
1.先将popupwindow.xml布局加载成一个View,并通过该View将RecyclerView进行实例化,然后RecyclerView进行设置,在这设置成竖向排列的线性布局,然后为其设置一个Adapter;
2.随后将popupWindow进行设置:
popupWindow = new PopupWindow(main_layout, ViewGroup.LayoutParams.WRAP_CONTENT, ViewGroup.LayoutParams.WRAP_CONTENT);main_layout是ImageView的父容器LinearLayout,
第一个ViewGroup.LayoutParams.WRAP_CONTENT是设置popupwindow的宽度,第二个ViewGroup.LayoutParams.WRAP_CONTENT是设置popupwindow的高度;
popupWindow.setContentView(view);设置popupwindow的布局;
popupWindow.showAsDropDown(bselect);调用PopupWindow的showAsDropDown(View view)将PopupWindow作为View组件的下拉组件显示出来;或调用PopupWindow的showAtLocation()方法将PopupWindow在指定位置显示出来;
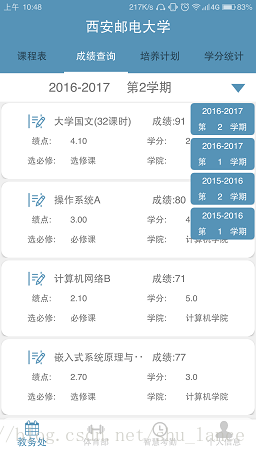
最后的效果如图:
想了解更多PopupWindow的用法,请看下面的简书:
发表评论
最新留言
关于作者
