yaml配置
一、
1.新建并配置
2.创建实体类
二、
1.配置
2.修改实体类
三、
发布日期:2021-06-30 22:58:38
浏览次数:2
分类:技术文章
本文共 2812 字,大约阅读时间需要 9 分钟。
yaml配置和properties配置的区别:1.
yaml配置是有序的,properties配置是无序的2.自定义的
yaml目前不支持使用注解直接注入到SpringBoot项目中
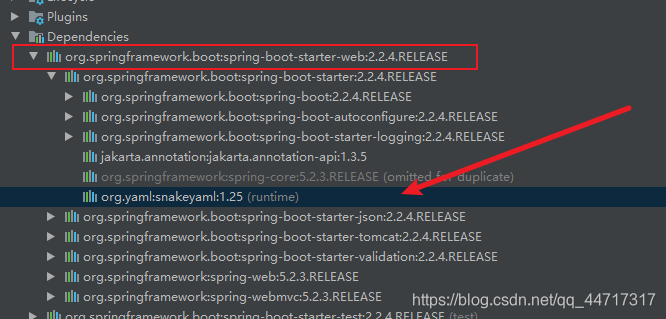
依赖
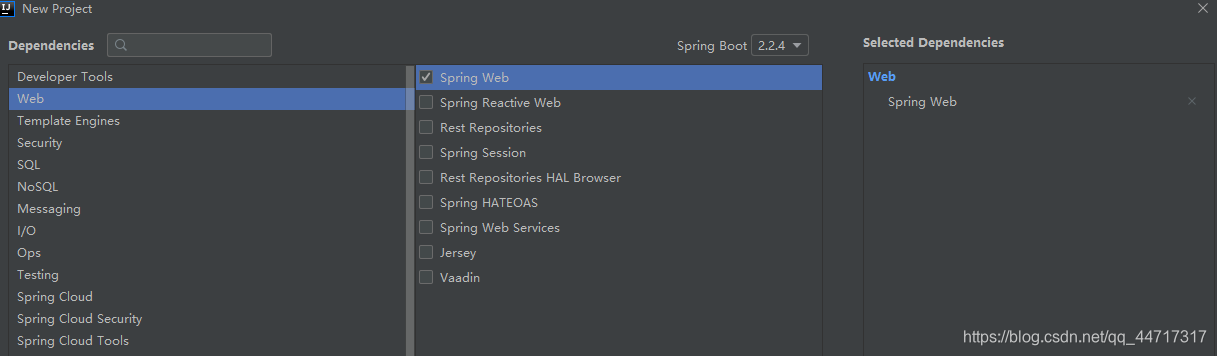
一、yaml注入数组
1.新建并配置application.yml文件
server: port: 8081 servlet: context-path: /alvin## 配置不同服务器Redis集群redis: port: 6379 hosts: - 121.40.80.81 - 121.40.80.82 - 121.40.80.83 - 121.40.80.84
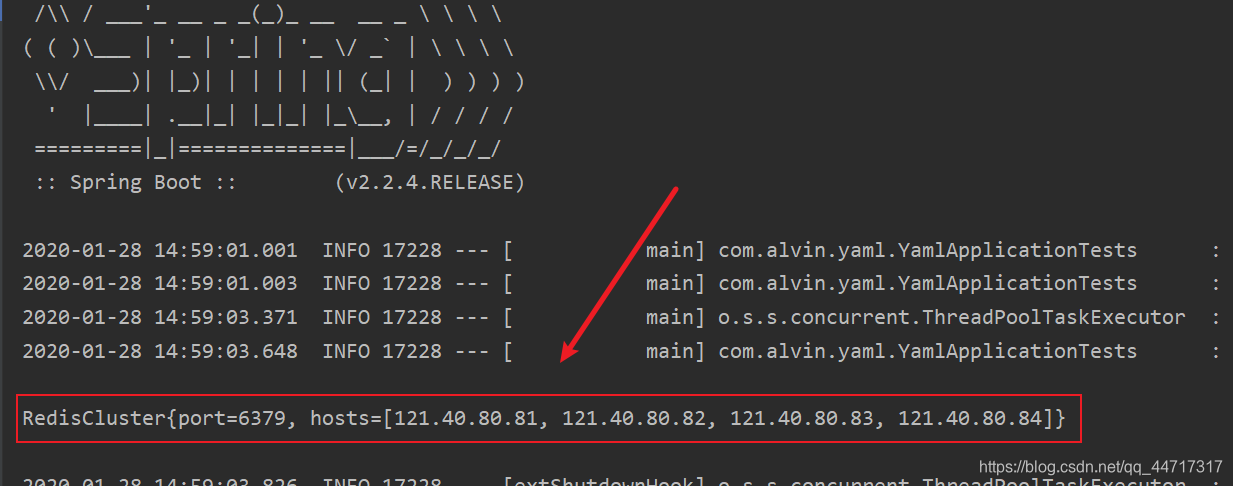
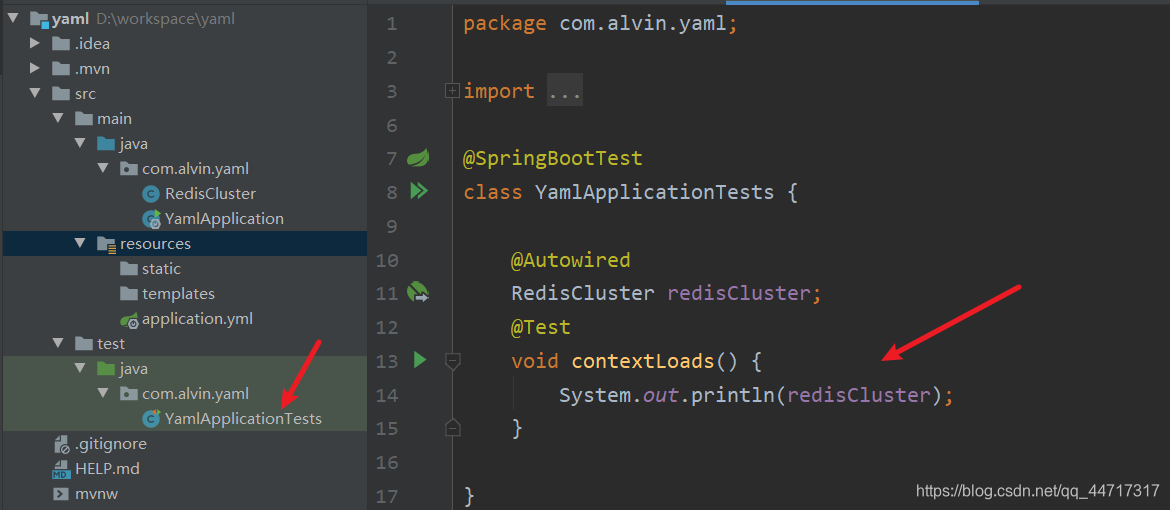
2.创建实体类RedisCluster.java
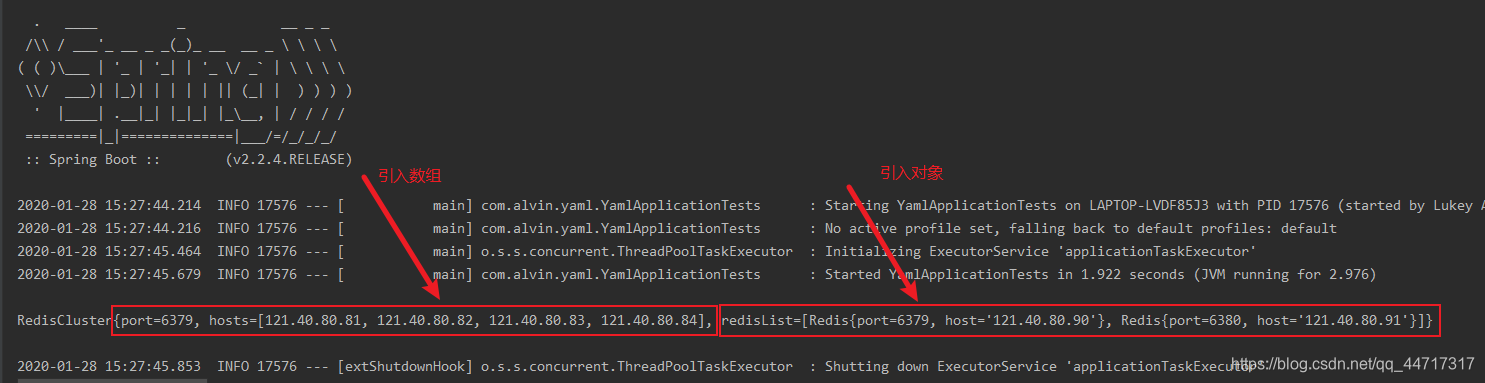
//将此类注入Spring容器@Component//引入Redid相关配置@ConfigurationProperties("redis")public class RedisCluster { private Integer port; private List hosts; @Override public String toString() { return "RedisCluster{" + "port=" + port + ", hosts=" + hosts + '}'; } public Integer getPort() { return port; } public void setPort(Integer port) { this.port = port; } public List getHosts() { return hosts; } public void setHosts(List hosts) { this.hosts = hosts; }} 3.进行单元测试
二、yaml注入对象
1.配置application.yml
server: port: 8081 servlet: context-path: /alvinredis: port: 6379 hosts: - 121.40.80.81 - 121.40.80.82 - 121.40.80.83 - 121.40.80.84 redisList: - port: 6379 host: 121.40.80.90 - port: 6380 host: 121.40.80.91
2.修改实体类RedisCluster,创建Redis实体类
- RedisCluster
@Component@ConfigurationProperties("redis")public class RedisCluster { private Integer port; private List hosts; //引入对象 private List redisList; @Override public String toString() { return "RedisCluster{" + "port=" + port + ", hosts=" + hosts + ", redisList=" + redisList + '}'; } public List getRedisList() { return redisList; } public void setRedisList(List redisList) { this.redisList = redisList; } public Integer getPort() { return port; } public void setPort(Integer port) { this.port = port; } public List getHosts() { return hosts; } public void setHosts(List hosts) { this.hosts = hosts; }} - Redis
public class Redis { private Integer port; private String host; @Override public String toString() { return "Redis{" + "port=" + port + ", host='" + host + '\'' + '}'; } public Integer getPort() { return port; } public void setPort(Integer port) { this.port = port; } public String getHost() { return host; } public void setHost(String host) { this.host = host; }} 3.进行单元测试
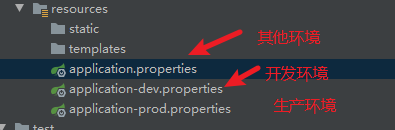
三、profile实现分工配置
properties和yaml是一样的 只是文件扩展名不同
启动方式:
在需要启动的配置环境下,写激活配置:
spring.profiles.active=dev
转载地址:https://lukeyalvin.blog.csdn.net/article/details/104099618 如侵犯您的版权,请留言回复原文章的地址,我们会给您删除此文章,给您带来不便请您谅解!
发表评论
最新留言
逛到本站,mark一下
[***.202.152.39]2024年04月25日 11时37分35秒
关于作者

喝酒易醉,品茶养心,人生如梦,品茶悟道,何以解忧?唯有杜康!
-- 愿君每日到此一游!
推荐文章
位图索引Bitmap indexes
2019-04-30
启发函数heuristic 与 A*
2019-04-30
Oracle 作业记录
2019-04-30
OpenCV实战(二)——答题卡识别判卷
2019-04-30
Boundary loss 损失函数
2019-04-30
pytorch训练cifar10数据集查看各个种类图片的准确率
2019-04-30
AGV自动导引运输车
2019-04-30
Trie树(字典树)
2019-04-30
COMP7404 Machine Learing——ROC
2019-04-30
YAPF —— Python代码格式化工具
2019-04-30
MATLAB与CUDA
2019-04-30
Linux png转jpg (convert命令)
2019-04-30
Ubuntu更新后终端中字体的颜色全是白色
2019-04-30
vscode git
2019-04-30
基于MATLAB的二进制数字调制与解调信号的仿真——2PSK
2019-04-30
基于MATLAB的模拟调制信号与解调的仿真——DSB
2019-04-30
HDU - 1166 敌兵布阵 (树状数组模板题/线段树模板题)
2019-04-30
白红宇的个人博客 - 记录点点滴滴的事 - 您是第 311232816 位访客
访问时间: 2024-05-06 00:20:47
访问IP: 18.226.169.94
Copyright © 2020 - 2023 blog.css8.cn 京ICP备2021015314号-1
手机版