本文共 7777 字,大约阅读时间需要 25 分钟。
如何利用pyecharts绘制炫酷的关系网络图
这是本学期在大数据哲学与社会科学实验室做的第六次分享了。
第一次分享的是:
第二次分享的是:
第三次分享的是:
第四次分享的是:
第五次分享的是:
本次分享的是“如何利用pyecharts绘制炫酷的关系网络图?”
关系网络图简单来说就是由节点和边连接起来的图,绘制这种图需要用到pyecharts库。
安装:
pip install pyecharts
官方地址:
https://github.com/pyecharts/pyecharts/
开源教程:
https://pyecharts.org/#/zh-cn/intro
关系网络图的节点:
class pyecharts.options.GraphNode
class GraphNode( # 数据项名称。 name: Optional[str] = None, # 该类目节点标记的大小,可以设置成诸如 10 这样单一的数字,也可以用数组分开表示宽和高, # 例如 [20, 10] 表示标记宽为 20,高为 10。 symbol_size: Union[Numeric, Sequence, None] = None, # 节点的初始 x 值。在不指定的时候需要指明layout属性选择布局方式。 x: Optional[Numeric] = None, # 节点的初始 y 值。在不指定的时候需要指明layout属性选择布局方式。 y: Optional[Numeric] = None, # 数据项所在类目的 index。 category: Optional[int] = None,)
关系网络图的边:
class pyecharts.options.GraphLink
class GraphLink( # 边的源节点名称的字符串,也支持使用数字表示源节点的索引。 source: Union[str, int, None] = None, # 边的目标节点名称的字符串,也支持使用数字表示源节点的索引。 target: Union[str, int, None] = None, # 边的数值,可以在力引导布局中用于映射到边的长度。 value: Optional[Numeric] = None,)
节点分类的类目:
class pyecharts.options.GraphCategory
class GraphCategory( # 类目名称,用于和 legend 对应以及格式化 tooltip 的内容。 name: Optional[str] = None,)
关系网络图:
class pyecharts.charts.Graph
class Graph( # 初始化配置项,参考 `global_options.InitOpts` init_opts: opts.InitOpts = opts.InitOpts() def add( # 系列名称,用于 tooltip 的显示,legend 的图例筛选。 series_name: str, # 关系图节点数据项列表,参考 `opts.GraphNode` nodes: Sequence[Union[opts.GraphNode, dict]], # 关系图节点间关系数据项列表,参考 `opts.GraphLink` links: Sequence[Union[opts.GraphLink, dict]], # 关系图节点分类的类目列表,参考 `opts.GraphCategory` categories: Union[Sequence[Union[opts.GraphCategory, dict]], None] = None, # 节点之间的斥力因子。 # 支持设置成数组表达斥力的范围,此时不同大小的值会线性映射到不同的斥力。值越大则斥力越大 repulsion: Numeric = 50, # 图的布局。可选: # 'none' 不采用任何布局,使用节点中提供的 x, y 作为节点的位置。 # 'circular' 采用环形布局。 # 'force' 采用力引导布局。 layout: str = "force", # 是否开启鼠标缩放和平移漫游。 is_roam: bool = True, # 是否在鼠标移到节点上的时候突出显示节点以及节点的边和邻接节点。 is_focusnode: bool = True, # 是否旋转标签,默认不旋转。 is_rotate_label: bool = False, # 标签配置项,参考 `series_options.LabelOpts` label_opts: Union[opts.LabelOpts, dict] = opts.LabelOpts(), # 关系边的公用线条样式。 linestyle_opts: Union[opts.LineStyleOpts, dict] = opts.LineStyleOpts(), ))
【例子】普通的关系网络图
from pyecharts import options as optsfrom pyecharts.charts import Graphnodes = [ { 'name': '结点1', 'symbolSize': 10}, { 'name': '结点2', 'symbolSize': 20}, { 'name': '结点3', 'symbolSize': 30}, { 'name': '结点4', 'symbolSize': 40}, { 'name': '结点5', 'symbolSize': 50}, { 'name': '结点6', 'symbolSize': 40}, { 'name': '结点7', 'symbolSize': 30}, { 'name': '结点8', 'symbolSize': 20}]links = []for i in nodes: for j in nodes: links.append({ 'source': i.get('name'), 'target': j.get('name')})G = Graph(init_opts=opts.InitOpts(width='900', height='500'))G.add( series_name='', nodes=nodes, links=links, repulsion=8000)G.set_global_opts(title_opts=opts.TitleOpts(title='Graph-基本示例'))G.render('graph_base.html') 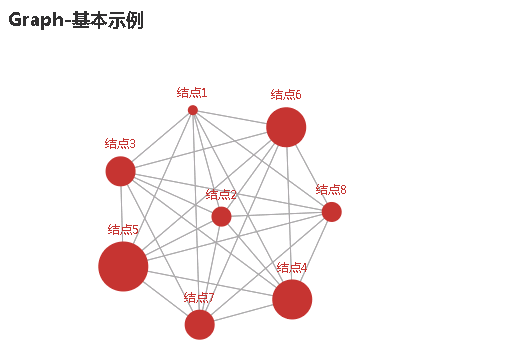
【例子】带边信息的关系网络图
from pyecharts import options as optsfrom pyecharts.charts import Graphnodes = [ { 'name': '结点1', 'symbolSize': 10}, { 'name': '结点2', 'symbolSize': 20}, { 'name': '结点3', 'symbolSize': 30}, { 'name': '结点4', 'symbolSize': 40}, { 'name': '结点5', 'symbolSize': 50}, { 'name': '结点6', 'symbolSize': 60},]links = [ { 'source': '结点1', 'target': '结点2', 'value': 2}, { 'source': '结点2', 'target': '结点3', 'value': 3}, { 'source': '结点3', 'target': '结点4', 'value': 4}, { 'source': '结点4', 'target': '结点5', 'value': 5}, { 'source': '结点5', 'target': '结点6', 'value': 6}, { 'source': '结点6', 'target': '结点1', 'value': 7},]G = Graph(init_opts=opts.InitOpts(width='900', height='500'))G.add( series_name='', nodes=nodes, links=links, repulsion=4000, edge_label=opts.LabelOpts(is_show=True, position='middle', formatter='{b}的数据{c}'))G.set_global_opts(title_opts=opts.TitleOpts(title='Graph-带边信息的图'))G.render('graph_with_edge_options.html') 
【例子】NPM中的包依赖
NPM(Node Package Manager)的思路大概是这样的:
1.买个服务器作为代码仓库(registry),在里面放所有需要被共享的代码。
2.发邮件通知 jQuery、Bootstrap、Underscore 作者使用 npm publish 把代码提交到 registry 上,分别取名 jquery、bootstrap 和 underscore(注意大小写)。
3.社区里的其他人如果想使用这些代码,就把 jquery、bootstrap 和 underscore 写到 package.json 里,然后运行 npm install ,npm 就会帮他们下载代码。
4.下载完的代码出现在 node_modules 目录里,可以随意使用了。
这些可以被使用的代码被叫做「包」(package),这就是 NPM 名字的由来:Node Package(包) Manager(管理器)。
import jsonfrom pyecharts import options as optsfrom pyecharts.charts import Graphwith open(r'data/npmdepgraph.min10.json', 'r') as f: data = json.load(f)nodes = [ { 'x': node['x'], 'y': node['y'], 'name': node['label'], 'symbolSize': node['size'], 'itemStyle': { 'color': node['color']} } for node in data['nodes']]edges = [ { 'source': edge['sourceID'], 'target': edge['targetID'] } for edge in data['edges']]G = Graph(init_opts=opts.InitOpts(width='900', height='900'))G.add( series_name='', nodes=nodes, links=edges, layout='none', is_roam=True, is_focusnode=True, label_opts=opts.LabelOpts(is_show=True), linestyle_opts=opts.LineStyleOpts(width=0.5, curve=0.3, opacity=0.7))G.set_global_opts(title_opts=opts.TitleOpts(title='NPM Dependencies'))G.render('npm_dependencies.html') 
【例子】悲惨世界(les miserables)人物关系网络图
import jsonfrom pyecharts import options as optsfrom pyecharts.charts import Graphwith open(r'data/les-miserables.json', 'r') as f: data = json.load(f)nodes = []idDict = dict()for node in data['nodes']: nodes.append( { 'x': node['x'], 'y': node['y'], 'name': node['name'], 'symbolSize': node['symbolSize'], 'category': node['category'], } ) idDict[node['id']] = node['name']links = [ { 'source': idDict[edge['source']], 'target': idDict[edge['target']], } for edge in data['links']]categories = [ { 'name': category['name'] } for category in data['categories']]G = Graph(init_opts=opts.InitOpts(width='900', height='900'))G.add( series_name='', nodes=nodes, links=links, categories=categories, layout='circular', is_rotate_label=True, label_opts=opts.LabelOpts(position='right'), linestyle_opts=opts.LineStyleOpts(color='source', curve=0.3, opacity=0.7))G.set_global_opts( title_opts=opts.TitleOpts(title='Les Miserables'), legend_opts=opts.LegendOpts(orient='vertical', pos_left='2%', pos_top='20%'))G.render('graph_les_miserables.html') layout='none'时的图像:

layout='circular'时的图像:

【例子】微博转发关系网络图
import jsonfrom pyecharts import options as optsfrom pyecharts.charts import Graphwith open(r'data/weibo.json', 'r',encoding='utf_8_sig') as f: data = json.load(f)nodes = [ { 'name': node['name'], 'symbolSize': node['symbolSize'], 'category': node['category'], } for node in data['nodes']]links = [ { 'source': edge['source'], 'target': edge['target'], } for edge in data['links']]categories = [ { 'name': category['name'] } for category in data['categories']]G = Graph(init_opts=opts.InitOpts(width='900', height='900'))G.add( series_name='', nodes=nodes, links=links, categories=categories, repulsion=30, label_opts=opts.LabelOpts(is_show=False), linestyle_opts=opts.LineStyleOpts(curve=0.2))G.set_global_opts( title_opts=opts.TitleOpts(title='微博转发关系图'), legend_opts=opts.LegendOpts(is_show=False))G.render('graph_with_edge_options.html') 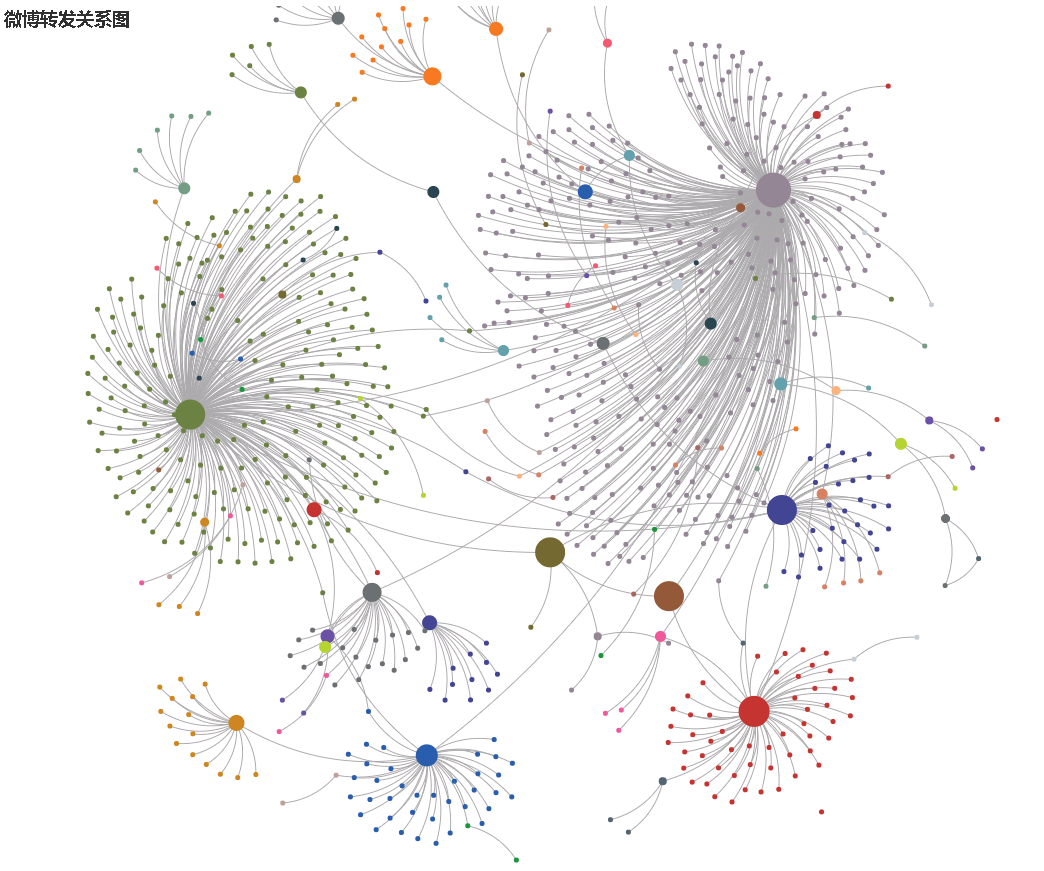
转载地址:https://lsgogroup.blog.csdn.net/article/details/117463653 如侵犯您的版权,请留言回复原文章的地址,我们会给您删除此文章,给您带来不便请您谅解!
发表评论
最新留言
关于作者
