[Python爬虫] 模拟浏览器、代理ip、开启日志、超时处理、异常处理、登录、下载图片

发布日期:2021-06-30 16:50:58
浏览次数:4
分类:技术文章
本文共 4049 字,大约阅读时间需要 13 分钟。
一、前言
之前以 Java 为主要的开发语言,后台、爬虫 都是使用 Java 语言
近来,开发时逐步使用 Python 取代 Java,换种口味~ 本文根据之前 Java 爬虫涉及到方法为导向,以 Python 来实现, 包括模拟浏览器、代理ip、开启日志、超时处理、异常处理、Get/Post请求 等 1、Java 爬虫常规操作:
2、参考资料: 《精通Python网络爬虫》韦玮 著
二、代码
2.1.urllib.request 模块
① 常规操作
# 注意:因为python3.X有时候不会将子模块自动导入进去,所以改成import url.request问题就解决了import urllib.request# 1、读取网页信息file=urllib.request.urlopen('https://blog.csdn.net/larger5')# ① 读取全部内容,赋予一个字符串# print(file.read())# ② 读取一行内容,赋予一个字符串# print(file.readline())# ③ 读取全部内容,赋予一个列表,一行一个元素print(file.readlines())# 2、获取其他信息# ① 环境print(file.info())# ② 状态码print(file.getcode())# ③ 获取 URLprint(file.geturl())# 3、URL 编码、解码# ① 编码print(urllib.request.quote('https://blog.csdn.net/larger5')) # https%3A//blog.csdn.net/larger5# ② 解码print(urllib.request.unquote('https%3A//blog.csdn.net/larger5')) # https://blog.csdn.net/larger5# 4、写到本地# ① 使用 传统文件:file=urllib.request.urlopen('https://blog.csdn.net/larger5')with open('C:/Users/linhongcun/Desktop/cun.html','wb')as fhandle: fhandle.write(file.read())# ② 使用 urllib 库:fhandle2=urllib.request.urlretrieve('https://blog.csdn.net/larger5',filename='C:/Users/linhongcun/Desktop/cun.html')# 5、模拟浏览器# ① 使用 build_opener() 修改报头headers=('User-Agent','Mozilla/5.0 (Windows NT 10.0; WOW64) AppleWebKit/537.36 (KHTML, like Gecko) Chrome/63.0.3239.132 Safari/537.36')opener=urllib.request.build_opener()opener.addheaders=[headers]print(opener.open('https://blog.csdn.net/larger5').read())# ② 使用 add_header ✔req=urllib.request.Request('https://blog.csdn.net/larger5')req.add_header('User-Agent','Mozilla/5.0 (Windows NT 10.0; WOW64) AppleWebKit/537.36 (KHTML, like Gecko) Chrome/63.0.3239.132 Safari/537.36')print(urllib.request.urlopen(req).read())# 6、设置超时try: file = urllib.request.urlopen('https://blog.csdn.net/larger5',timeout=1) print('正常爬取') print(file.read())except Exception as e: print('爬取失败') print(str(e))# 7、使用代理 ipproxy=urllib.request.ProxyHandler({ 'http':'202.93.128.98:3128'})opener=urllib.request.build_opener(proxy,urllib.request.HTTPHandler)urllib.request.install_opener(opener)url='https://blog.csdn.net/larger5'data=urllib.request.urlopen(url).read().decode('utf-8')print(len(data))# 8、开启日志httphd=urllib.request.HTTPHandler(debuglevel=1)httpshd=urllib.request.HTTPSHandler(debuglevel=1)opener=urllib.request.build_opener(httphd,httpshd)urllib.request.install_opener(opener)url='https://blog.csdn.net/larger5/article/details/79946353'data=urllib.request.urlopen(url)# 9、通用爬虫异常处理try: urllib.request.urlopen('https://blog.csdn.net/larger5')except urllib.error.URLError as e: if hasattr(e,'code'): print(e.code) if hasattr(e,'reason'): print(e.reason) ② Get/Post 请求实战
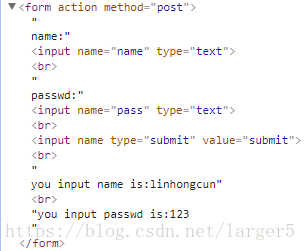
import urllib.requestimport urllib.parse# 1、Get 请求示例url='http://www.baidu.com/s?wd='wd='爬虫'wd_code=urllib.request.quote(wd) # 注意含中文,要编码fullurl=url+wd_codefhandle=urllib.request.urlretrieve(fullurl,filename='C:/Users/linhongcun/Desktop/cun.html')# 2、Post 请求示例url='http://www.iqianyue.com/mypost'postdata=urllib.parse.urlencode({ 'name':'linhongcun', 'pass':'123'}).encode('utf-8')req=urllib.request.Request(url,postdata)req.add_header('User-Agent','Mozilla/5.0 (Windows NT 10.0; WOW64) AppleWebKit/537.36 (KHTML, like Gecko) Chrome/63.0.3239.132 Safari/537.36')data=urllib.request.urlopen(req).read()with open('C:/Users/linhongcun/Desktop/cun.html','wb') as fhandle2: fhandle2.write(data) Post 请求涉及到的网页源码
2.2.requests 模块
①登录
# pip3 install requestsimport requests# 登录session = requests.Session()payload = { 'username': 'Morvan', 'password': 'password'}r = session.post('http://pythonscraping.com/pages/cookies/welcome.php', data=payload)print(r.content)r = session.get("http://pythonscraping.com/pages/cookies/welcome.php")print(r.content) 登录成功
登录页
登录失败

效果:
先进入登录失败页, 后面的都是成功页了 ②下载图片
# pip3 install requestsimport requestsIMAGE_URL="https://www.baidu.com/img/bd_logo1.png?where=super"r = requests.get(IMAGE_URL, stream=True) # stream loadingSAVE_URL="C://LLLLLLLLLLLLLLLLLLL/image3.png"with open(SAVE_URL, 'wb') as f: for chunk in r.iter_content(chunk_size=32): f.write(chunk)
转载地址:https://larger5.blog.csdn.net/article/details/80047433 如侵犯您的版权,请留言回复原文章的地址,我们会给您删除此文章,给您带来不便请您谅解!
发表评论
最新留言
表示我来过!
[***.240.166.169]2024年04月19日 01时41分03秒
关于作者

喝酒易醉,品茶养心,人生如梦,品茶悟道,何以解忧?唯有杜康!
-- 愿君每日到此一游!
推荐文章
软件测试工程师工作有多累?怎么入门学习软件测试呢?
2019-04-30
自学软件测试技术怎么入门?自学三要素分享
2019-04-30
全球大数据调查:编程始于少年,Python 成为最爱
2019-04-30
厉害!黑客怎样用谷歌查找信息?
2019-04-30
Python下载网易云音乐厉害? 骚操作竟能撩妹!!
2019-04-30
人民日报整版报道区块链,我只想知道用什么语言开发?
2019-04-30
2018年,人工智能 VS 区块链,谁更牛逼?
2019-04-30
饿了么、美团、滴滴对决的背后,是巨头的厮杀?
2019-04-30
2018 年 Java,Web 和移动开发需要学习的 12 个框架
2019-04-30
作为程序员,我到底在恐慌什么
2019-04-30
AI人才大迁徙:如何迅速成为机器学习内行?
2019-04-30
大数据之Hadoop vs. Spark,如何取舍?
2019-04-30
著名全球最大同性交友社区网站
2019-04-30
杭州入局无人驾驶,你的城市开始无人驾驶测试了吗?
2019-04-30
一个实例学习Kotlin 开发 Android App 的全过程(内有代码)
2019-04-30
请查收:写给纯小白的机器学习指南
2019-04-30
Node.js 用户量会不会在一年内超越 Java?
2019-04-30
Vue + Node + Mongodb 开发一个完整博客流程
2019-04-30
中国央行将发行全球首个法定数字货币,你准备好了吗?
2019-04-30
真疯了!Java 9 还没会用,Java 10 就要来了!
2019-04-30
白红宇的个人博客 - 记录点点滴滴的事 - 您是第 310910343 位访客
访问时间: 2024-05-05 01:26:39
访问IP: 3.12.155.100
Copyright © 2020 - 2023 blog.css8.cn 京ICP备2021015314号-1
手机版