Hibernate框架介绍以及入门 【一】Hibernate 快速入门 框架的概述 什么是 Hibernate Hibernate 持久层的ORM框架 下载Hibernate 官网 编写测试代码
 下载好解压
下载好解压 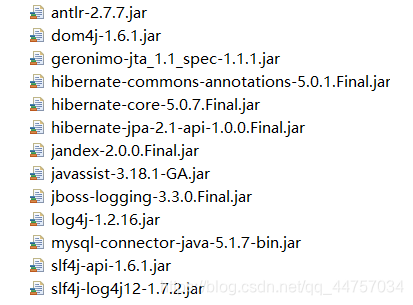 然后Builder path
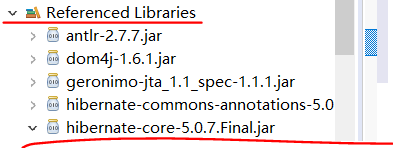
 创建hibernate.cfg.xml文件
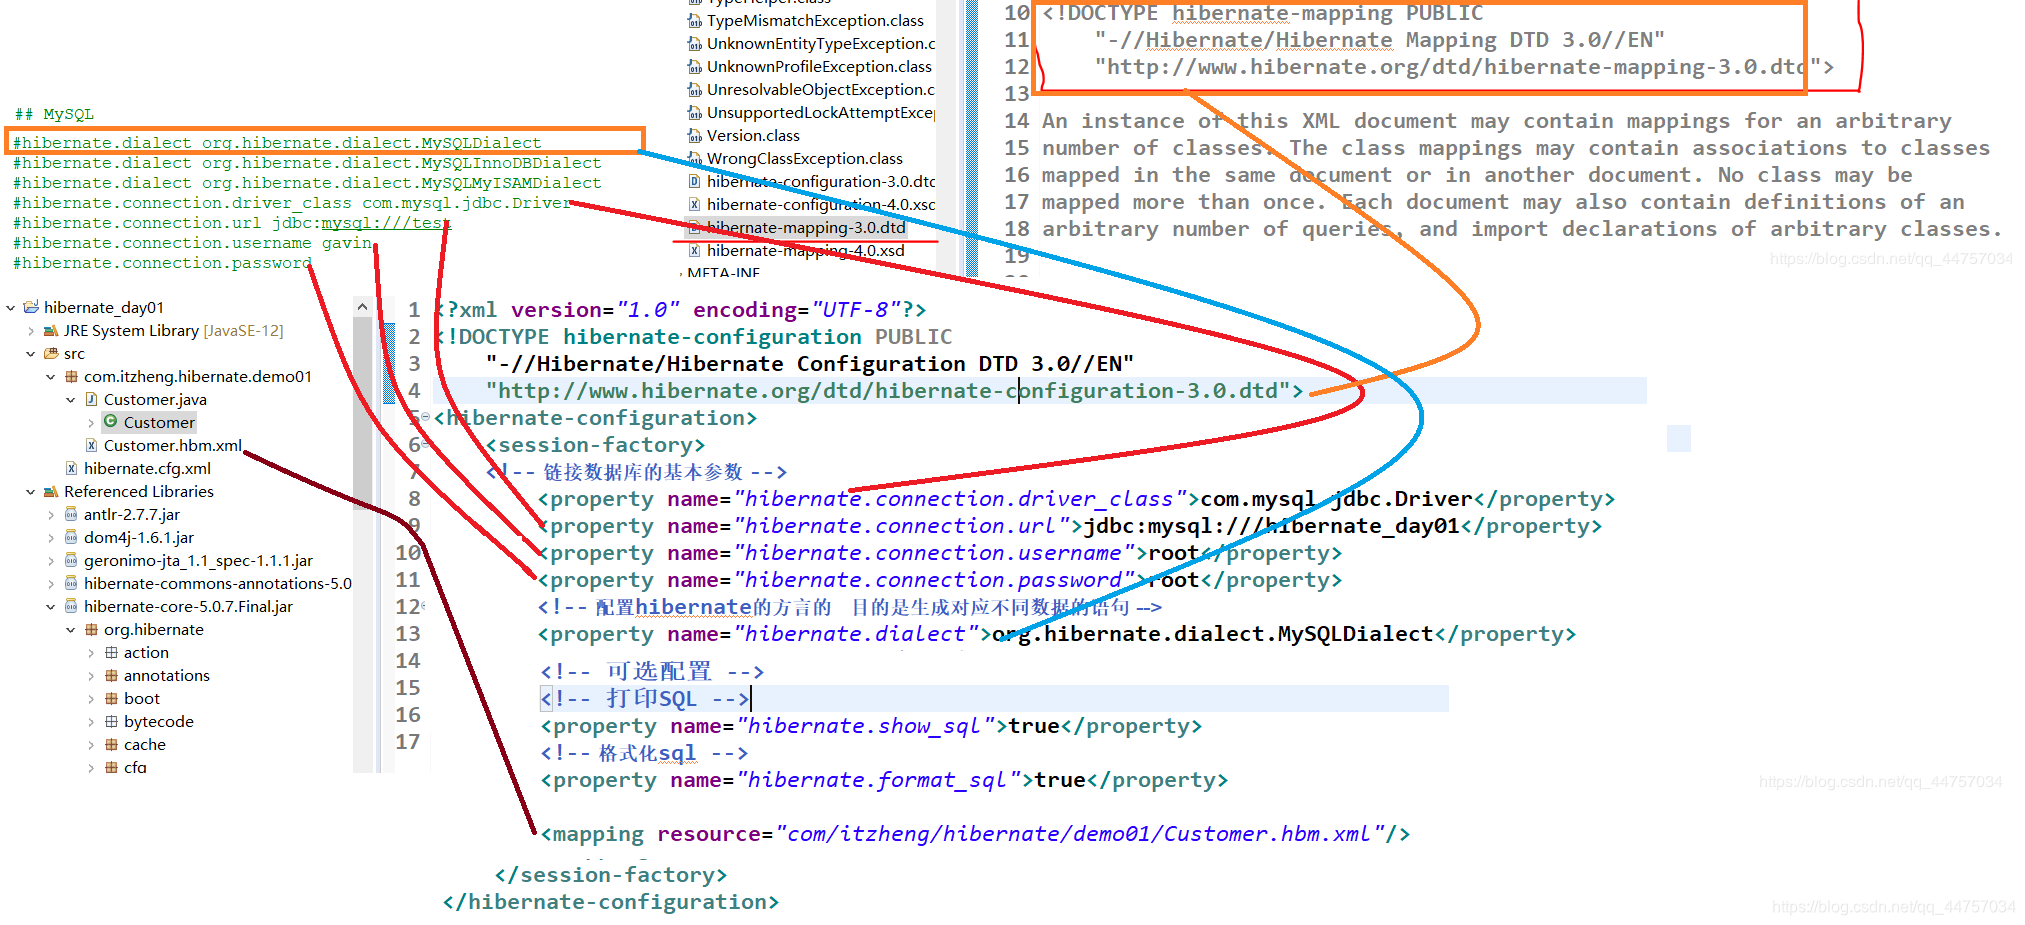

发布日期:2021-06-29 15:01:32
浏览次数:2
分类:技术文章
本文共 4699 字,大约阅读时间需要 15 分钟。
Hibernate框架
Hibernate框架入门: 一、框架的概述
1、什么是框架
框架:指的是软件的半成品,已经完成的部分功能。
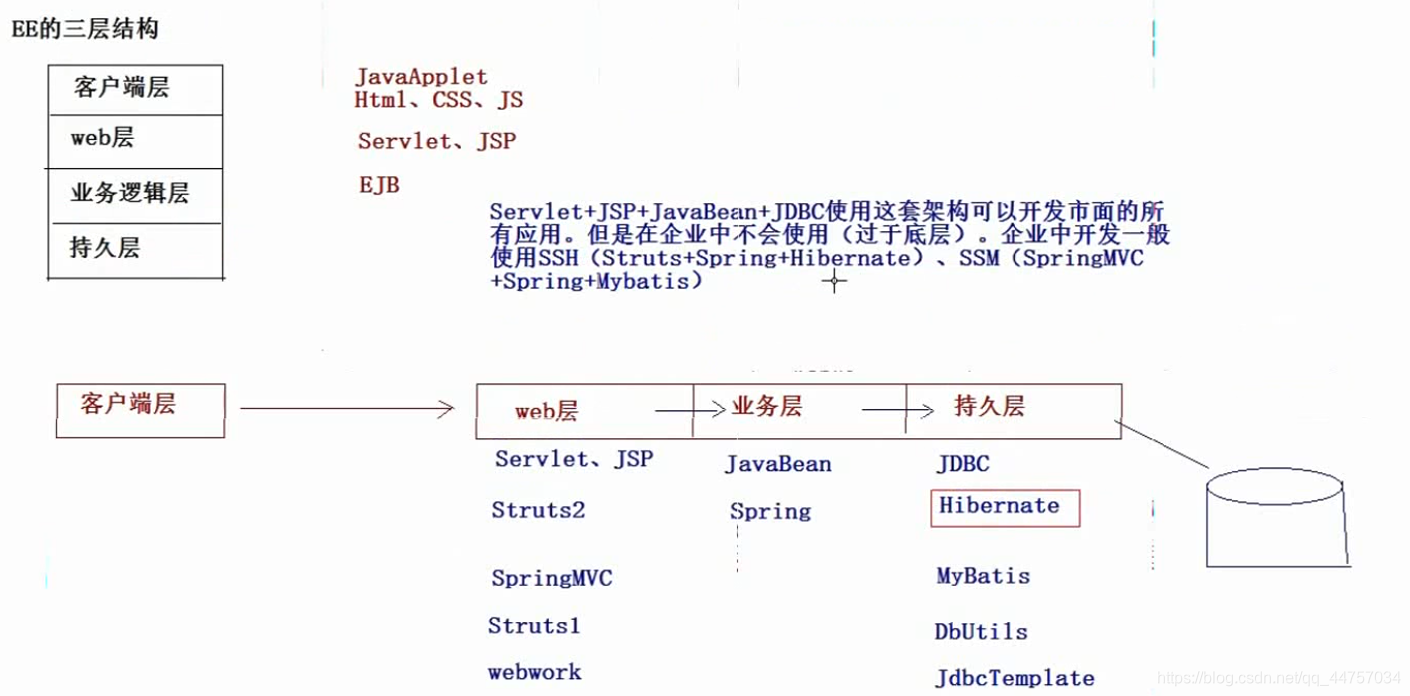
二、EE的三层结构 三、什么是 Hibernate
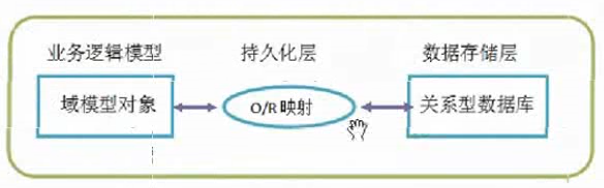
Hibernate (开放源代码的对象关系映射框架)
Hibernate是一个开放源代码的对象关系映射框架,它对JDBC进行了非常轻量级的对象封装,它将POJO与数据库表建立映射关系,是一个全自动的orm框架,hibernate可以自动生成SQL语句,自动执行,使得Java程序员可以随心所欲的使用对象编程思维来操纵数据库。 Hibernate可以应用在任何使用JDBC的场合,既可以在Java的客户端程序使用,也可以在Servlet/JSP的Web应用中使用,最具革命意义的是,Hibernate可以在应用EJB的JaveEE架构中取代CMP,完成数据持久化的重任。
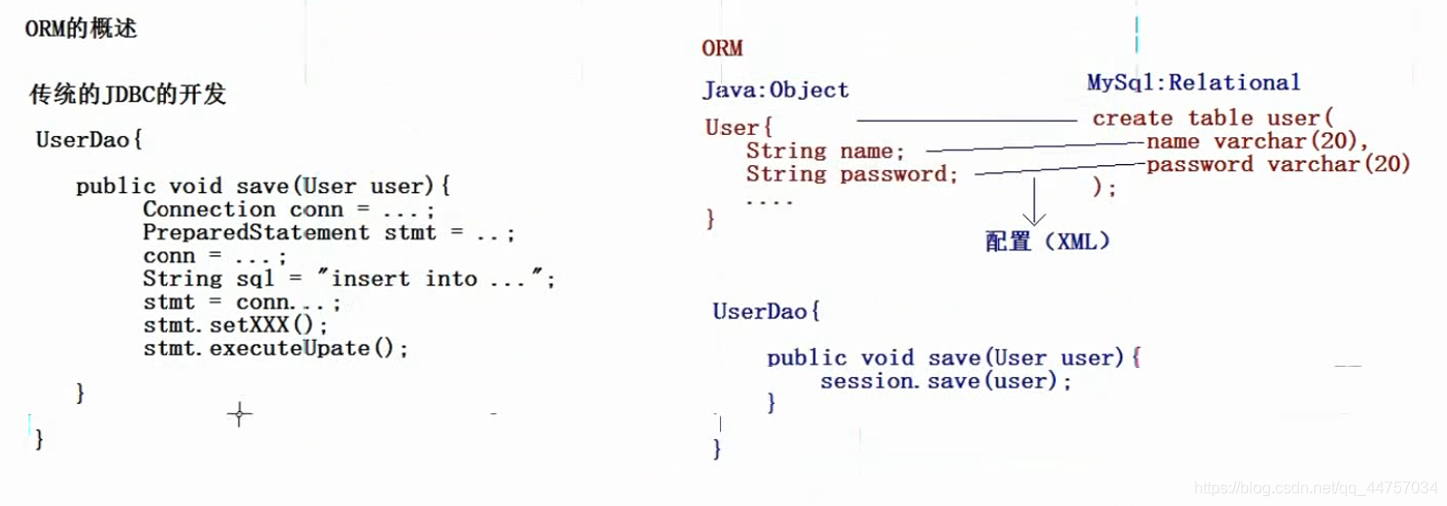
1、Hibernate 持久层的ORM框架
什么是ORM Object Relational Mapping(对象关系映射)。指的是对象与关系型数据库中的表建立一种映射关系。从而来操作我们的对象就可以操作数据库当中的表。
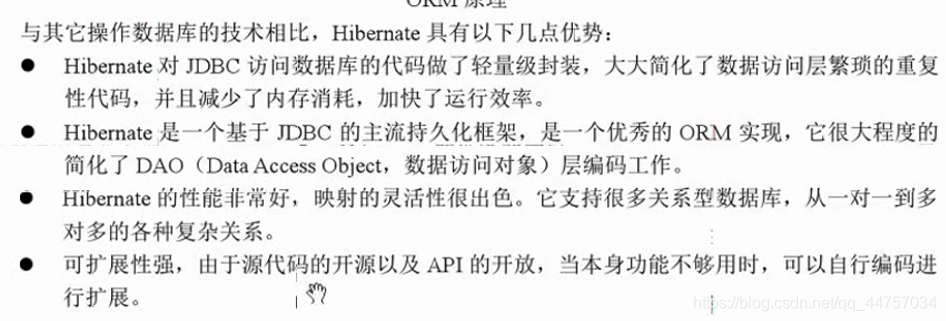
四、Hibernate 特点
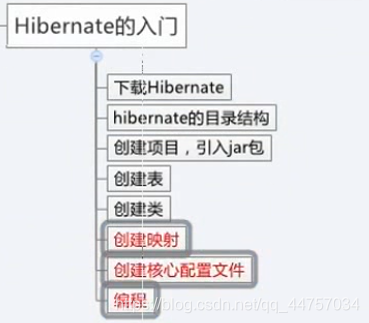
五、Hibernate 入门
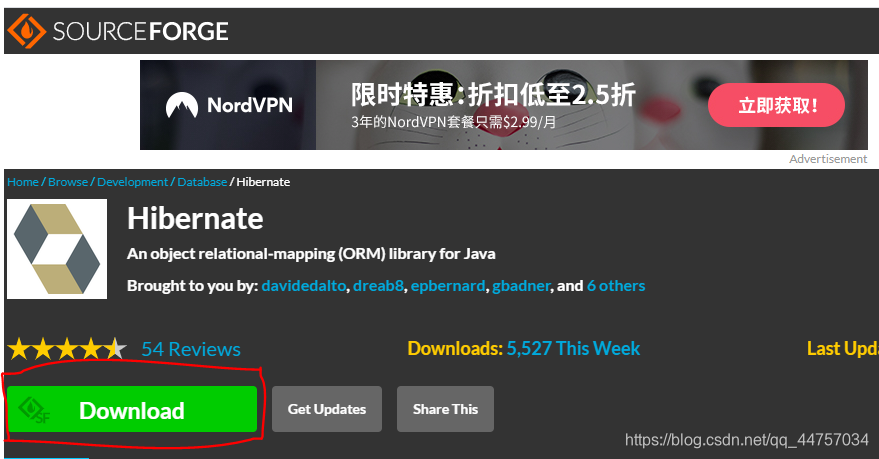
1、下载Hibernate 官网
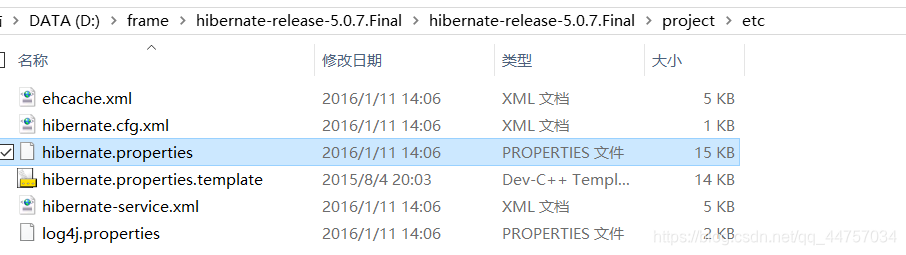
下载好解压 2、Hibernate 目录文件当中各自作用

3、创建一个项目引入jar包
1、引入数据库的驱动包
2、Hibernate 开发必须的jar包 3、Hibernate 引入日志记录包: 然后Builder path 4、创建表
在数据库当中创建表
CREATE TABLE `cst_customer` ( `cust_id` bigint(32) NOT NULL AUTO_INCREMENT COMMENT '客户编号(主键)', `cust_name` varchar(32) NOT NULL COMMENT '客户名称(公司名称)', `cust_source` varchar(32) DEFAULT NULL COMMENT '客户信息来源', `cust_industry` varchar(32) DEFAULT NULL COMMENT '客户所属行业', `cust_level` varchar(32) DEFAULT NULL COMMENT '客户级别', `cust_phone` varchar(64) DEFAULT NULL COMMENT '固定电话', `cust_mobile` varchar(16) DEFAULT NULL COMMENT '移动电话', PRIMARY KEY (`cust_id`)) ENGINE=InnoDB AUTO_INCREMENT=1 DEFAULT CHARSET=utf8;
5、创建实体类Customer
public class Customer { private Long cust_id; private String cust_name; private String cust_source; private String cust_industry; private String cust_level; private String cust_phone; private String cust_mobile; public Long getCust_id() { return cust_id; } public void setCust_id(Long cust_id) { this.cust_id = cust_id; } public String getCust_name() { return cust_name; } public void setCust_name(String cust_name) { this.cust_name = cust_name; } public String getCust_source() { return cust_source; } public void setCust_source(String cust_source) { this.cust_source = cust_source; } public String getCust_industry() { return cust_industry; } public void setCust_industry(String cust_industry) { this.cust_industry = cust_industry; } public String getCust_level() { return cust_level; } public void setCust_level(String cust_level) { this.cust_level = cust_level; } public String getCust_phone() { return cust_phone; } public void setCust_phone(String cust_phone) { this.cust_phone = cust_phone; } public String getCust_mobile() { return cust_mobile; } public void setCust_mobile(String cust_mobile) { this.cust_mobile = cust_mobile; } public Customer() { // TODO Auto-generated constructor stub } public Customer(Long cust_id, String cust_name, String cust_source, String cust_industry, String cust_level, String cust_phone, String cust_mobile) { super(); this.cust_id = cust_id; this.cust_name = cust_name; this.cust_source = cust_source; this.cust_industry = cust_industry; this.cust_level = cust_level; this.cust_phone = cust_phone; this.cust_mobile = cust_mobile; } @Override public String toString() { return "Customer [cust_id=" + cust_id + ", cust_name=" + cust_name + ", cust_source=" + cust_source + ", cust_industry=" + cust_industry + ", cust_level=" + cust_level + ", cust_phone=" + cust_phone + ", cust_mobile=" + cust_mobile + "]"; }} 6、创建映射
映射需要通过XML配置文件来完成,这个配置文件可以任意命名。尽量统一命名规范(类名.hbm.xml)
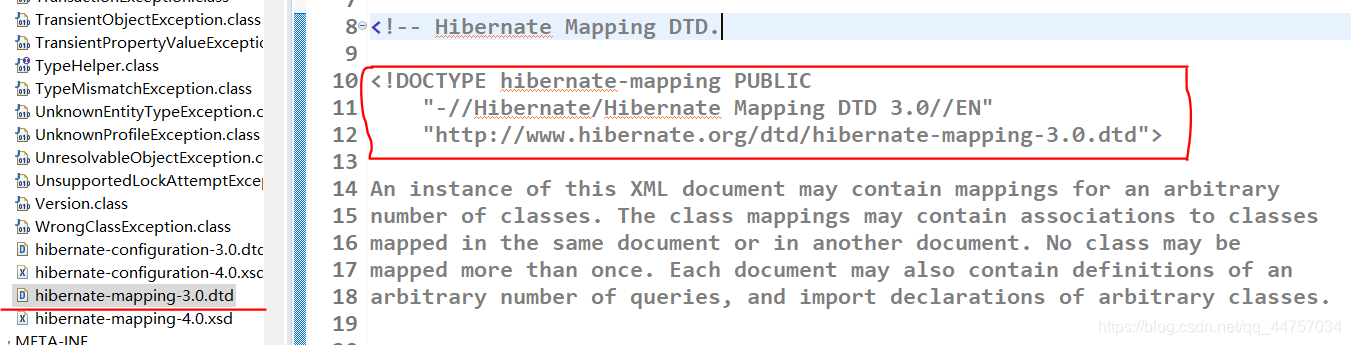
复制该头,引入jar当中的配置 7、创建Customer.hbm.xml文件*
8、创建hibernate的核心配置文件*
hibernate核心配置文件的名称:hibernate.cfg.xml
创建hibernate.cfg.xml文件 com.mysql.jdbc.Driver jdbc:mysql:///hibernate_day01 root root org.hibernate.dialect.MySQLDialect true true
配置文件与hibernate提供资料的联系
9、编写测试代码
在这里可能会遇到jdk新版本和hibernate不兼容的问题
手动加入这些依赖Jar包
要解决这个问题,我导入了下面这四个Jar包修复成功。
public class HibernateDemo01 { @Test // 保存客户的案例 public void demo01() { // 1、加载Hibernate核心配置文件 Configuration configuration = new Configuration().configure();// 该方法加载了Customer.hbm.xml // 2、创建SessionFactory对象:类似于JDBC中的链接池 SessionFactory sessionFactory = configuration.buildSessionFactory();// sessionFactory工厂 // 3、通过SessionFactory获取到Session对象:类似于我们JDBC中的Connection Session session = sessionFactory.openSession();// Hibernate以及和mysql数据库建立起链接 // 4、手动开启事务: Transaction transaction = session.beginTransaction(); // 5、编写代码 Customer customer = new Customer(); customer.setCust_name("张三"); session.save(customer); // 6、事务提交 transaction.commit(); // 7、资源释放 session.close(); }} 输出该结果表示插入数据库数据成功
转载地址:https://code100.blog.csdn.net/article/details/105441933 如侵犯您的版权,请留言回复原文章的地址,我们会给您删除此文章,给您带来不便请您谅解!
发表评论
最新留言
哈哈,博客排版真的漂亮呢~
[***.90.31.176]2024年04月17日 18时48分12秒
关于作者

喝酒易醉,品茶养心,人生如梦,品茶悟道,何以解忧?唯有杜康!
-- 愿君每日到此一游!
推荐文章
Python 生成多条多位随机密码
2019-04-29
C++判断质数
2019-04-29
Git,GitHub与GitLab的区别
2019-04-29
解决git每次提交代码都要输入帐号和密码
2019-04-29
mybatis mapper开发方式-XML
2019-04-29
@Data注解不生效
2019-04-29
mybatis一对一、一对多
2019-04-29
mybatis延迟加载
2019-04-29
MyBatis的statementType标签
2019-04-29
测试Linux端口的是否可访问的四种方法
2019-04-29
【面试准备】MySQL索引篇
2019-04-29
100%无压力学会安装Docker
2019-04-29
玩转Docker常用基本命令
2019-04-29
看一遍闭着眼都会安装Lua了
2019-04-29
vue博客模板—Gblog
2019-04-29
通过@Value获取数据库中配置参数
2019-04-29
python案例1-爬取优美桌面壁纸
2019-04-29
java开发idea小技巧
2019-04-29
zTree基础教程
2019-04-29
白红宇的个人博客 - 记录点点滴滴的事 - 您是第 310029114 位访客
访问时间: 2024-05-02 13:45:48
访问IP: 18.220.1.239
Copyright © 2020 - 2023 blog.css8.cn 京ICP备2021015314号-1
手机版