OpenCV-Python——小项目1:实现文档扫描
发布日期:2021-06-29 01:52:15
浏览次数:2
分类:技术文章
本文共 2339 字,大约阅读时间需要 7 分钟。
目标:
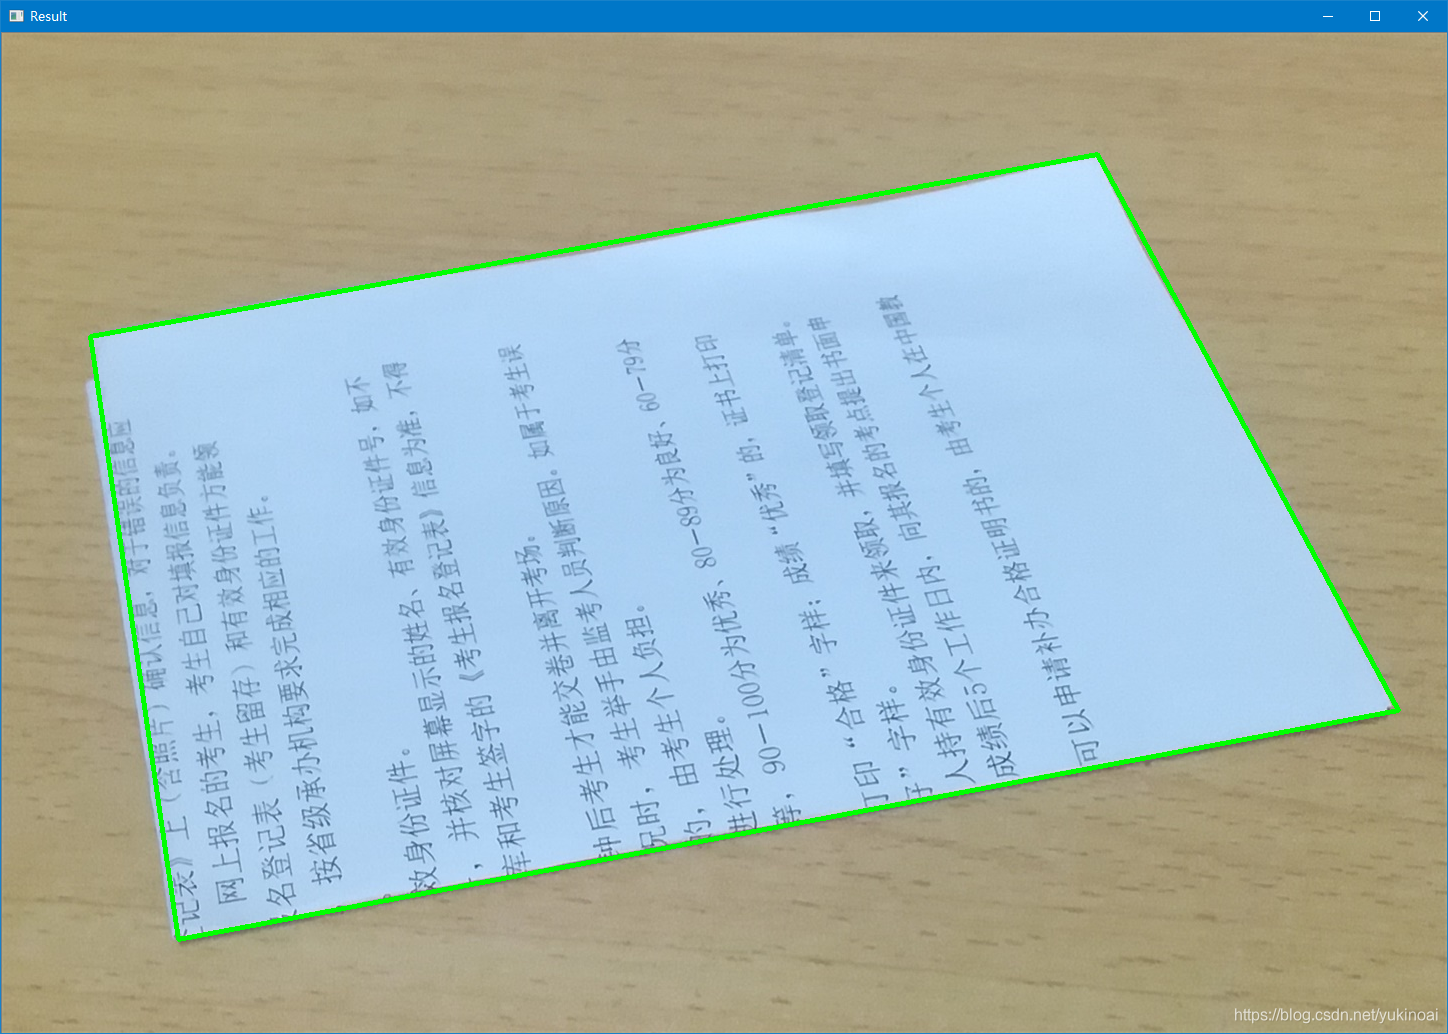
1. 识别图片中的文档并矫正
2. 可以旋转结果来调整
3. 可以保存。
注意:文档与背景差别越大越好。
效果如下:
原图像:

识别结果:
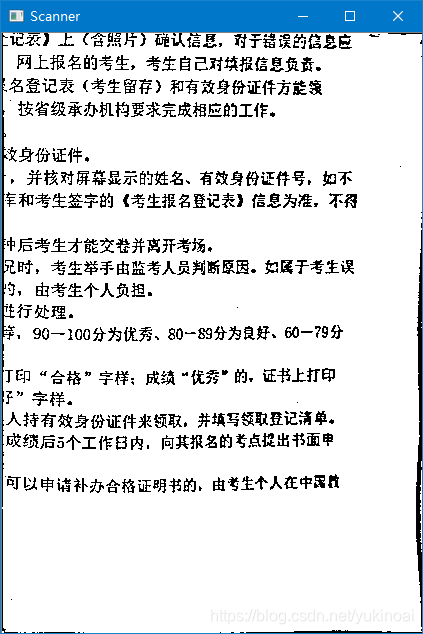
矫正结果:
程序如下:
import cv2import numpy as np# 文档长宽,下面是A4纸比例x = 420 # 长y = 600 # 宽def preProcessor(img): """ 图片预处理 """ gray = cv2.cvtColor(img, cv2.COLOR_BGR2GRAY) # 灰度 blurred = cv2.bilateralFilter(gray, 2, 200, 200) # 双边滤波降噪 edged = cv2.Canny(blurred, 25, 200) # 边缘识别 edged = cv2.dilate(edged, cv2.getStructuringElement(cv2.MORPH_RECT, (3, 3))) # 膨胀连接边缘 cnts = cv2.findContours(edged.copy(), cv2.RETR_EXTERNAL, cv2.CHAIN_APPROX_SIMPLE) # 寻找轮廓 cnts = cnts[1] # 最外轮廓 docCnt = None # 文档轮廓 # 确保至少找到一个轮廓 if len(cnts) > 0: # 按轮廓面积降序排列 cnts = sorted(cnts, key=cv2.contourArea, reverse=True) for c in cnts: # 近似轮廓 peri = cv2.arcLength(c, True) # 获取轮廓周长 approx = cv2.approxPolyDP(c, 0.02 * peri, True) # 多边形拟合,输出多边形顶点 # 如果我们的近似轮廓有四个顶点,则确定找到了文档 if len(approx) == 4: docCnt = approx break cv2.polylines(img, [docCnt], True, (0, 255, 0), 3) # 画出轮廓 return [i[0] for i in docCnt]def transform(img, mp, dp): """ 透视变换,mp:原图像点, dp:目标图像点 """ global x global y # 修改点的格式 pts1 = np.float32(mp) pts2 = np.float32(dp) # 生成透视矩阵 M = cv2.getPerspectiveTransform(pts1, pts2) # 转换 dst = cv2.warpPerspective(img, M, (x, y)) return dstdef enhance(img): """ 增强显示 """ dst = cv2.cvtColor(img, cv2.COLOR_BGR2GRAY) # 自适应阈值 th = cv2.adaptiveThreshold(dst, 255, cv2.ADAPTIVE_THRESH_MEAN_C, cv2.THRESH_BINARY, 11, 5) return thdef show(img): """ 绘图 """ global x global y cv2.imshow('Scanner', img) k = cv2.waitKey(0) if k == 27: # 按ESC退出 cv2.destroyAllWindows() elif k == ord('r'): # 按r旋转结果 init = [[0, 0], [x, 0], [x, y], [0, y]] dstp = init[1:] + init[:1] img = transform(img, init, dstp) show(img) elif k == ord('s'): # 按s保存图片 cv2.imwrite('Scanned5.png')if __name__ == "__main__": img = cv2.imread("doc2.jpg") src = img.copy() mp = preProcessor(img) cv2.imshow('Result', img) dp = [[0, y], [x, y], [x, 0], [0, 0]] docimg = transform(src, mp, dp) docimg = enhance(docimg) cv2.namedWindow('Scanner', cv2.WINDOW_NORMAL) show(docimg) 原图不清楚的话,扫描后也看不清:

扫描结果,刚识别完方向不对,可以按r调整:

转载地址:https://blog.csdn.net/yukinoai/article/details/89413395 如侵犯您的版权,请留言回复原文章的地址,我们会给您删除此文章,给您带来不便请您谅解!
发表评论
最新留言
感谢大佬
[***.8.128.20]2024年04月14日 16时37分14秒
关于作者

喝酒易醉,品茶养心,人生如梦,品茶悟道,何以解忧?唯有杜康!
-- 愿君每日到此一游!
推荐文章
打破职能之缺陷预防之路
2019-04-29
mac开启mysql,重置mysql密码,允许远程连接
2019-04-29
安装kibana
2019-04-29
linux安装nodejs
2019-04-29
tomcat部署vue,spring项目
2019-04-29
idea2020打包war包
2019-04-29
测试框架
2019-04-29
解决切换分支时,maven不自动下载依赖的问题
2019-04-29
java正则
2019-04-29
ios app开发环境配置方法总结
2019-04-29
app界面设计规范及缺陷
2019-04-29
TV App的设计借鉴游戏界面设计技巧
2019-04-29
短视频APP开发对影视行业有哪些影响?
2019-04-29
如何解决APP应用反应速度缓慢问题?
2019-04-29
APP开发失败的原因有哪些?
2019-04-29
解决软件开发中常见的问题
2019-04-29
在2021年, Python是否会全面超越 Java?
2019-04-29
程序员编程入门一定知道!程序员需要学什么?
2019-04-29
运动APP软件开发具有什么好处?
2019-04-29
APP开发应该注意什么?如何切换模拟数据和真实数据?
2019-04-29
白红宇的个人博客 - 记录点点滴滴的事 - 您是第 309308382 位访客
访问时间: 2024-04-30 09:54:02
访问IP: 18.224.64.226
Copyright © 2020 - 2023 blog.css8.cn 京ICP备2021015314号-1
手机版