【Python】爬虫:图形验证码识别(一)
 标注好后,随机用一张进行测试。
 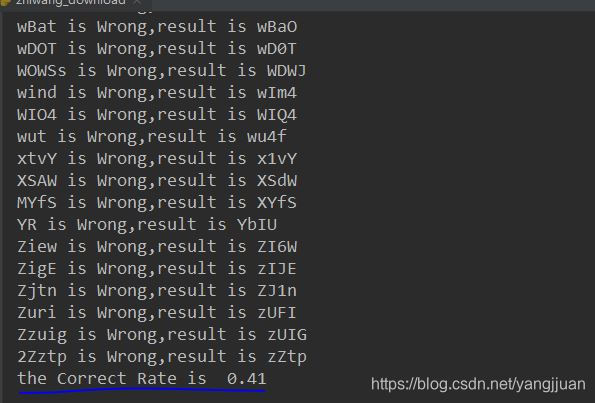 正确率并不高,后面继续研究如何提高识别的正确率!
发布日期:2021-06-28 20:47:03
浏览次数:2
分类:技术文章
本文共 3212 字,大约阅读时间需要 10 分钟。
【Python】爬虫:图形验证码识别(一)
一, tesseract 安装,以及相关库安装
对于安装的过程,百度一下就会有很多,这里就记录下自己安装时觉得还有注意的几点
1,tesseract 安装时,因为下载很多语言包,而且估计服务器在国外,链接会断开。 2,最好使用wheel的方式, 3,将tesseract安装目录中的tessdata复制到python路径下。二, demo
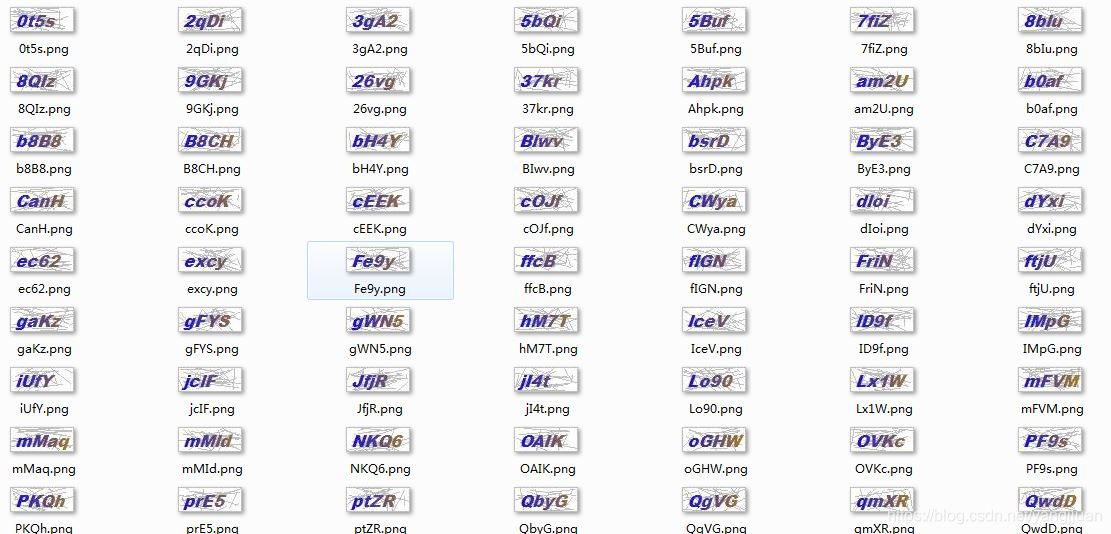
使用的验证码是从中国知网下载的验证码,先下载了100张验证码。
import requestsfrom lxml import etreeimport timeimport osrootPath = 'e:\\yanzheng'URL = 'http://my.cnki.net/elibregister/commonRegister.aspx#'headers = { 'User-Agent':'Mozilla/5.0 (Windows NT 6.1; Win64; x64) AppleWebKit/537.36 (KHTML, like Gecko) Chrome/73.0.3683.103 Safari/537.36' }def download_img(num): filename = os.path.join(rootPath,str(num)+'.png') response = requests.get(URL,headers = headers) if response.status_code == 200: content = response.text html = etree.HTML(content) img_url = 'http://my.cnki.net/elibregister/' + html.xpath('//*[@id="checkcode"]/@src')[0] html_img = requests.get(img_url) with open(filename, 'wb') as fd: fd.write(html_img.content) if __name__ == '__main__': for i in range(1,101): download_img(i) time.sleep(3) 下载后,人工对每张验证码进行标注,将结果保存为文件名。
标注好后,随机用一张进行测试。 def binarizing(img,threshold): #二值化。i参数 灰度图,阈值 pixdata = img.load() w, h = img.size for y in range(h): for x in range(w): if pixdata[x, y] < threshold: pixdata[x, y] = 0 else: pixdata[x, y] = 255 return img img_path = 'E:\\yanzheng\\3gA2.png'image = Image.open(img_path) # 打开图片文件imgry = image.convert('L') # 转化为灰度图img = binarizing(imgry,130) #二值化# img = cut_noise(img)text = tesserocr.image_to_text(img) # tesserocr.识别图片内容result = re.findall(r'[\w]+',text) #正则匹配验证码。img.show()print(result) 
接下来一口气识别100张,看下正确率能达到多少?验证码一般可以忽略大小写,这里也设置忽略大小写。
def binarizing(img,threshold): # #二值化。i参数 灰度图,阈值 pixdata = img.load() w, h = img.size for y in range(h): for x in range(w): if pixdata[x, y] < threshold: pixdata[x, y] = 0 else: pixdata[x, y] = 255 return imgdef Compute_Correct_Rate(Correct,Recognition): #计算正确率,打印识别错误的 Correct_num = 0 for i in range(len(Correct)): if Correct[i].lower() == Recognition[i].lower(): Correct_num+=1 else: print('{} is Wrong,result is {}'.format(Recognition[i],Correct[i])) print('the Correct Rate is ',Correct_num/len(Correct))def process_img(): Correct_result = [] Recognition_result = [] for root,dirs,files in os.walk(rootPath): #遍历整个文件夹,识别所有图片 for file in files: filepath = os.path.join(rootPath, file) image = Image.open(filepath) # 打开图片文件 imgry = image.convert('L') # 转化为灰度图 img = binarizing(imgry, 130) text = tesserocr.image_to_text(img) match = re.findall(r'[\w]+', text) if len(match) != 0: r_result = ''.join(match) else: r_result = '' c_result = os.path.splitext(file)[0] Correct_result.append(c_result) Recognition_result.append(r_result) Compute_Correct_Rate(Correct_result, Recognition_result)if __name__ == '__main__': process_img() 识别正确率有41%
正确率并不高,后面继续研究如何提高识别的正确率! 转载地址:https://blog.csdn.net/yangjjuan/article/details/90256249 如侵犯您的版权,请留言回复原文章的地址,我们会给您删除此文章,给您带来不便请您谅解!
发表评论
最新留言
初次前来,多多关照!
[***.217.46.12]2024年04月04日 15时04分21秒
关于作者

喝酒易醉,品茶养心,人生如梦,品茶悟道,何以解忧?唯有杜康!
-- 愿君每日到此一游!
推荐文章
pycharm创建django项目linux部署
2019-04-29
利用Android Studio快速搭建App
2019-04-29
CompletableFuture的多线程和异步监听实现
2019-04-29
HashMap jdk1.7和1.8概述
2019-04-29
springboot多环境加载yml和logback配置
2019-04-29
几道简单的算法题(来自leetcode)
2019-04-29
推一波JAVA学习公众号
2019-04-29
org.apache.ibatis.reflection.ReflectionException: Error instantiating class with invalid types
2019-04-29
HttpsURLConnection 返回 400
2019-04-29
python基础语法05
2019-04-29
Linux基础01
2019-04-29
工作总结04-脚本
2019-04-29
01-MYSQL8环境搭建
2019-04-29
02-初始数据库
2019-04-29
03-基础查询和排序
2019-04-29
查漏补缺!Android开发还会吃香吗?Android面试题及解析
2019-04-29
安卓开发权威指南!2021大厂Android面试经验,不吃透都对不起自己
2019-04-29
java安卓ios开发!字节跳动上千道精选面试题还不刷起来!不吃透都对不起自己
2019-04-29
白红宇的个人博客 - 记录点点滴滴的事 - 您是第 309222753 位访客
访问时间: 2024-04-30 03:47:33
访问IP: 3.144.103.10
Copyright © 2020 - 2023 blog.css8.cn 京ICP备2021015314号-1
手机版