本文共 16910 字,大约阅读时间需要 56 分钟。
linux网络相关
ifconfig:查看网卡命令,这个命令在centos6中是默认安装的,在centos7中我们需要安装net-tools。[root@localhost ~]# ifconfigens33: flags=4163<UP,BROADCAST,RUNNING,MULTICAST> mtu 1500inet 192.168.1.105 netmask 255.255.255.0 broadcast 192.168.1.255inet6 fe80::df71:e49:bd9a:8b3 prefixlen 64 scopeid 0x20<link>ether 00:0c:29:52:5a:0f txqueuelen 1000 (Ethernet)RX packets 6714 bytes 894198 (873.2 KiB)RX errors 0 dropped 0 overruns 0 frame 0TX packets 9197 bytes 2440939 (2.3 MiB)TX errors 0 dropped 0 overruns 0 carrier 0 collisions 0lo: flags=73<UP,LOOPBACK,RUNNING> mtu 65536
inet 127.0.0.1 netmask 255.0.0.0inet6 ::1 prefixlen 128 scopeid 0x10<host>loop txqueuelen 1 (Local Loopback)RX packets 68 bytes 5912 (5.7 KiB)RX errors 0 dropped 0 overruns 0 frame 0TX packets 68 bytes 5912 (5.7 KiB)TX errors 0 dropped 0 overruns 0 carrier 0 collisions 0这里有一个参数-a,他的意思是网卡没有IP的时候它是不显示的。
ifdown 网卡名:关闭网卡
 这里有一个参数-a,他的意思是网卡没有IP的时候它是不显示的。
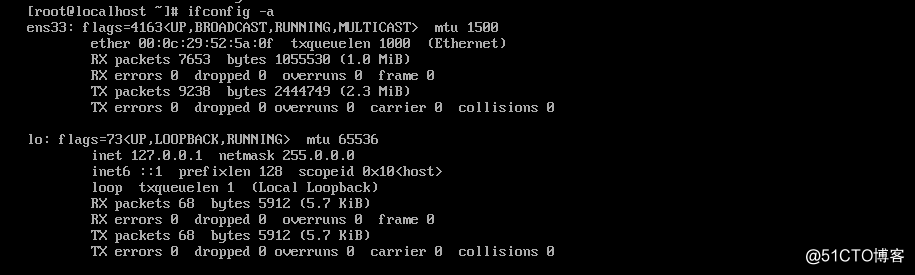 ifup 网卡名:网卡开启
 ifup/ifdown这两个命令一般在我们单独针对一个网卡进行更改,比如我们增加一个dns或者更改网关,改完我们要重启网卡,但是我们又不想重启所有网卡,我们只需要重启指定网卡,那我们就可以用这两个命令,如果我们正在使用这个网卡,那我们不能直接ifdown网卡,那样我们就不能远程连接了。但是我们可以这个样做 ifdown 网卡名 && ifup 网卡名 。两个命令一起执行,这样就可以了。
 给一个网卡设置多个IP
首先我们先到网卡配置文件中所在的目录中拷贝一下[root@localhost ~]# cd /etc/sysconfig/network-scripts/[root@localhost network-scripts]# lsifcfg-ens33 ifdown-eth ifdown-post ifdown-Team ifup-aliases ifup-ipv6 ifup-post ifup-Team init.ipv6-globalifcfg-lo ifdown-ippp ifdown-ppp ifdown-TeamPort ifup-bnep ifup-isdn ifup-ppp ifup-TeamPort network-functionsifdown ifdown-ipv6 ifdown-routes ifdown-tunnel ifup-eth ifup-plip ifup-routes ifup-tunnel network-functions-ipv6ifdown-bnep ifdown-isdn ifdown-sit ifup ifup-ippp ifup-plusb ifup-sit ifup-wireless然后拷贝一下当前网卡[root@localhost network-scripts]# cp ifcfg-ens33 ifcfg-ens33\:0(\是脱意的意思)然后我们编辑这个文件vi ifcfg-ens33\:0TYPE="Ethernet"
PROXY_METHOD="none"BROWSER_ONLY="no"BOOTPROTO="dhcp"DEFROUTE="yes"IPV4_FAILURE_FATAL="no"IPV6INIT="yes"IPV6_AUTOCONF="yes"IPV6_DEFROUTE="yes"IPV6_FAILURE_FATAL="no"IPV6_ADDR_GEN_MODE="stable-privacy"NAME="ens33:0"(需要改成新网卡名)DEVICE="ens33:0"(需要改成新网卡名)ONBOOT="yes"IPV7_PRIVACY="no"IPADDR=192.168.1.150(改成新IP)然后执行命令
[root@localhost network-scripts]# ifdown ens33 && ifup ens33成功断开设备 'ens33'。连接已成功激活(D-Bus 活动路径:/org/freedesktop/NetworkManager/ActiveConnection/4)然后我们再查询一下网络
[root@localhost network-scripts]# ifconfigens33: flags=4163<UP,BROADCAST,RUNNING,MULTICAST> mtu 1500inet 192.168.1.105 netmask 255.255.255.0 broadcast 192.168.1.255inet6 fe80::df71:e49:bd9a:8b3 prefixlen 64 scopeid 0x20<link>ether 00:0c:29:52:5a:0f txqueuelen 1000 (Ethernet)RX packets 10789 bytes 1865182 (1.7 MiB)RX errors 0 dropped 0 overruns 0 frame 0TX packets 9772 bytes 2509163 (2.3 MiB)TX errors 0 dropped 0 overruns 0 carrier 0 collisions 0ens33:0: flags=4163<UP,BROADCAST,RUNNING,MULTICAST> mtu 1500
inet 192.168.1.150 netmask 255.255.255.0 broadcast 192.168.1.255ether 00:0c:29:52:5a:0f txqueuelen 1000 (Ethernet)这样我们就获得了新网卡lo: flags=73<UP,LOOPBACK,RUNNING> mtu 65536
inet 127.0.0.1 netmask 255.0.0.0inet6 ::1 prefixlen 128 scopeid 0x10<host>loop txqueuelen 1 (Local Loopback)RX packets 96 bytes 8232 (8.0 KiB)RX errors 0 dropped 0 overruns 0 frame 0TX packets 96 bytes 8232 (8.0 KiB)TX errors 0 dropped 0 overruns 0 carrier 0 collisions 0然后我们用windows ping一下新网卡的ip
 可以ping通,证明没有问题。
 mii-tool 网卡名:查看网卡是否连接
[root@localhost network-scripts]# mii-tool ens33ens33: negotiated 1000baseT-FD flow-control, link ok这就证明我们的网卡是通的有的时候我们用这个命令时会提示不支持,那我们就用ethtool 网卡名
[root@localhost network-scripts]# ethtool ens33Settings for ens33:Supported ports: [ TP ]Supported link modes: 10baseT/Half 10baseT/Full100baseT/Half 100baseT/Full1000baseT/FullSupported pause frame use: NoSupports auto-negotiation: YesAdvertised link modes: 10baseT/Half 10baseT/Full100baseT/Half 100baseT/Full1000baseT/FullAdvertised pause frame use: NoAdvertised auto-negotiation: YesSpeed: 1000Mb/sDuplex: FullPort: Twisted PairPHYAD: 0Transceiver: internalAuto-negotiation: onMDI-X: off (auto)Supports Wake-on: dWake-on: dCurrent message level: 0x00000007 (7)drv probe linkLink detected: yes(如果是yes,就是连接成功。若是no则是没有连接网卡)hostnamectl:更改主机名。
sentos6不支持这个命令。[root@localhost ~]# hostnamectl set-hostname linletao-001更改完后我们在当前的终端下我们可以用hostname来查看主机名
[root@localhost ~]# hostnamelinletao-001但是我们发现最前面我们的主机名还是没有改过来,如果我们想显示新的主机名,我们需要重新登录。我们也可以进入一个子shell,让他显示新的主机名
[root@localhost ~]# bash[root@linletao-001 ~]#它的配置文件
[root@localhost ~]# cat /etc/hostnamelinletao-001设置DNS
DNS是用来解析域名的,平时我们上网都是直接数如一个网址,而DNS把这个网站解析到一个ip。zailinux下设置DNS非常简单。只要把DNS地址写到配置文件/etc/resolv.conf中即可[root@localhost ~]# cat /etc/resolv.confGenerated by NetworkManager
search DHCP HOST
nameserver 202.96.69.38nameserver 202.96.64.68如果我们以后想改dns,那么就直接改网卡的配置文件,当然也可以vim /etc/resolv.conf。但是这样改只会是临时更改,如果网卡重启,那么他还会被以前的dns所覆盖。linux下有一个特殊文件/etc/hosts也能解析域名,不过需要我们在里面手动添加IP和域名这些内容。它的作用是临时解析某个域名。
[root@localhost ~]# cat /etc/hosts127.0.0.1 localhost localhost.localdomain localhost4 localhost4.localdomain4::1 localhost localhost.localdomain localhost6 localhost6.localdomain6我们用vim编辑这个文件,在里面增加一行内容。
[root@localhost ~]# vim /etc/hosts127.0.0.1 localhost localhost.localdomain localhost4 localhost4.localdomain4
::1 localhost localhost.localdomain localhost6 localhost6.localdomain6192.168.1.150 www.baidu.com(新增加的一行内容)然后我们再ping一下www.baidu.com
[root@localhost ~]# ping www.baidu.comPING www.baidu.com (192.168.1.150) 56(84) bytes of data.64 bytes from www.baidu.com (192.168.1.150): icmp_seq=1 ttl=64 time=0.214 ms64 bytes from www.baidu.com (192.168.1.150): icmp_seq=2 ttl=64 time=0.080 ms64 bytes from www.baidu.com (192.168.1.150): icmp_seq=3 ttl=64 time=0.081 ms^C--- www.baidu.com ping statistics ---3 packets transmitted, 3 received, 0% packet loss, time 2000msrtt min/avg/max/mdev = 0.080/0.125/0.214/0.062 ms这样我们再ping这个网站的时候就会自动连接到我们设置的ip了。/etc/hosts的格式很简单,每行记录一条记录,分为两部分,第一部分是IP,第二部分是域名。关于hosts的文件,我们需要注意以下几点。
1.一个ip后面可以跟多个域名,甚至是几十个上百个。2.每行只能有一个ip,也就是一个域名不能对用多个ip。3.如果有多行中出现相同的域名(对应ip不一样),会安最下面出现的记录来解析。linux防火墙-netfilter
我们配置秘钥认证的时候后,我们要关闭selinux,关闭selinux分为为两种,一种是临时关闭,一种是永久关闭。临时关闭的命令是:setenforce 0永久关闭我们要编辑配置文件/etc/selinux/config[root@linletao-001 ~]# vi /etc/selinux/configThis file controls the state of SELinux on the system.
SELINUX= can take one of these three values:
enforcing - SELinux security policy is enforced.
permissive - SELinux prints warnings instead of enforcing.
disabled - No SELinux policy is loaded.
SELINUX=enforcing改为(disabled关闭selinux)
SELINUXTYPE= can take one of three two values:
targeted - Targeted processes are protected,
minimum - Modification of targeted policy. Only selected processes are protected.
mls - Multi Level Security protection.
SELINUXTYPE=targeted(切记这行不要改)
然后我们用getenforce这个命令来查看selinux是否打开
[root@linletao-001 ~]# getenforcePermissivePermissive:虽然selinux也开启了,但是他仅仅是遇到需要发生阻断的时候它不需要真正的阻断,他仅仅是个提醒。selinux我们平时都是关闭的,如果开启,会增大我们的运维管理成本,因为很多服务受限于selinux,我们把他关闭也不会有太大的安全问题。
linux的另一个防火墙:netfilter
netfilter在centos7以前的版本存在,在centos7中改了名字firewalld。他们两个的防火墙机制不太一样,但实际上他们的内部工具iptables的用法是一样的,我们可以通过iptables工具去添加一些规则,比如我们把80端口开放,把20端口开放。把8080端口关闭,那么我们就可以用iptables这个命令来实现,增加一定规则就可以了。不管是netfilter还是firewalld,他们都支持iptables命令的。虽然我们现在主流还是centos7,但是不排除还有用centos6甚至是centos5。所以我们也要了解netfilte的。在centos7中默认的是firewalld。netfilte防火墙没有开启。我们现在可以在centos7中关闭firewalld,开启netfilte。在7系统中运行6的防火墙机制是没有问题的。
[root@linletao-001 ~]# systemctl disable firewalld
Removed symlink /etc/systemd/system/dbus-org.fedoraproject.FirewallD1.service.Removed symlink /etc/systemd/system/basic.target.wants/firewalld.service.我们先将fierwalld停掉,不让他开机启动。[root@linletao-001 ~]# systemctl stop firewalld
然后我们在将它关掉。我们开启netfilte,在开启之前,我们需要安装一个包,iptables-services。
安装完后会产生一个服务:[root@linletao-001 ~] # systemctl enable iptablesCreated symlink from /etc/systemd/system/basic.target.wants/iptables.service to /usr/lib/systemd/system/iptables.service.然后我么把他开启
[root@linletao-001 ~]#systemctl start iptables然后我们可以通过命令iptables -nvL来查看他的默认规则
[root@linletao-001 ~]# iptables -nvLChain INPUT (policy ACCEPT 0 packets, 0 bytes)pkts bytes target prot opt in out source destination 27 1860 ACCEPT all -- 0.0.0.0/0 0.0.0.0/0 state RELATED,ESTABLISHED0 0 ACCEPT icmp -- 0.0.0.0/0 0.0.0.0/0 0 0 ACCEPT all -- lo 0.0.0.0/0 0.0.0.0/0 0 0 ACCEPT tcp -- 0.0.0.0/0 0.0.0.0/0 state NEW tcp dpt:2229 29251 REJECT all -- * 0.0.0.0/0 0.0.0.0/0 reject-with icmp-host-prohibitedChain FORWARD (policy ACCEPT 0 packets, 0 bytes)
pkts bytes target prot opt in out source destination 0 0 REJECT all -- 0.0.0.0/0 0.0.0.0/0 reject-with icmp-host-prohibitedChain OUTPUT (policy ACCEPT 16 packets, 1504 bytes)
pkts bytes target prot opt in out source destinationnetfilter表
filter表:它包含了三个内置的链,包括INPUT、FORWARD、OUTPUT。INPUT:数据包进入的时候,我们要经过的一个链。进入本机后我们要进行一些操作,比如访问我们80端口的数据包,我们要检查一下源IP,发现可疑IP我们要禁掉,这就是INPUT的作用。
FORWARD:数据进入到我们的设备,但它并不会进入我们的内核里,因为这个数据包不是给你处理的,而是给另外一台机器处理的,所以他要判断一下目标地址是不是本机,如果不是本机,它就要经过FORWARD。经过FORWARD时我们也要进行一些操作,比如我们要把目标地址做一些更改,或者做一个转发。
OUTPUT:在本机产生的包,出去之前做的一些操作。比如说我这个包是发给某一个IP的,这个IP我要禁掉,把这个IP加入黑名单,只要是发往这个IP的数据包我们都给他禁掉。
nat表:它的作用是网络地址转换和端口映射。它也包含三个链,PREROUTING、OUTPUT、POSTROUTING。
OUTPUT:它和filter表的OUTPUT作用相同。
PREROUTING:这个链用来更改这个数据包,在进来的瞬间更改。
POSTROUTING:而POSTROUTING也是要更改数据包,在他们出去的那一刻更改。
数据包流向分为经过本机和不经过本机两种。
经过本机:数据包--->PREROUTING--->INPUT--->OUTPUT--->POSTROUTING不经过本机:数据包--->PREROUTING--->FORWARD--->POSTROUTING然后我们再针对数据包所在的那一个链做一些相应的规则处理,那这个就是iptablesiptables的基本语法
查看iptables的规则:iptables -nvL
[root@linletao-001 ~]# iptables -nvLChain INPUT (policy ACCEPT 0 packets, 0 bytes)pkts bytes target prot opt in out source destination 27 1860 ACCEPT all -- 0.0.0.0/0 0.0.0.0/0 state RELATED,ESTABLISHED0 0 ACCEPT icmp -- 0.0.0.0/0 0.0.0.0/0 0 0 ACCEPT all -- lo 0.0.0.0/0 0.0.0.0/0 0 0 ACCEPT tcp -- 0.0.0.0/0 0.0.0.0/0 state NEW tcp dpt:2229 29251 REJECT all -- * 0.0.0.0/0 0.0.0.0/0 reject-with icmp-host-prohibitedChain FORWARD (policy ACCEPT 0 packets, 0 bytes)
pkts bytes target prot opt in out source destination 0 0 REJECT all -- 0.0.0.0/0 0.0.0.0/0 reject-with icmp-host-prohibitedChain OUTPUT (policy ACCEPT 16 packets, 1504 bytes)
pkts bytes target prot opt in out source destinationiptables的规则储存在/etc/sysconfig/iptables
[root@linletao-001 ~]# cat /etc/sysconfig/iptablessample configuration for iptables service
you can edit this manually or use system-config-firewall
please do not ask us to add additional ports/services to this default configuration
*filter
:INPUT ACCEPT [0:0]:FORWARD ACCEPT [0:0]:OUTPUT ACCEPT [0:0]-A INPUT -m state --state RELATED,ESTABLISHED -j ACCEPT-A INPUT -p icmp -j ACCEPT-A INPUT -i lo -j ACCEPT-A INPUT -p tcp -m state --state NEW -m tcp --dport 22 -j ACCEPT-A INPUT -j REJECT --reject-with icmp-host-prohibited-A FORWARD -j REJECT --reject-with icmp-host-prohibitedCOMMIT有时候我们觉得规则不合适,想把所有的规则都清掉。输入命令iptables -F
[root@linletao-001 ~]# iptables -F[root@linletao-001 ~]# iptables -nvLChain INPUT (policy ACCEPT 38 packets, 6058 bytes)pkts bytes target prot opt in out source destinationChain FORWARD (policy ACCEPT 0 packets, 0 bytes)
pkts bytes target prot opt in out source destinationChain OUTPUT (policy ACCEPT 20 packets, 1968 bytes)
pkts bytes target prot opt in out source destination这时我们发现规则都没有了,但是文件中还保存这规则,并保存在在配置文件/etc/sysconfig/iptables(文件路径)中。如果我们想把当前的规则保存到文件中,我们则需要运行一个命令,service iptables save(保存规则),这样才会把当前的规则保存到配置文件中去。但实际上默认规则清空后他就没有任何规则,我们现在保存的只是一个空规则。如果不保存,我们可以重启服务器或者是iptables规则,他都会加载配置文件中的规则的。
这些操作都是针对filter表,这是默认的表。
我们也可以查看nat表
[root@linletao-001 ~]# iptables -t nat -nvL Chain PREROUTING (policy ACCEPT 34 packets, 34150 bytes)pkts bytes target prot opt in out source destinationChain INPUT (policy ACCEPT 0 packets, 0 bytes)
pkts bytes target prot opt in out source destinationChain OUTPUT (policy ACCEPT 2 packets, 152 bytes)
pkts bytes target prot opt in out source destinationChain POSTROUTING (policy ACCEPT 2 packets, 152 bytes)
pkts bytes target prot opt in out source destination net表中是没有任何规则的。service iptables save(保存规则):当我们把规则写完后,他只是保存在当前的内存中生效的,如果我们想让他重启依然生效,我们需要做一个save操作,service iptables save保存规则。
iptables计数器清零:为什么要清0呢,比如我们现在抓包,发现有一些请求来源的IP有异常,所以我们就会把这个IP给拒绝掉,然后我们在iptables -nvL的统计中会有统计数据量和数据包量。那我可以设定一个规则,如果过了半小时数据包量没有超过一个范围,那么我们就可以将这个IP解封掉。我们是通过第一列的数字作为判断依据。
Chain INPUT (policy ACCEPT 0 packets, 0 bytes)
pkts bytes target prot opt in out source destination 205 14520 ACCEPT all -- 0.0.0.0/0 0.0.0.0/0 state RELATED,ESTABLISHED在我们用 -nvL时第一列和第二列都是有数字的。其中pkts下面的数字是有多少个包,bytes是数据量有多少字节。如果我们想把这两个数字清空,我们要运行这个命令iptables -Z来清零。pkts bytes target prot opt in out source destination
0 0 ACCEPT all -- 0.0.0.0/0 0.0.0.0/0 state RELATED,ESTABLISHED这样就清零了。但是过一会它就会重新出现数字,这是因为它无时无刻的都在通信,所以会产生数据。给iptables增加规则
假设我们现在给iptables增加一条规则iptables -A INPUT -s 192.168.188.1 -p tcp --sport 1234 -d 192.168.188.128 --dport 80 -j DROP这里我么们没有加-t,默认就是针对filter表iptables -A INPUT -s 192.168.188.1 -p tcp --sport 1234 -d 192.168.188.128 --dport 80 -j DROP
(针对的链) (指定的来源ip) (指定协议) (来源端口) (目标的ip) (目标端口) (数据直接扔掉)[root@linletao-001 ~]# iptables -nvL
Chain INPUT (policy ACCEPT 0 packets, 0 bytes)pkts bytes target prot opt in out source destination 204 13828 ACCEPT all -- 0.0.0.0/0 0.0.0.0/0 state RELATED,ESTABLISHED0 0 ACCEPT icmp -- 0.0.0.0/0 0.0.0.0/0 0 0 ACCEPT all -- lo 0.0.0.0/0 0.0.0.0/0 0 0 ACCEPT tcp -- 0.0.0.0/0 0.0.0.0/0 state NEW tcp dpt:22138 140K REJECT all -- 0.0.0.0/0 0.0.0.0/0 reject-with icmp-host-prohibited0 0 DROP tcp -- * 192.168.188.1 192.168.188.128 tcp spt:1234 dpt:80(这就是我们刚增加的一条规则)还有一种用法 -i插入
iptables -I INPUT -p tcp --dport 80 -j DROP[root@linletao-001 ~]# iptables -nvLChain INPUT (policy ACCEPT 0 packets, 0 bytes)pkts bytes target prot opt in out source destination 0 0 DROP tcp -- 0.0.0.0/0 0.0.0.0/0 tcp dpt:80(新添加的规则)411 29564 ACCEPT all -- 0.0.0.0/0 0.0.0.0/0 state RELATED,ESTABLISHED0 0 ACCEPT icmp -- 0.0.0.0/0 0.0.0.0/0 0 0 ACCEPT all -- lo 0.0.0.0/0 0.0.0.0/0 0 0 ACCEPT tcp -- 0.0.0.0/0 0.0.0.0/0 state NEW tcp dpt:22582 590K REJECT all -- 0.0.0.0/0 0.0.0.0/0 reject-with icmp-host-prohibited0 0 DROP tcp -- * 192.168.188.1 192.168.188.128 tcp spt:1234 dpt:80Chain FORWARD (policy ACCEPT 0 packets, 0 bytes)
pkts bytes target prot opt in out source destination 0 0 REJECT all -- 0.0.0.0/0 0.0.0.0/0 reject-with icmp-host-prohibitedChain OUTPUT (policy ACCEPT 9 packets, 1068 bytes)
pkts bytes target prot opt in out source我们不写来源ip,也不写目标ip,我们只写目标的端口,但是我们一定要指定-ptcp,一旦我们用了--dport,我们前面一定要指定协议,如果不指定,就会报错。用-I的作用是将这条规则插入到iptables规则的第一行。iptables在过滤的时候优先过滤通过-I添加的规则,因为-I会将他插入到第一行,一旦匹配,直接执行。然后再一条一条的往下执行。而-A是添加到最后一行所以会延后执行规则。既然我们可以增加规则,可以插入规则,那么我们也可以删除规则 -d就是删除规则。
iptables -D INPUT -p tcp --dport 80 -j DROP[root@linletao-001 ~]# iptables -D INPUT -p tcp --dport 80 -j DROP[root@linletao-001 ~]# iptables -nvLChain INPUT (policy ACCEPT 0 packets, 0 bytes)pkts bytes target prot opt in out source destination 411 29564 ACCEPT all -- 0.0.0.0/0 0.0.0.0/0 state RELATED,ESTABLISHED0 0 ACCEPT icmp -- 0.0.0.0/0 0.0.0.0/0 0 0 ACCEPT all -- lo 0.0.0.0/0 0.0.0.0/0 0 0 ACCEPT tcp -- 0.0.0.0/0 0.0.0.0/0 state NEW tcp dpt:22582 590K REJECT all -- 0.0.0.0/0 0.0.0.0/0 reject-with icmp-host-prohibited0 0 DROP tcp -- * 192.168.188.1 192.168.188.128 tcp spt:1234 dpt:80这样我们就将第一条添加的命令给删除了。优势也会出现下面这种情况,我们想删除一条规则,但是隔了很长时间,我们已经忘了命令是怎样写的。这时候我们还有一种方法。就是通过--line-number给规则加上序列号,然后通过序列号删除。
[root@linletao-001 ~]# iptables -nvL --line-numberChain INPUT (policy ACCEPT 0 packets, 0 bytes)num pkts bytes target prot opt in out source destination 1 803 59932 ACCEPT all -- 0.0.0.0/0 0.0.0.0/0 state RELATED,ESTABLISHED2 0 0 ACCEPT icmp -- 0.0.0.0/0 0.0.0.0/0 3 0 0 ACCEPT all -- lo 0.0.0.0/0 0.0.0.0/0 4 0 0 ACCEPT tcp -- 0.0.0.0/0 0.0.0.0/0 state NEW tcp dpt:225 928 940K REJECT all -- 0.0.0.0/0 0.0.0.0/0 reject-with icmp-host-prohibited6 0 0 DROP tcp -- * 192.168.188.1 192.168.188.128 tcp spt:1234 dpt:80(这是我们要删除的)然后我们开始删除
[root@linletao-001 ~]# iptables -D INPUT 6[root@linletao-001 ~]# iptables -nvL --line-numberChain INPUT (policy ACCEPT 0 packets, 0 bytes)num pkts bytes target prot opt in out source destination 1 848 62928 ACCEPT all -- 0.0.0.0/0 0.0.0.0/0 state RELATED,ESTABLISHED2 0 0 ACCEPT icmp -- 0.0.0.0/0 0.0.0.0/0 3 0 0 ACCEPT all -- lo 0.0.0.0/0 0.0.0.0/0 4 0 0 ACCEPT tcp -- 0.0.0.0/0 0.0.0.0/0 state NEW tcp dpt:225 939 951K REJECT all -- * 0.0.0.0/0 0.0.0.0/0 reject-with icmp-host-prohibited这样我们就删除成功了。参数:-A是add(增加)
-s是source(来源),指定来源ip-p指定协议-d指定ip-j后面跟动作-I插入-D删除-P默认策略(最好不要动,保持默认)我们现在再总结一下关于iptables的命令语法。
iptables -nvL:查看规则iptables -F :清空规则iptables -Z :计数器清零iptables -t :指定表的名字,不加-t是默认filter表service iptables seva :保存规则。它将规则保存在/etc/sysconfig/iptables。我们重启的时候它会调用里面的规则。iptables -A/-I:他们的区别在于-A是将新规则放到最后面,-I是将规则插入到最前面。在读取的时候是先从第一条开始匹配,然后逐条向下。iptables -D :删除规则-A,-I-D后面跟的是链的名字,可以是INPUT,OUTPUT, FORWARD(用的比较少)-s :指定源IP-p :指定协议,可以是tcp,icmp--sport :指定源端口--dport :指定目标端口-d :指定目标地址-j :跟你的行为,可以是DROP(丢掉包) ,ACCEPT(允许包), REJECT(拒绝包)--line-numbers:列出规则编号,然后根据编号来删除规则。-P :指定链的默认策略。(最好不要直接去操作,有可能导致远程终端断开)转载于:https://blog.51cto.com/13067688/2089571
转载地址:https://blog.csdn.net/weixin_33894640/article/details/92718022 如侵犯您的版权,请留言回复原文章的地址,我们会给您删除此文章,给您带来不便请您谅解!
发表评论
最新留言
关于作者
