本文共 8862 字,大约阅读时间需要 29 分钟。
4.2搭建Redis-Cluster
4.2.1搭建要求 需要 6 台 redis 服务器。搭建伪集群。需要 6 个 redis 实例。
需要运行在不同的端口 7001-7006
4.2.2准备工作
(1)安装gcc 【此步省略】Redis 是 c 语言开发的。安装 redis 需要 c 语言的编译环境。如果没有 gcc 需要在线安装。
yum install gcc-c++
(2)使用yum命令安装 ruby (我们需要使用ruby脚本来实现集群搭建)【此步省略】
yum install rubyyum install rubygems
---- 知识点小贴士 -----
Ruby,一种简单快捷的面向对象(面向对象程序设计)脚本语言,在20世纪90年代由日本人松本行弘(Yukihiro Matsumoto)开发,遵守GPL协议和Ruby License。它的灵感与特性来自于 Perl、Smalltalk、Eiffel、Ada以及 Lisp 语言。由 Ruby 语言本身还发展出了JRuby(Java平台)、IronRuby(.NET平台)等其他平台的 Ruby 语言替代品。Ruby的作者于1993年2月24日开始编写Ruby,直至1995年12月才正式公开发布于fj(新闻组)。因为Perl发音与6月诞生石pearl(珍珠)相同,因此Ruby以7月诞生石ruby(红宝石)命名 RubyGems简称gems,是一个用于对 Ruby组件进行打包的 Ruby 打包系统(3)将redis源码包上传到 linux 系统 ,解压redis源码包
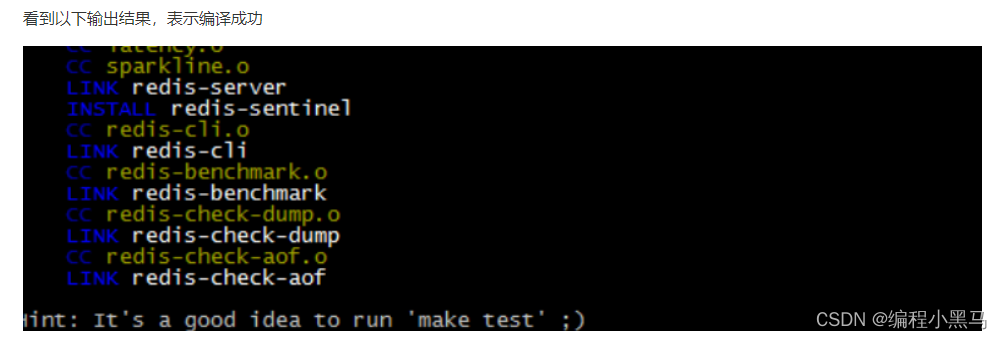
(4)编译redis源码 ,进入redis源码文件夹make
mkdir /usr/local/redis-cluster/redis-1mkdir /usr/local/redis-cluster/redis-2mkdir /usr/local/redis-cluster/redis-3mkdir /usr/local/redis-cluster/redis-4mkdir /usr/local/redis-cluster/redis-5mkdir /usr/local/redis-cluster/redis-6
以第一个redis实例为例,命令如下
make install PREFIX=/usr/local/redis-cluster/redis-1

(6)复制配置文件 将 /redis-3.0.0/redis.conf 复制到redis下的bin目录下
[root@localhost redis-3.0.0]# cp redis.conf /usr/local/redis-cluster/redis-1/bin[root@localhost redis-3.0.0]# cp redis.conf /usr/local/redis-cluster/redis-2/bin[root@localhost redis-3.0.0]# cp redis.conf /usr/local/redis-cluster/redis-3/bin[root@localhost redis-3.0.0]# cp redis.conf /usr/local/redis-cluster/redis-4/bin[root@localhost redis-3.0.0]# cp redis.conf /usr/local/redis-cluster/redis-5/bin[root@localhost redis-3.0.0]# cp redis.conf /usr/local/redis-cluster/redis-6/bin
4.2.3配置集群
(1)修改每个redis节点的配置文件redis.conf 修改运行端口为7001 (7002 7003 ……)
将cluster-enabled yes 前的注释去掉(632行)

6个节点3主3从1)创建6个节点 7001-70062)开启集群3)串联集群[将集群链接到一起]
(2)启动每个redis实例
以第一个实例为例,命令如下
cd /usr/local/redis-cluster/redis-1/bin/./redis-server redis.conf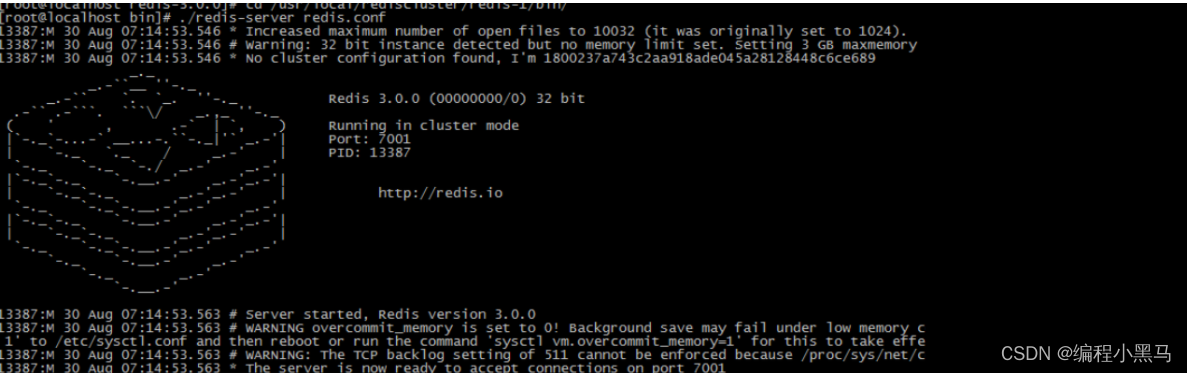
把其余的5个也启动起来,然后查看一下是不是都启动起来了
[root@localhost ~]# ps -ef | grep redisroot 15776 15775 0 08:19 pts/1 00:00:00 ./redis-server *:7001 [cluster]root 15810 15784 0 08:22 pts/2 00:00:00 ./redis-server *:7002 [cluster]root 15831 15813 0 08:23 pts/3 00:00:00 ./redis-server *:7003 [cluster]root 15852 15834 0 08:23 pts/4 00:00:00 ./redis-server *:7004 [cluster]root 15872 15856 0 08:24 pts/5 00:00:00 ./redis-server *:7005 [cluster]root 15891 15875 0 08:24 pts/6 00:00:00 ./redis-server *:7006 [cluster]root 15926 15895 0 08:24 pts/7 00:00:00 grep redis
(3)上传redis-3.0.0.gem ,安装 ruby用于搭建redis集群的脚本。
[root@localhost ~]# gem install redis-3.0.0.gemSuccessfully installed redis-3.0.01 gem installedInstalling ri documentation for redis-3.0.0...Installing RDoc documentation for redis-3.0.0...
(4)使用 ruby 脚本搭建集群。
进入redis源码目录中的src目录 执行下面的命令 redis-trib.rb ruby工具,可以实现Redis集群,create创建集群,–replicas创建主从关系 1:是否随机创建(是)。
./redis-trib.rb create --replicas 1 192.168.25.140:7001 192.168.25.140:7002 192.168.25.140:7003192.168.25.140:7004 192.168.25.140:7005 192.168.25.140:7006
出现下列提示信息
>>> Creating clusterConnecting to node 192.168.25.140:7001: OKConnecting to node 192.168.25.140:7002: OKConnecting to node 192.168.25.140:7003: OKConnecting to node 192.168.25.140:7004: OKConnecting to node 192.168.25.140:7005: OKConnecting to node 192.168.25.140:7006: OK>>> Performing hash slots allocation on 6 nodes...Using 3 masters:192.168.25.140:7001192.168.25.140:7002192.168.25.140:7003Adding replica 192.168.25.140:7004 to 192.168.25.140:7001Adding replica 192.168.25.140:7005 to 192.168.25.140:7002Adding replica 192.168.25.140:7006 to 192.168.25.140:7003M: 1800237a743c2aa918ade045a28128448c6ce689 192.168.25.140:7001 slots:0-5460 (5461 slots) masterM: 7cb3f7d5c60bfbd3ab28800f8fd3bf6de005bf0d 192.168.25.140:7002 slots:5461-10922 (5462 slots) masterM: 436e88ec323a2f8bb08bf09f7df07cc7909fcf81 192.168.25.140:7003 slots:10923-16383 (5461 slots) masterS: c2a39a94b5f41532cd83bf6643e98fc277c2f441 192.168.25.140:7004 replicates 1800237a743c2aa918ade045a28128448c6ce689S: b0e38d80273515c84b1a01820d8ecee04547d776 192.168.25.140:7005 replicates 7cb3f7d5c60bfbd3ab28800f8fd3bf6de005bf0dS: 03bf6bd7e3e6eece5a02043224497c2c8e185132 192.168.25.140:7006 replicates 436e88ec323a2f8bb08bf09f7df07cc7909fcf81Can I set the above configuration? (type 'yes' to accept): yes>>> Nodes configuration updated>>> Assign a different config epoch to each node>>> Sending CLUSTER MEET messages to join the clusterWaiting for the cluster to join....>>> Performing Cluster Check (using node 192.168.25.140:7001)M: 1800237a743c2aa918ade045a28128448c6ce689 192.168.25.140:7001 slots:0-5460 (5461 slots) masterM: 7cb3f7d5c60bfbd3ab28800f8fd3bf6de005bf0d 192.168.25.140:7002 slots:5461-10922 (5462 slots) masterM: 436e88ec323a2f8bb08bf09f7df07cc7909fcf81 192.168.25.140:7003 slots:10923-16383 (5461 slots) masterM: c2a39a94b5f41532cd83bf6643e98fc277c2f441 192.168.25.140:7004 slots: (0 slots) master replicates 1800237a743c2aa918ade045a28128448c6ce689M: b0e38d80273515c84b1a01820d8ecee04547d776 192.168.25.140:7005 slots: (0 slots) master replicates 7cb3f7d5c60bfbd3ab28800f8fd3bf6de005bf0dM: 03bf6bd7e3e6eece5a02043224497c2c8e185132 192.168.25.140:7006 slots: (0 slots) master replicates 436e88ec323a2f8bb08bf09f7df07cc7909fcf81[OK] All nodes agree about slots configuration.>>> Check for open slots...>>> Check slots coverage...[OK] All 16384 slots covered.
4.3连接Redis-Cluster
4.3.1客户端工具连接 Redis-cli 连接集群:redis-cli -p ip地址 -p 端口 -c
-c:代表连接的是 redis 集群
测试值的存取:
(1)从本地连接到集群redis 使用7001端口 加 -c 参数
(2)存入name值为abc ,系统提示此值被存入到了7002端口所在的redis (槽是5798)
(3)提取name的值,可以提取。
(4)退出(quit)
(5)再次以7001端口进入 ,不带-c
(6)查询name值,无法获取,因为值在7002端口的redis上
(7)我们以7002端口进入,获取name值发现是可以获取的,而以其它端口进入均不能获取
4.3.2 springboot连接redis集群
(1)创建工程 ,打包方式jar包,命名为:changgou-redis-demo
4.0.0 org.springframework.boot spring-boot-starter-parent 2.1.4.RELEASE com.itheima changgou-redis-demo 0.0.1-SNAPSHOT changgou-redis-demo redis 1.8 org.springframework.boot spring-boot-starter-data-redis org.springframework.boot spring-boot-starter-web org.mybatis.spring.boot mybatis-spring-boot-starter 2.0.1 mysql mysql-connector-java runtime org.springframework.boot spring-boot-starter-test test org.springframework.boot spring-boot-maven-plugin
(3)配置application.yml
在这里插入代码片
spring: datasource: driver-class-name: com.mysql.jdbc.Driver url: jdbc:mysql://127.0.0.1:3306/changgou_user?useUnicode=true&characterEncoding=UTF-8&serverTimezone=UTC username: root password: itcast application: name: redis-demo #redis配置# rabbitmq:# addresses: 192.168.25.130:5672,192.168.25.134:5672# username: guest# password: guest redis: cluster: nodes: - 192.168.25.153:7001 - 192.168.25.153:7002 - 192.168.25.153:7003 - 192.168.25.153:7004 - 192.168.25.153:7005 - 192.168.25.153:7006server: ssl: enabled: false port: 9008mybatis: configuration: map-underscore-to-camel-case: true
(4)创建测试类进行测试:
package com.itheima.changgouredisdemo;import org.junit.Test;import org.junit.runner.RunWith;import org.springframework.beans.factory.annotation.Autowired;import org.springframework.boot.test.context.SpringBootTest;import org.springframework.data.redis.core.RedisTemplate;import org.springframework.test.context.junit4.SpringRunner;@RunWith(SpringRunner.class)@SpringBootTestpublic class ChanggouRedisDemoApplicationTests { @Autowired private RedisTemplate redisTemplate; @Test public void contextLoads() { redisTemplate.boundValueOps("key111").set("123"); System.out.println(redisTemplate.boundValueOps("key111").get()); }} 4.4 Redis的持久化
4.4.1 redis的持久化介绍
Redis的数据都放在内存中。如果机器挂掉,内存的数据就不存在,数据不能恢复,严重影响使用。那么redis本身给我们提供了持久化机制。即时出现这样的问题,也能恢复数据。接下来我们来看下redis的两种持久化方4.4.2 开启RDB
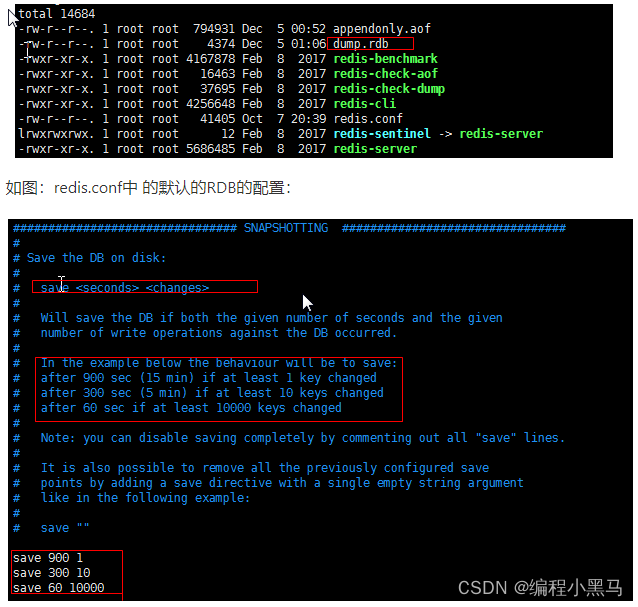
RDB: 快照形式 (定期数据保存磁盘中)会产生一个dump.rdb文件,redis默认开启了RDB的持久化方式。特点:会存在数据丢失,性能较好,用于数据备份。
如图:有一个文件产生
转载地址:https://blog.csdn.net/qq_37430469/article/details/123128251 如侵犯您的版权,请留言回复原文章的地址,我们会给您删除此文章,给您带来不便请您谅解!
发表评论
最新留言
关于作者
