最近因为需要用到图片制作,所以重拾了一下Graphics的相关操作。我们的目的是输入一串字符串,使用特殊字体,生成一张奇数位文字左倾斜15度,偶数位文字右倾斜15度的图片。
1.使用自定义字体(因为字体现在有版权问题,在使用过程中,先确定是否已取得版权)。将自定义字体加入到字体序列集合(PrivateFontCollection)中,并返回其FontFamily,注意,字体路径一定要绝对路径。如下代码:
1 ///2 /// 添加字体文件到客户字符集合中,并返回当前FontFamily 3 /// 4 /// 字体文件绝对路径 5 6 ///7 public FontFamily AddFontToFamily(string fontPath) 8 { 9 if (string.IsNullOrWhiteSpace(fontPath) || !System.IO.File.Exists(fontPath))10 {11 return new FontFamily("黑体");//没有传字体文件,或字体文件不存在,则直接返回系统默认的黑体。12 }13 PrivateFontCollection pfc=new PrivateFontCollection();14 pfc.AddFontFile(fontPath);15 var idxCurrentFont = pfc.Families.Length - 1;16 return pfc.Families[idxCurrentFont];17 }
2.文字处理:
2.1.文字编辑,新建Font对象:
1 ///2 /// 相对路径转绝对路径 3 /// 4 /// 5 ///6 public string RelativeToAbsPath(string path) 7 { 8 return AppDomain.CurrentDomain.BaseDirectory + path.Replace("/", "\\"); 9 }10 11 /// 12 /// 使用自定义字符集13 /// 14 /// 使用字符集15 /// 字符大小16 /// 字符样式17 ///字符及样式 18 public Font UseCustomFont(FontFamily fontFamily, int fontSize, FontStyle fontStyle = FontStyle.Regular)19 {20 var font = new Font(fontFamily, fontSize, FontStyle.Regular);21 return font;22 }
2.2.绘制文字,因为每个字可能定义的样式不同,所以这里采用愚笨的方法,单字处理:
1 ///2 /// 生成正规的单个文字图片(不做任何处理) 3 /// 4 /// 字体 5 /// 内容 6 /// 字体大小 7 /// 字符颜色 8 /// 倾斜角度 9 ///10 public Bitmap CreateOneTxtImg(Font font, string content, int fontSize,Color fontColor,int deg=0)11 {12 13 int mapWidth = fontSize + 200;14 15 int mapHeight = fontSize + 200;16 17 Bitmap bitmap = new Bitmap(mapWidth, mapHeight);18 19 Graphics graphics = Graphics.FromImage(bitmap);20 21 graphics.TextRenderingHint = System.Drawing.Text.TextRenderingHint.AntiAlias;//消除锯齿,枚举值22 23 graphics.Clear(Color.Transparent);//设置图片背景色为透明,枚举值,或自定义24 25 var brush=new SolidBrush(fontColor);//画笔并设置颜色26 27 graphics.DrawString(content, font, brush, 0, 0);28 29 //获取字符宽高30 SizeF sizeF = graphics.MeasureString(content, font);31 32 33 #if DEBUG 34 //查证是否和实际字符大小有差距35 graphics.DrawRectangle(new Pen(Color.Chartreuse), new Rectangle(0, 0, (int)sizeF.Width, (int)sizeF.Height));36 //保存图片看效果37 string uploadFileDirectory = "/tempuploads/usernames";38 string fileName = uploadFileDirectory + "/" + TimeStampServices.CurrentTimeSeconds().ToString() + UtilServices.CreateNonceStr(3) + ".png";39 string filePath = AppDomain.CurrentDomain.BaseDirectory + fileName.Replace("/", "\\");40 if (System.IO.File.Exists(filePath))41 {42 System.IO.File.Create(filePath).Close();43 }44 bitmap.Save(filePath, System.Drawing.Imaging.ImageFormat.Png);45 #endif46 47 return bitmap;48 }
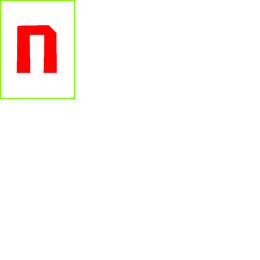
上述代码中为什么要加200的大小,是因为文字虽然设定了文字大小,但是实际大小并不是n*n的正方形,并且最终生成的字大小我们没法确定。Graphics.MeasureString测出来的也会有偏差我们看看实际效果,如下图,我们发现使用文字绘制四周会有留空,而且中英文的差异也是显而易见,暂时没找到精确计算字符宽高处理。现阶段可以想到的方案是截掉空白位置,但是需要测量,不能保证所有文字空白位置都是一定的值。这里不做此处理。


既然Graphics.MeasureString获取到的大小必然会大于文字的实际绘制大小,那么我们就用它的大小作为最终的显示大小进行处理(旋转)。
2.2.1.把文字范围外的内容裁掉,因为我们是从(0,0)位置写的文字,所以我们可以使用Graphics.DrawImage(img,0,0)进行处理:
1 ///2 /// 图片裁剪及旋转操作 3 /// 4 /// 内容大小 5 /// 内容 6 ///7 public Bitmap ClipImg(SizeF textSize, Bitmap tempBitmap) 8 { 9 Bitmap bitmap = new Bitmap((int)textSize.Width, (int)textSize.Height);10 Graphics graphics = Graphics.FromImage(bitmap);11 graphics.Clear(Color.Transparent);12 graphics.DrawImage(tempBitmap, 0, 0);//13 graphics.Dispose();14 return bitmap;15 }
2.2.2.裁剪后进行旋转,获取旋转后的宽高,这里需要用到三角函数处理(sin(a+b),sin(a-b))的内容,大家可以补一下,不再赘述整个推导过程。需要注意的是,sin及cos用的度数值都是弧度制,所以需要先把度数转成弧度。代码如下:
1 ///2 /// 获取旋转后的宽高 3 /// 4 /// 原始宽 5 /// 原始高 6 /// 旋转的角度 7 8 public static SizeF GetRotateSize(int width, int height, int deg) 9 {10 double radian = (deg * Math.PI / 180); ;11 double cos = Math.Cos(radian);12 double sin = Math.Sin(radian);13 float newWidth = (float)(Math.Abs(width * cos) + Math.Abs(height * sin));14 float newHeight = (float)(Math.Abs(width * sin) + Math.Abs(height * cos));15 return new SizeF(newWidth, newHeight);16 }
2.2.3.图片旋转。因为我们是Graphics坐标系中,坐标原点(0,0)是在左上方,所以我们做的处理时:1.把坐标原点移至中心点;2.画布旋转n度;3.把坐标原点移回原坐标原点。有两套方案进行这个操作:
1.矩阵旋转:
1 Matrix matrix = graphics.Transform;2 matrix.RotateAt(deg, new PointF(旋转点x, 旋转点y);3 graphics.Transform = matrix;
2.设置graphics:
1 int moveX=偏移量x;2 int moveY=偏移量y;3 graphics.TranslateTransform(moveX, moveY);4 graphics.RotateTransform(deg);5 graphics.TranslateTransform(-moveX, -moveY);
因为我们的画布大小是图片经过旋转后外接矩形的大小,所以此时绘图的初始坐标应该是((int)(旋转后画布大小宽/ 2 - 内容宽 / 2), (int)(旋转后画布大小高/ 2 - 图片高 / 2)),关于这个点,大家也自行脑补一下,不再赘述。采用2.2.3 方法一进行旋转代码如下:
1 ///2 /// 图片旋转操作 3 /// 4 /// 内容大小 5 /// 内容 6 /// 旋转角度 7 ///8 public Bitmap RotateImg(SizeF textSize,Bitmap tempBitmap,int deg) 9 {10 var sizeF = GetRotateSize(textSize.Width, textSize.Height, deg);11 12 Bitmap bitmap = new Bitmap((int)sizeF.Width, (int)sizeF.Height);13 14 Graphics graphics = Graphics.FromImage(bitmap);15 16 graphics.TextRenderingHint = System.Drawing.Text.TextRenderingHint.AntiAlias;//消除锯齿,枚举值17 18 graphics.Clear(Color.Transparent);//设置图片背景色为透明,枚举值,或自定义19 20 21 Matrix matrix = graphics.Transform;22 matrix.RotateAt(deg, new PointF((float)bitmap.Width / 2, (float)bitmap.Height / 2));23 graphics.Transform = matrix;24 25 graphics.DrawImage(tempBitmap, new Rectangle((int)(bitmap.Width / 2 - tempBitmap.Width / 2), (int)(bitmap.Height / 2 - tempBitmap.Height / 2), tempBitmap.Width, tempBitmap.Height));26 27 graphics.ResetTransform();28 29 graphics.Dispose();30 31 return bitmap;32 33 34 }
此时,我们修改一下2.2的CreateOneTxtImg方法:
1 ///2 /// 生成正规的单个文字图片(不做任何处理) 3 /// 4 /// 字体 5 /// 内容 6 /// 字体大小 7 /// 字符颜色 8 /// 倾斜角度 9 ///10 public Bitmap CreateOneTxtImg(Font font, string content, int fontSize,Color fontColor,int deg=0)11 {12 13 int mapWidth = fontSize + 200;14 15 int mapHeight = fontSize + 200;16 17 Bitmap bitmap = new Bitmap(mapWidth, mapHeight);18 19 Graphics graphics = Graphics.FromImage(bitmap);20 21 graphics.TextRenderingHint = System.Drawing.Text.TextRenderingHint.AntiAlias;//消除锯齿,枚举值22 23 graphics.Clear(Color.Transparent);//设置图片背景色为透明,枚举值,或自定义24 25 var brush=new SolidBrush(fontColor);//画笔并设置颜色26 27 graphics.DrawString(content, font, brush, 0, 0);28 29 //获取字符宽高30 SizeF sizeF = graphics.MeasureString(content, font);31 32 var clipBitmap = ClipImg(sizeF, bitmap);33 bitmap.Dispose();34 graphics.Dispose();35 var rotateBitmap = RotateImg(sizeF, clipBitmap, deg);36 clipBitmap.Dispose();37 #if DEBUG 38 //查证是否和实际字符大小有差距39 //graphics.DrawRectangle(new Pen(Color.Chartreuse), new Rectangle(0, 0, (int)sizeF.Width, (int)sizeF.Height));40 //保存图片看效果41 string uploadFileDirectory = "/tempuploads/usernames";42 string fileName = uploadFileDirectory + "/" + TimeStampServices.CurrentTimeSeconds().ToString() + UtilServices.CreateNonceStr(3) + ".png";43 string filePath = AppDomain.CurrentDomain.BaseDirectory + fileName.Replace("/", "\\");44 if (System.IO.File.Exists(filePath))45 {46 System.IO.File.Create(filePath).Close();47 }48 rotateBitmap.Save(filePath, System.Drawing.Imaging.ImageFormat.Png);49 #endif50 51 return bitmap;52 }
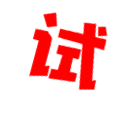
可以看到,如下效果:


基本操作已经完成,最后我们计算每个字的宽总和,以及字图的高度最大值,生成最终的图片。
1 ///2 /// 内容最终宽高 3 /// 4 /// 所有内容 5 ///6 7 public Size GetAllWidthAndHeihgt(List bitmaps) 8 { 9 int width = 0;10 int height = 0;11 foreach (var item in bitmaps)12 {13 width += item.Width;14 if (item.Height > height)15 {16 height = item.Height;17 }18 }19 return new Size(width, height);20 }
内容整合:
1 ///2 /// 文转图 3 /// 4 /// 字体相对路径 5 /// 字体大小 6 /// 字符颜色 7 /// 需处理的内容 8 /// 生成的图片路径 9 ///10 public bool TextToImg(string fontPath, int fontSize, Color fontColor, string textContent = "", string filePath = "")11 {12 if (string.IsNullOrWhiteSpace(fontPath) || string.IsNullOrWhiteSpace(textContent))13 {14 return false;15 }16 17 fontPath = RelativeToAbsPath(fontPath);18 19 if (fontColor.IsEmpty)20 {21 fontColor = Color.FromArgb(255, 255, 255, 255);22 }23 24 var fontFamily = AddFontToFamily(fontPath);25 26 var font = UseCustomFont(fontFamily, fontSize);27 28 List lstTextImg = new List ();29 30 foreach (var txt in textContent)31 {32 var idxInContent = textContent.IndexOf(txt);//当前字符在字符串的索引位置33 int deg = -15;34 if (idxInContent % 2 == 1)35 {36 deg = 15;37 }38 var bitMap = CreateOneTxtImg(font, txt.ToString(), fontSize, fontColor, deg);39 lstTextImg.Add(bitMap);40 }41 Bitmap endBitmap = CreateResult(lstTextImg);42 endBitmap.Save(filePath, ImageFormat.Png); 43 endBitmap.Dispose(); 44 return true;45 }
调用示例,记得生成文件时要释放文件资源,否则会一直被占用中:
1 ///2 /// 文转图接口测试 3 /// 4 /// 字符颜色 5 /// 字符大小 6 /// 字符串内容 7 ///8 public ActionResult TextToImgTest(string fontColor, int fontSize = 60, string textContent = "测试123avenAVEN") 9 {10 Color color = Color.Red;11 if (!string.IsNullOrWhiteSpace(fontColor))12 {13 string[] argb = fontColor.Split(new char[] { ','});14 if (argb.Length == 4)15 {16 color = Color.FromArgb(int.Parse(argb[0]), int.Parse(argb[1]), int.Parse(argb[2]),17 int.Parse(argb[3]));18 }19 }20 //最终保存图片的地址21 string uploadFileDirectory = "/tempuploads/usernames";22 if (Directory.Exists(uploadFileDirectory))23 {24 Directory.CreateDirectory(uploadFileDirectory);25 }26 string fileName = uploadFileDirectory + "/" + TimeStampServices.CurrentTimeSeconds().ToString() + UtilServices.CreateNonceStr(3) + ".png";27 string filePath = AppDomain.CurrentDomain.BaseDirectory + fileName.Replace("/", "\\");28 29 if (!System.IO.File.Exists(filePath))30 {31 System.IO.File.Create(filePath).Close();//创建完后记得释放,否则资源被占用32 }33 34 bool result = TextToImg("/fonts/mfxingyan-noncommercial-regular.ttf", fontSize, color, textContent, filePath);35 return Content(result.ToString());36 }

End
本文应该有很多不细腻的地方,比如文字处理方面,获取大小的精度问题,请大家多多指教,如有不对的地方,请指出。有更好的方案处理,也请不吝赐教,感恩!

